
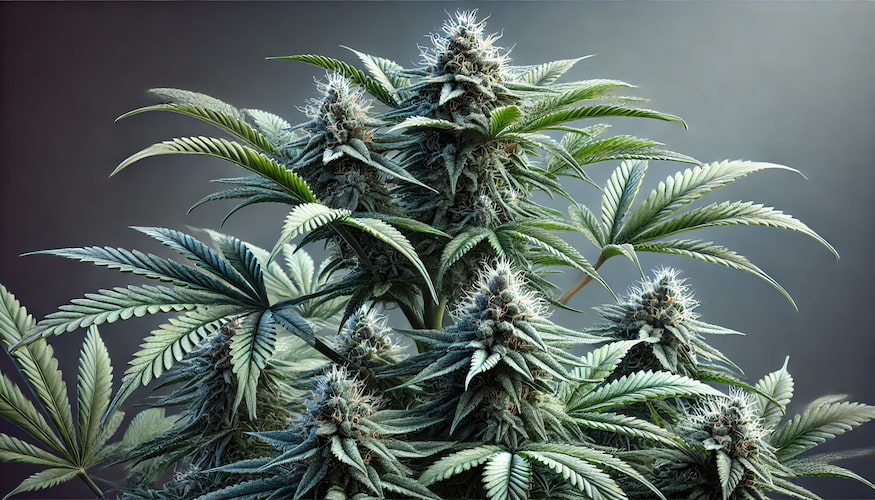
Drying and curing cannabis correctly transforms good buds into great ones. The drying stage removes most moisture over 7–14 days at 60°F and 60% relative humidity; the curing stage then conditions the buds in sealed jars for 2–8 weeks, developing smoother smoke, richer terpene expression, and longer shelf life. Done right, it’s the difference between harsh, mediocre flower and a polished, dispensary-quality harvest.
At IWantClones.com we’ve helped thousands of growers take their harvests the full distance — from clone to cure. This guide covers every step, the science behind it, and the most common mistakes we see growers make.
Key Takeaways
- The ideal drying environment is 60°F (15.5°C) and 60% RH with complete darkness and gentle airflow — this range produces the slowest, most terpene-preserving dry.
- A slow dry of 10–14 days is strongly preferred over a fast dry of 3–5 days; faster drying destroys terpenes and produces harsher smoke.
- The stem snap test is the most reliable way to know when buds are ready to jar: small stems should snap cleanly, not bend.
- Curing in sealed glass jars at 58–62% RH for a minimum of 2 weeks (ideally 4–8 weeks) significantly improves flavor, smoothness, and potency expression.
- Burping jars — opening them once or twice daily for the first two weeks — releases CO2 and excess moisture, preventing anaerobic conditions and mold.
- Long-term storage at 55–62% RH in a cool, dark environment can keep properly cured cannabis fresh for 6–12 months.
Why Drying and Curing Cannabis Matters
Most growers spend months carefully dialing in their grow — selecting genetics, managing nutrients, training plants, and nailing harvest timing. Then they rush the dry and cure, and lose a significant portion of what they worked for. This is one of the most common and most preventable mistakes in home cultivation.
What Drying Does
Cannabis buds at harvest contain 75–80% water by weight. Drying brings that down to roughly 10–15% — the range where buds can be jarred safely. The goal isn’t just removing water; it’s removing it slowly enough that the plant’s enzymatic processes have time to complete. Chlorophyll breaks down during a slow dry, which is responsible for the reduction in harsh, “green” flavor. Starches and sugars continue converting into simpler compounds that contribute to smoother combustion.
A dry that’s too fast — achieved with heat, excessive airflow, or very low humidity — locks chlorophyll into the bud before it can fully degrade. The result is harsh, green-tasting smoke, a noticeably inferior smoke quality, and significantly diminished terpene expression. Terpenes are volatile compounds; heat and aggressive airflow drive them off.
What Curing Does
Curing is the process of conditioning dried buds in a controlled environment — typically sealed glass jars — over weeks to months. During curing, residual enzymatic activity continues to break down remaining sugars, chlorophyll, and starch. Moisture redistributes evenly through the buds (the center of a dense bud often retains more moisture than the outside). Terpenes stabilize and sometimes intensify as their precursors convert.
Well-cured cannabis is meaningfully different from uncured: smoother on inhale, more complex in flavor, and longer-lasting in storage. Cannabis dispensaries that sell top-shelf flower know this — their premium products are always properly cured. For home growers, the same principle applies.
The Drying Room: Setting Up the Right Environment
Your drying environment is the single most important variable in post-harvest quality. Get this right and the rest follows naturally.
Target Environmental Parameters
| Parameter | Target Range | Why It Matters |
|---|---|---|
| Temperature | 60–65°F (15–18°C) | Slows drying, preserves terpenes, inhibits mold |
| Relative Humidity | 55–65% RH | Prevents too-fast drying; above 65% risks mold |
| Light | Complete darkness | UV degrades THC and terpenes rapidly |
| Airflow | Gentle, indirect circulation | Prevents hot spots; direct fan blast dries too fast |
| Duration | 7–14 days | Slow dry = better enzyme breakdown and terpene retention |
Most growers find that a spare closet, tent, or small room works well as a drying space. Use a hygrometer/thermometer combo unit to monitor conditions — don’t guess. A small oscillating fan in the corner (not pointed directly at the buds) provides enough airflow without overdrying.
Humidity Control During Drying
If your drying space runs too dry (below 50% RH), the exterior of buds dries while the interior stays moist — this leads to case hardening, where a dry outer layer tricks you into thinking the bud is done while the center is still wet. Case-hardened buds go moldy in jars.
If humidity runs too high (above 65% RH), drying slows too much and creates conditions for Botrytis cinerea (gray mold). A humidifier or dehumidifier allows you to dial in and hold your target range. Portable smart plugs with humidity sensors automate this effectively in small spaces.
Wet Trim vs. Dry Trim: Which Is Better?
Trimming — removing sugar leaves from buds — can happen immediately after harvest (wet trim) or after drying (dry trim). Each has real advantages:
Wet Trimming
- Pros: Easier to trim (leaves are rigid and stick out); buds dry faster (useful if you’re dealing with high ambient humidity); less total drying space needed.
- Cons: Faster drying = more terpene loss; buds can look less aesthetically uniform after trimming when wet.
Dry Trimming
- Pros: Slower drying (the sugar leaves act as a moisture barrier, slowing transpiration); better terpene preservation; generally considered to produce higher-quality final product.
- Cons: Trimming dry, brittle leaves is harder on trichomes; takes longer; requires more airflow monitoring.
Our recommendation: Dry trim whenever possible. Hang whole branches (or the whole plant in a mesh rack) and trim after the buds have dried to the snap-test stage. The slower moisture loss produces meaningfully better results. In high-humidity environments where mold is a real risk, wet trimming is a practical compromise.
How to Tell When Cannabis Is Dry Enough to Jar
Jarring too early is the most common drying mistake — and it causes mold in jars, which ruins the cure and potentially the entire harvest. There are two reliable tests:
The Stem Snap Test
The stem snap test is the most reliable indicator that buds are ready to jar. Take a small branch and try to bend it:
- Snaps cleanly: The bud is ready to jar. Stems at this moisture content break rather than bend because the water that previously kept them flexible has dried out.
- Bends without snapping: Still too moist — keep drying. Check again in 24 hours.
- Breaks but feels brittle/crumbly: Overdried — jar immediately and add a Boveda pack to rehydrate.
Test multiple stems across your drying space, as conditions can vary. Larger, denser buds take longer than smaller ones.
The Feel Test
Buds ready to jar feel dry but not crispy on the outside. When you gently squeeze a bud, it should have slight give — not spongy, not rock-hard. The outside surface should feel dry to the touch, not sticky or damp. If fingers stick to the bud, it needs more time.
How to Cure Cannabis in Jars: Step-by-Step
Glass mason jars are the industry-standard curing container. They’re airtight, non-reactive, and allow precise humidity control. Avoid plastic bags or containers — they leach plastic compounds into your buds and don’t seal reliably.
Jar Setup
- Use wide-mouth mason jars (quart or half-gallon). Wash and dry them completely before use.
- Fill jars 75–80% full. Buds need some air space — don’t pack jars tightly.
- Add a Boveda 62% RH pack (or 58% if you prefer a slightly drier cure) to each jar. Boveda packs are two-way humidity controllers that absorb or release moisture as needed to hold target RH.
- Seal the jar and store in a cool, dark location. A cupboard, closet, or drawer away from heat sources works well. Target storage temp: 60–70°F.
Burping Schedule
Burping means opening the sealed jar briefly to exchange air — releasing CO2 and excess moisture that builds up inside. This is critical during the first two weeks of cure and is what distinguishes a proper cure from just storing buds in a jar.
| Cure Week | Burping Frequency | Duration per Burp | What to Watch For |
|---|---|---|---|
| Week 1 | 2–3x daily | 5–10 minutes each | Smell check; feel for moisture on jar walls; remove any wet buds |
| Week 2 | Once daily | 5 minutes | Aroma should shift from harsh/green toward more complex; moisture should be equalizing |
| Weeks 3–4 | Every 2–3 days | 2–5 minutes | Terpenes developing; RH stabilizing with Boveda |
| Weeks 5–8 | Once a week | 2–3 minutes | Flavor and smoothness continue to improve; peak quality often around week 6–8 |
| Long-term storage (8+ weeks) | Monthly or less | 2 minutes | Check Boveda pack condition; replace if crystallized |
Target RH Inside Jars
The sweet spot for cured cannabis in jars is 58–62% RH. Within this range, buds remain properly hydrated (not dried out), mold cannot establish (mold typically needs 65%+ RH to grow on cannabis), and enzymatic curing processes continue to run. A digital hygrometer with a small probe fits inside mason jars and gives you real-time readings — this is the most accurate way to monitor jar humidity.
Boveda’s 62% two-way humidity packs are the most widely used solution and work well for most cures. If you prefer a slightly drier result (common for vaporizer users), use their 58% packs.
Signs of Problems During Curing
Mold in the Jar
If you see white, gray, or blue-green fuzzy growth on buds, or if the aroma shifts from cannabis to a musty, ammonia-like smell, mold has established. Discard affected buds immediately — do not try to save moldy cannabis. The entire jar should be assessed closely; if only one bud is affected, remove it, but understand the rest of the jar has likely been exposed.
Prevention: ensure buds pass the stem snap test before jarring, burp consistently in week 1, and store at target RH. Never skip the snap test step.
Ammonia Smell
A strong ammonia odor when opening a jar is a sign of anaerobic bacterial breakdown — usually caused by buds being jarred too wet. This is not mold, but it indicates the cure has gone wrong. Increase burping frequency immediately, spread buds on a rack for an hour to dry slightly, then re-jar. If the smell is very strong, the batch may be compromised.
Overdried Buds (Too Brittle)
If buds feel dry, crumbly, or harsh when smoked, they’ve lost too much moisture. Place them in a jar with a Boveda 62% pack and seal for 24–48 hours — properly overdried buds can often be rehydrated to a usable state. Don’t use orange peels or lettuce for rehydration; they introduce bacteria and foreign flavors.
The Full Drying and Curing Timeline
| Phase | Timeframe | Key Actions | Target Conditions |
|---|---|---|---|
| Harvest | Day 0 | Cut plants; hang or rack; initial trim (wet or dry) | — |
| Early Dry | Days 1–5 | Hang dry in dark room; no direct fan on buds | 60–65°F, 60–65% RH |
| Late Dry | Days 6–14 | Monitor daily; stem-snap test after day 7 | 60–65°F, 55–60% RH |
| Trim (if dry trim) | Day 10–14 | Trim sugar leaves; manicure buds; prepare for jars | — |
| Jar & Cure: Week 1 | Days 14–21 | Fill jars; add Boveda; burp 2–3x daily | 58–62% RH inside jar |
| Jar & Cure: Week 2 | Days 21–28 | Burp once daily; aroma begins to develop | 58–62% RH |
| Minimum Cure Complete | Day 28 (2 weeks) | Smoke-ready; burp every 2–3 days now | 58–62% RH |
| Optimal Cure | Days 42–56 (6–8 wks) | Peak flavor, smoothness, terpene complexity | 58–62% RH; burp weekly |
| Long-Term Storage | 8+ weeks | Keep sealed; check Boveda monthly; store cool/dark | 55–62% RH, 60–70°F |
Common Drying and Curing Mistakes
Mistake 1: Drying Too Fast
The most common and most damaging mistake. Growers use space heaters, point fans directly at buds, or dry in a warm room to speed things up — and end up with harsh, terp-stripped flower. There’s no way to recover terpenes that were driven off by heat during drying. Slow down, hit 60°F/60% RH, and give it the full 10–14 days.
Mistake 2: Drying in Light
UV light degrades both THC and terpenes rapidly. This is not a slow process — buds left in direct sunlight or under grow lights will lose potency and aroma within days. Use a completely dark drying space. A cardboard tent or blacked-out window works if a dedicated room isn’t available.
Mistake 3: Jarring Too Early
If small stems still bend rather than snap, the bud is not dry enough to jar. Jarring moist bud leads to mold within days, even with burping. The stem snap test takes five seconds — do it every time.
Mistake 4: Not Burping Consistently
Skipping burps during week 1–2 allows CO2 and humidity to build inside jars, creating anaerobic conditions that promote bacterial breakdown. Set a phone reminder if you need to. This part of the process only requires 5–10 minutes per day — it’s worth it.
Mistake 5: Using Plastic Containers or Bags
Plastic bags and containers are permeable to air and can impart plastic flavor compounds to your buds over time. Glass mason jars are cheap, airtight, non-reactive, and reusable indefinitely. There’s no good reason to cure in plastic.
Mistake 6: Curing in Too Short a Window
Two weeks in jars produces smoke-ready flower. Four to eight weeks produces a meaningfully better product. If you have the patience, cure longer. The difference between a 2-week cure and a 6-week cure on the same harvest is significant — smoother, more complex, more shelf-stable.
Long-Term Cannabis Storage
Once cured, cannabis stores well for 6–12 months if conditions are maintained. For long-term storage:
- Keep jars in a cool, dark location — 60–70°F is ideal; avoid temperature fluctuations.
- Maintain 55–62% RH inside jars with Boveda packs — replace packs when they become fully rigid (indicating they’ve exhausted their capacity).
- Store away from electronics, HVAC vents, and refrigerators (condensation risk).
- Avoid freezing — ice crystal formation damages trichomes, and repeated freeze-thaw cycles degrade cannabinoids.
- Vacuum-sealed jars extend storage life further by reducing oxygen exposure.
Properly cured and stored cannabis retains acceptable potency and terpene quality for 6–12 months. After 12 months, THC begins degrading to CBN (a less potent, more sedating cannabinoid) more noticeably, and terpene expression fades. Still smokeable, but past its peak.
Drying and Curing Cannabis by Grow Medium
The grow medium doesn’t change the drying and curing process, but it affects how your buds behave post-harvest. Coco-grown plants tend to dry slightly faster than soil-grown plants because less organic matter in the medium means less retained moisture in the plant at harvest. Hydroponic plants also tend to dry a bit faster. Soil-grown plants, particularly those grown in living soil with complex microbiology, often produce the most terp-rich buds for curing — but the drying timeline and process remain the same.
If you grew in coco or hydro, watch the stem snap test more carefully — buds can hit snap-test-ready a day or two earlier than expected. Check from day 7 onward.
Connecting Drying and Curing to the Full Grow Timeline
Drying and curing is the final stage of a grow that started with selecting and receiving your clone. For growers who want a complete week-by-week view from clone arrival to jar, our cannabis clone timeline week-by-week guide maps every stage of the grow so you can plan your drying space and schedule in advance.
Getting harvest timing right before you even get to drying is equally critical — harvesting too early means underdeveloped cannabinoids and terpenes that no amount of perfect curing can fix. Our harvest timing guide covers trichome assessment, pistil color, calyx swell, and all the other indicators that tell you when a plant is truly ready.
If you run into problems during drying or curing — unexpected smells, mold issues, or humidity that won’t stabilize — our cannabis clone troubleshooting guide covers post-harvest issues alongside grow-stage problems.
Ready to Grow Your Next Harvest?
Drying and curing are only as good as the genetics and grow that precede them. Starting from a verified, high-quality clone gives you the best possible raw material to work with — confirmed genetics, confirmed female, confirmed pest-free.
At IWantClones.com, we ship rooted cannabis clones overnight to legal US states — backed by 15+ years of genetics expertise at SeedsHereNow.com. Browse our full selection at the IWantClones shop, or check current offers at our promotions page. Every clone comes with our 3-day no-bullshit guarantee.
Cannabis cultivation laws vary by state and locality. Always verify your local home-grow regulations before purchasing or growing. See our home-grow laws by state 2026 guide for the most current information.
Frequently Asked Questions
How long should you dry cannabis before curing?
Most cannabis should dry for 7–14 days at 60°F and 60% RH before being jarred for curing. The stem snap test is the definitive readiness check — small stems should snap cleanly rather than bend. A 10–12 day dry is typical for whole-branch hang drying; buds that are wet-trimmed before drying may be ready in 7–10 days.
What humidity should cannabis be cured at?
Target 58–62% RH inside sealed jars during the curing process. This range allows continued enzymatic activity, prevents mold growth (which requires 65%+ RH), and keeps buds properly hydrated without over-drying. Boveda 62% two-way humidity packs are the easiest way to maintain this range consistently without constant monitoring.
How often should you burp cannabis jars?
Burp 2–3 times daily for the first week, once daily in week 2, every 2–3 days in weeks 3–4, and weekly in weeks 5–8. Burping releases CO2 and excess moisture that builds up in sealed jars, preventing anaerobic conditions that cause bacteria-driven breakdown. Consistent burping in the first two weeks is critical — skipping it risks the entire cure.
Can you cure cannabis too long?
Cannabis can be over-cured if jars are left open or if conditions fluctuate, but sealed jars with proper Boveda humidity control prevent over-curing indefinitely. Buds in properly sealed jars at 58–62% RH continue to improve through 8 weeks and then maintain quality for many months afterward. Over-drying (not over-curing) is the more common problem — buds left too long in jars without humidity control can become too dry and lose terpenes.
What does properly dried cannabis smell like during drying?
During the first week of drying, buds often smell strongly of chlorophyll — a green, vegetal, sometimes grassy odor. This is normal and it diminishes as chlorophyll breaks down over the full dry period. By days 10–14, the green smell should have faded significantly and the strain’s characteristic terpene profile should be emerging. If the smell is musty, ammonia-like, or has any mold character at this stage, investigate for moisture issues.
Is a 2-week cure long enough?
Two weeks of curing produces smoke-ready flower that’s noticeably better than uncured bud. However, a 4–8 week cure produces a meaningfully superior product — smoother smoke, more complex flavor, and more stable terpene expression. For personal use, curing longer when possible is always worth it. For those who can’t wait, two weeks is the practical minimum for acceptable quality.