A cannabis clone takes 14 to 20 weeks from the moment you receive it to harvest, depending entirely on how long you run the vegetative stage. Rooting takes 1 to 2 weeks, veg runs 3 to 8 weeks (your call), and flower takes 8 to 11 weeks based on the strain. That’s your full window, and every week inside it has a job to do.
Buying a rooted clone from IWantClones.com cuts 3 to 4 weeks off that timeline right out of the gate—you skip germination (5 to 10 days) and the fragile seedling stage (2 to 3 weeks) that seed growers have to nurse through. You start the clock already ahead.
Key Takeaways
- The full cannabis clone timeline runs 14 to 20 weeks from clone receipt to harvest, depending on veg length.
- Rooting takes 7 to 14 days; you’ll see white root tips emerging from the rockwool, cube, or plugs before week 2 ends.
- Vegetative stage length is the grower’s choice—3 weeks gives a small plant, 8 weeks gives a bush; most indoor growers land at 4 to 6 weeks.
- Flower stage runs 8 to 11 weeks for most photoperiod strains; always confirm with the strain’s listed flowering time.
- Clones skip germination and the seedling stage entirely, saving 3 to 4 weeks compared to starting from seed.
- Trichome color—not a calendar date—is the definitive signal that your plant is ready to harvest.
Why the Clone Timeline Beats Seeds
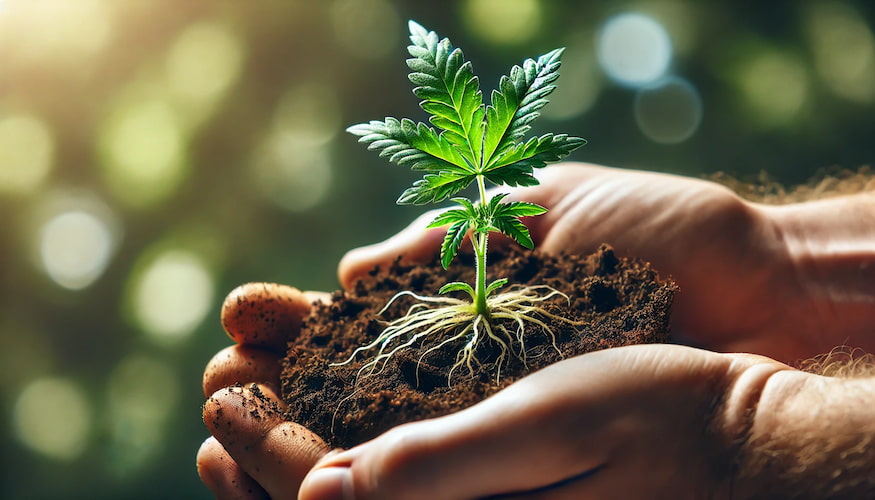
Let’s put the time savings in plain numbers. A seed grower waits 5 to 10 days for germination, then another 2 to 3 weeks in the seedling stage before the plant is ready for serious vegetative growth. That’s up to 31 days before the real growing even begins. When you start with a rooted clone—especially a shop verified cannabis clones from IWantClones.com—you skip all of that and land directly in the establishment phase.
The other benefit is genetic certainty. Every clone is a cutting of a known mother, which means you know the sex (always female), you know the strain’s characteristics, and you know what flowering time to expect. That predictability makes timeline planning much more reliable than popping a pack of seeds.
For a deeper look at how clones develop from one phase to the next, check out our breakdown of cannabis clone growth stages.
The Full Week-by-Week Cannabis Clone Timeline
The table below maps every week from clone receipt to late flower. Use it as your planning reference at the start of every grow. Veg length is shown as a range (Weeks 4 to 8) because you control how long you run it—adjust based on your space, goals, and strain.
| Week(s) | Stage | What’s Happening | Grower Actions | Light Schedule |
|---|---|---|---|---|
| Week 1 | Rooting—Early | The cutting is callusing at the stem base; water uptake is minimal; plant relies on stored energy in leaves | Keep humidity dome on, mist interior walls 2x/day, no nutrients, keep medium barely moist | 18/6 (or 20/4), ~150 to 200 PPFD, light 18 to 24 inches above |
| Week 2 | Rooting—Late | First white root tips appear at cube base or emerge from plug; leaves may droop slightly before perking up | Gently tug clone—resistance means roots; begin lifting dome 2x/day for 15 min to acclimate; still no nutrients | 18/6, ~200 PPFD, raise dome slightly for airflow |
| Week 3 | Establishment / Hardening | Root system is active; new leaf growth visible at apical tip; plant begins feeding on its own | Remove dome fully by end of week; introduce quarter-strength veg nutrients; transplant into first container if roots are circling | 18/6, ~300 to 400 PPFD, raise intensity gradually |
| Weeks 4 to 5 | Early Vegetative | Rapid internode development; root system expanding into new container; canopy starting to take shape | Move to half-strength nutrients; begin topping or LST if desired; check runoff pH (5.8 to 6.3 soil, 5.5 to 6.0 hydro) | 18/6, ~400 to 600 PPFD |
| Weeks 6 to 7 | Mid Vegetative | Plant doubles or triples in size; multiple bud sites developing; branching fills out with LST | Ramp to full-strength veg nutrients; train aggressively if running SCROG; transplant to final container if needed | 18/6, ~600 to 800 PPFD |
| Week 8 | Late Veg / Pre-Flip | Plant is at roughly half its final expected height (it will stretch 50% to 100% in flower); node count solid | Decide on flip timing based on space; stop heavy training; clean up lower canopy (lollipopping optional) | 18/6, ~800 PPFD, begin defoliation if needed |
| Week 9 / Flower Week 1 | Flower—Transition | 12/12 flip triggers hormonal shift; plant doesn’t yet show visible flower sites; stretch begins | Switch to bloom nutrient profile (lower N, higher P/K); install stakes or SCROG net if not already done | 12/12, ~600 to 800 PPFD |
| Flower Weeks 2 to 3 | Flower—Stretch | Plant stretches aggressively (expect 50% to 100% height increase); first pistils (white hairs) emerging at bud sites | Tuck branches under net; support tall colas with stakes; raise light to avoid bleaching; push PPFD to 800 to 1000 | 12/12, ~800 to 1000 PPFD |
| Flower Weeks 4 to 5 | Mid Flower—Bulking | Stretch slows; calyxes stacking; buds fattening; trichome production ramping up; aroma increasing sharply | Maintain peak bloom nutrients; watch for pests and mold in dense canopy; defoliate for airflow if needed | 12/12, ~900 to 1000 PPFD |
| Flower Week 6 | Mid Flower—Trichome Development | Trichomes visible to naked eye; pistils beginning to darken on some varieties; buds gaining weight and density | Begin monitoring trichomes with loupe or jeweler’s scope; consider whether to flush or not based on your approach | 12/12, ~900 to 1000 PPFD |
| Flower Weeks 7 to 8 | Late Flower—Ripening | Majority of pistils darkening (50% to 70%); trichomes shifting from clear to milky/cloudy; calyxes swelling | If flushing, begin 10 to 14 days of plain water; watch humidity closely (keep under 50% RH to prevent bud rot) | 12/12, ~800 to 900 PPFD |
| Flower Week more than 9 | Final Ripening / Harvest Window | Trichomes showing mix of cloudy and amber; fan leaves yellowing naturally (normal); maximum resin expression | Check trichomes daily; harvest when amber levels match your target (10% to 20% for balanced high, more than 30% for sedative effect) | 12/12; optional 24 to 48 hr darkness before chop |
Note: Autoflowering strains follow their own internal clock regardless of light schedule. They typically run 8 to 11 weeks total from clone (if available) and cannot be kept in extended veg by manipulating light.
Week 1 to 2: The Rooting Phase
The first two weeks are the most critical—and the most hands-off—of the entire grow. What’s happening inside the cutting is invisible to you: the base of the stem is forming a callus, a cluster of undifferentiated cells that will eventually push out root initials. The plant is essentially in survival mode, holding onto the moisture and energy stored in its leaves while it builds the infrastructure to feed itself.
Your environment is doing the heavy lifting here. Aim for a relative humidity (RH) of 75% to 85% inside the dome. That high humidity reduces transpiration through the leaves, which matters because the cutting has no roots yet and can’t replace the water it loses through leaf surfaces. If the humidity drops too low, the clone wilts before roots ever form.
Keep temperatures in the 72 to 78°F (22 to 26°C) range. Slightly warmer is fine; cooler slows rooting noticeably. Rooting hormone—indole-3-butyric acid (IBA), the active compound in most gel and powder products—should already be on the stem base when you receive a professional clone, but if you’re cutting your own, apply it immediately before inserting into the medium.
Light during rooting should be low intensity: 150 to 200 PPFD (micromoles per meter squared per second) at canopy level. Think T5 fluorescents or an LED dimmed way back, sitting 18 to 24 inches above the tops. High light stress right now does more harm than good. An 18/6 or 20/4 schedule works well—the clone doesn’t need darkness to root, but consistent light encourages photosynthesis at a gentle rate.
Keep the medium barely moist, not soaking wet. Oversaturation drowns the nascent root zone. If you’re using rockwool cubes, squeeze them until water barely drips before inserting clones. Peat plugs should feel damp but never waterlogged. No nutrients yet—the rooting medium should be sterile, and the cutting can’t absorb nutrients without roots anyway.
By the end of week 2, gently tug the clone. If you feel resistance, roots have formed. If white tips are visible emerging from the cube or plug base, you’re right on schedule. If neither is happening by day 14, check your humidity and temperature before assuming the clone has failed—give it a few more days under stable conditions.
Week 3: Establishment and Hardening
Week 3 is the transition week. The clone has roots—now it needs to learn how to use them. This stage is also called “hardening off,” a term borrowed from outdoor cultivation that means gradually reducing the protected environment so the plant can handle ambient conditions.
Start by lifting the dome for 15 minutes in the morning and 15 minutes in the evening on days 1 to 2 of this week. By days 3 to 4, leave the dome off for an hour at a time. By the end of week 3, the dome should be removed entirely. If the plant wilts dramatically when the dome comes off, it needs more time—some genetics take a few extra days to adjust.
This is also the first week you introduce nutrients. Start with one quarter of the manufacturer’s recommended dose for a grow-phase formula. Look for an N-P-K ratio that’s high in nitrogen—something like a 3-1-2 ratio is classic for veg. The plant’s root system is small but active, and overfeeding at this stage causes nutrient burn that sets the plant back by days.
By the end of week 3, you should see clear evidence of new growth: fresh leaf tips pushing out from the apical meristem (the growing tip at the top of the plant). That new growth is your confirmation that the plant has transitioned from survival mode into genuine vegetative growth. For specifics on what to feed and when, see our feeding guide for cannabis clones.
Weeks 4 to 8: The Vegetative Stage
Vegetative growth is where the grower has the most control. There’s no fixed endpoint—you flip to flower when you decide to, and that decision shapes everything about the final plant size and yield. Most indoor growers in standard 4×4 or 5×5 tents run veg for 4 to 6 weeks after the establishment phase. Outdoor growers have less control and are governed by natural day length—clones put outside after the summer solstice in June may begin to flower sooner than indoor growers expect.
Nutrients and Feeding
Ramp up to full-strength veg nutrients by weeks 5 to 6. A solid veg formula will have a higher nitrogen content to drive leaf and stem development. Watch for signs of deficiency (yellowing from the bottom up usually means nitrogen) or toxicity (dark clawing leaves, burnt tips mean you’re overfeeding). Check runoff pH at every watering—target 5.8 to 6.3 for soil and 5.5 to 6.0 for hydro or coco. pH lockout is the most common cause of mid-veg nutrient problems.
Training Techniques
Topping (removing the apical tip) and low-stress training (LST—bending and tying branches down) are the most useful techniques during veg. Topping creates two main colas where one existed and encourages a wider, bushier structure. LST opens up the canopy and exposes lower bud sites to light without the recovery time that topping requires. You can combine both.
If you’re running a Screen of Green (SCROG), install your net early in veg—weeks 4 to 5 — and begin weaving branches through it as they grow. The goal is a flat, even canopy so every bud site sits at roughly the same distance from the light when you flip to flower.
Transplanting
Most clones arrive in a small starter container. Plan to transplant at least once during veg—from starter plug to a 1-gallon pot around week 3 to 4, then to your final container (3 to 7 gallons for most indoor plants) by weeks 6 to 7. Transplanting too late causes the plant to become rootbound, which stunts growth and slows the entire timeline. A rootbound plant in late veg going into flower is a common yield killer.
Node Development and Canopy Management
Each set of leaves that grows off the main stem is attached at a “node.” Nodes become bud sites in flower. The more nodes you develop during veg, and the more you expose those nodes to light through training, the more flowering sites you’ll have. By the end of veg, a well-trained plant should look wide and bushy, not tall and thin.
Defoliation—removing leaves that block light from lower bud sites—can be done lightly during late veg (week 7 to 8) to set up the canopy for the flip. Don’t go overboard. Remove leaves that are clearly shading bud sites, but leave enough foliage for the plant to photosynthesize efficiently. For guidance on your optimal light schedules during veg, we’ve got a full breakdown on the site.
Transitioning to Flower: When and How To Flip
Deciding when to flip is one of the most consequential calls you make in a grow. Flip too early and you’ll have a small plant with limited yield potential. Flip too late and your plant outgrows the space, creates light management headaches, and risks heat and airflow problems.
The standard rule for indoor growing: flip when the plant is at roughly 40% to 50% of the final height you want. Cannabis plants typically stretch 50% to 100% during the first 2 to 3 weeks of flower, so a plant that’s 24 inches tall at flip will likely reach 36 to 48 inches by the time stretch is done. Know your ceiling clearance, know your light’s sweet spot, and plan accordingly.
Node count is also a useful indicator. A plant with 8 to 10 internodes (pairs of branches) has enough structure to support a solid flower set. Plants with fewer than 6 nodes usually benefit from more veg time.
To trigger flowering in photoperiod strains indoors, switch the light timer to 12 hours on, 12 hours off. The uninterrupted dark period is critical—any light leak during the 12-hour dark cycle can disrupt the flowering hormone (phytochrome) and cause problems ranging from delayed flowering to hermaphroditism. Light-proof your tent thoroughly before flipping.
Outdoor plants are governed by the natural photoperiod. In most of North America, plants start naturally transitioning to flower in late July or early August as day length shortens past the 14-hour threshold. For a complete guide to this transition, see our article on transitioning clones from veg to flower.
Flower Weeks 1 to 3: The Stretch
The first three weeks of flower are dominated by the “stretch”—a period of rapid vertical growth driven by hormonal changes triggered by the 12/12 light shift. Don’t be surprised when a plant that looked perfectly sized at flip suddenly looks like it’s trying to touch the ceiling. A 50% height increase is average; sativa-dominant genetics can stretch 100% or more.
During this phase, bud sites form but don’t yet show real substance. What you’ll see are small, white pistils (the hair-like structures that will eventually turn orange or red at maturity) emerging at every node and bud site. This is the plant’s announcement that it’s in reproductive mode.
Switch your nutrient profile to a bloom formula. Lower nitrogen, higher phosphorus and potassium—a ratio like 1-3-2 or similar. Nitrogen excess at this stage (called nitrogen toxicity in flower) produces dark, clawing leaves and can delay bud development. Some growers run a light nitrogen supplement through week 3 of flower to support the stretch, then cut it entirely by week 4.
Keep PPFD in the 800 to 1000 range and raise your light as plants stretch to maintain the right distance. For most modern LED grow lights, that’s 18 to 24 inches above the canopy. Adjust every few days during peak stretch periods. Install stakes for tall colas now, before buds add weight.
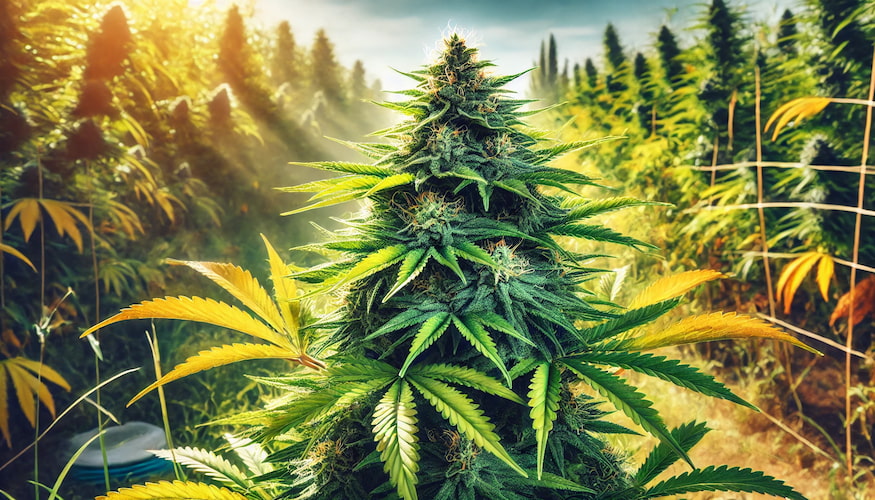
Mid-Flower Weeks 4 to 6: The Bulk-Up
The stretch has stopped. Now comes the part every grower looks forward to: bud development. Weeks 4 to 6 are when calyxes start stacking on each other, density increases rapidly, and the plants begin producing the terpenes and resin that define the strain’s aroma and effect profile. The smell in your grow space will intensify dramatically during this phase—make sure your carbon filter is doing its job.
Trichomes—the tiny, hair-like glandular structures on buds and surrounding leaves that contain cannabinoids and terpenes—become visible to the naked eye by week 5 to 6. A jeweler’s loupe (30 to 60x magnification) or a digital microscope lets you watch them develop. At this stage they should be mostly clear and stalked, like tiny glass mushrooms.
Keep humidity below 55% RH during mid-flower, and ideally below 50%. Dense buds with poor airflow are an invitation for botrytis (gray mold) and powdery mildew, both of which can destroy weeks of work in days. Run an oscillating fan through the canopy, defoliate lightly if airflow is restricted, and monitor your tent’s VPD (vapor pressure deficit) if you have the gear for it. A VPD of 1.0 to 1.5 kPa is optimal for mid-to-late flower.
Pest monitoring is also critical during mid-flower. Spider mites, fungus gnats, aphids, and thrips are all more damaging when buds are present, and your options for treatment become more limited. Inspect the undersides of leaves weekly. At IWantClones.com, our plants ship pest- and disease-free, but protecting them in your environment is on you after delivery.
Late Flower Weeks 7 to 9 or more: Ripening and Reading Trichomes
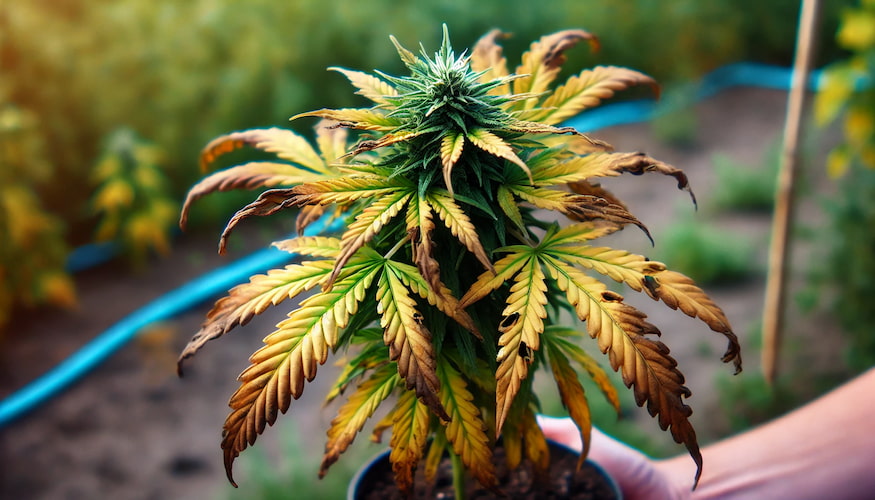
This is the final stretch before harvest, and it’s where patience separates good crops from great ones. Late flower is about ripening, not growing. The plant is redirecting all its energy into resin production and seed-set (even without seeds, the genetic impulse drives trichome development). Fan leaves will begin yellowing naturally—this is normal nitrogen draw-down and not a problem unless it happens too early.
Reading Trichomes
Trichome color is the single most reliable indicator of harvest readiness. A 60x–100x loupe or a digital microscope makes this easy. Here’s what each stage means:
- Clear trichomes: THC is still converting from its precursor (THCA); not ready.
- Milky/cloudy trichomes: Peak THC content; effects will be more cerebral and energetic.
- Amber trichomes: THC is degrading to CBN; effects become more sedative and body-heavy.
Most experienced growers harvest when trichomes are 80% to 90% cloudy with 10% to 20% amber for a balanced effect. If you prefer a more relaxing, heavy high, wait for 20% to 30% amber. Check trichomes on the buds themselves, not the sugar leaves—leaves mature faster and will show amber sooner than the calyx trichomes you’re actually interested in.
Pistil color change is a secondary indicator. When 70% to 90% of the white pistils have darkened to orange, red, or brown, the plant is in the harvest window—but always confirm with trichomes, since pistil color varies by genetics and environmental conditions. For a complete guide to this decision, read our article on harvest timing.
The Final Flush
Whether or not to flush (feeding plain water for the final 10 to 14 days) is one of the more debated topics in cultivation. The argument for flushing is that it clears residual nutrient salts from the plant tissue, resulting in a smoother, cleaner smoke. Whether this is scientifically supported at scale is disputed, but many experienced growers swear by it, particularly in soil grows. If you choose to flush, start 10 to 14 days before your anticipated harvest date and use pH-correct water only.
An optional technique at the very end: a 24- to 48-hour dark period immediately before harvest. Some growers believe this drives a final trichome push as the plant senses stress. The evidence is anecdotal, but it costs nothing and many growers use it as standard practice.
Harvest, Drying, and the Road to Cure
Harvest day: you’ve done the work, you’ve watched the trichomes, and the window is open. The mechanics are straightforward—cut the plant at the base or harvest branch by branch. Wet trimming (removing sugar leaves immediately) versus dry trimming (leaving them on during drying) is a matter of preference and environment. In high-humidity environments, wet trimming helps prevent mold during drying. In dry climates, leaving the sugar leaves on slows the drying process to a better rate.
Hang your trimmed branches in a dark room at 60 to 65°F (15 to 18°C) with 55% to 60% RH and gentle airflow that doesn’t blow directly on the buds. Proper drying takes 7 to 14 days. The goal is drying slowly enough to preserve terpenes—the aromatic compounds that are heat- and light-sensitive—while preventing mold. Stems should snap, not bend, when the buds are properly dried.
After drying comes curing: sealing dried buds in glass jars (mason jars are the standard), burping the jars daily for the first two weeks to release moisture, then weekly for the next 2 to 4 weeks. A proper cure improves flavor, smoothness, and effect profile significantly. Minimum cure is 2 to 4 weeks; 6 to 8 weeks produces noticeably better results for most strains.
Photoperiod vs. Autoflowering: A Quick Note
Everything in this timeline applies to photoperiod cannabis—the vast majority of clones on the market, including those available at IWantClones.com. Photoperiod plants stay in veg as long as you give them more than 18 hours of light, and flower only when you trigger the 12/12 switch.
Autoflowering cannabis (Cannabis ruderalis hybrids) operates on an internal clock. Autos begin flowering 3 to 5 weeks after germination regardless of light schedule and typically finish in 8 to 11 weeks from seed. Clones of autoflowering plants are rarely produced commercially, because the clock runs from germination—a clone of a 4-week-old auto is already 4 weeks into its life and won’t root before flowering begins. For practical purposes, autos are a seed-only game. If you’re growing photoperiod strains and want the timeline control and genetic certainty described in this article, a rooted clone is your best starting point.
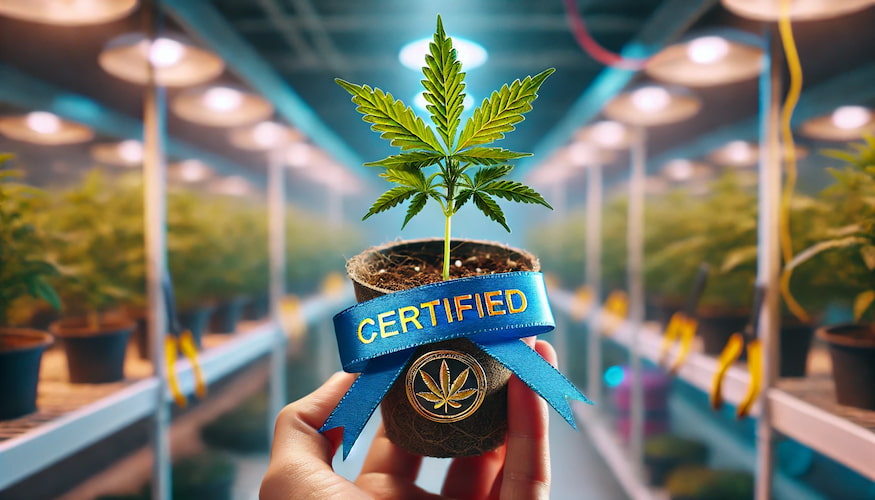
Getting Started: Your Clone Is Ready When You Are
If you’re planning your first grow or your tenth, the most time-efficient start is a verified, rooted clone shipped overnight. At IWantClones.com, backed by more than 15 years of genetics sourcing through SeedsHereNow.com and partnerships with more than 70 breeders, our clones arrive ready for week 3 on this timeline—rooted, healthy, and guaranteed for 3 days after delivery. Clones are $98.88, ship overnight within the U.S., and we accept crypto payments.
Ready to start the clock? Shop verified cannabis clones and have your plant on the way this week.
Frequently Asked Questions
How long does it take a cannabis clone to root?
A cannabis clone typically roots in 7 to 14 days under the right conditions: 75% to 85% humidity, 72–78°F, and low light intensity around 150–200 PPFD. Rooting hormone speeds the process. You’ll know rooting is complete when white tips emerge from the cube or plug base, or when the cutting resists a gentle tug.
How long from clone to harvest?
The full cannabis clone timeline runs 14 to 20 weeks from clone receipt to harvest. That breaks down as 1 to 2 weeks rooting, 1 week establishment, 3–8 weeks vegetative growth (your choice), and 8–11 weeks flower depending on the strain. Shorter veg means smaller plants and faster harvest; longer veg means larger plants and more yield potential.
Can I skip veg and flip to flower right away?
Technically yes—a practice called “12-12 from clone”—but it produces very small plants with limited yield. The plant still needs 2–3 weeks to establish before it responds well to flowering. Skipping veg entirely results in plants that finish at 6 to 12 inches tall. Most growers find that even a 3- to 4-week veg period produces dramatically better results than no veg at all.
What is the total cannabis clone timeline compared to seeds?
Starting from seed adds 5 to 10 days for germination plus 2–3 weeks in the seedling stage before you can begin real vegetative growth. That’s 3 to 4 weeks longer than starting from a rooted clone. Clones also guarantee female plants, known genetics, and predictable flowering times—three advantages seeds can’t reliably offer without feminized genetics.
How do I know when to harvest my clone?
The most reliable method is trichome inspection with a 60x–100x loupe or digital microscope. Harvest when trichomes are 80% to 90% cloudy with 10–20% amber for a balanced effect profile. Secondary indicators include 70–90% of pistils darkening from white to orange or red, and the natural yellowing of fan leaves in late flower as the plant draws down nitrogen reserves.
Does clone size at purchase affect the timeline?
Yes. A larger, more established clone at purchase means you start further along in the veg stage—potentially saving another week or two versus a freshly-rooted cutting. Check the height and node count of clones when ordering. A clone with 4 to 6 established nodes and visible branching is already ahead of one that’s just rooted with two leaf sets, and that difference shows up in your overall timeline.