The veg to flower transition is the most pivotal moment in your grow. To trigger flowering in photoperiod cannabis clones, switch your light schedule from 18 hours on / 6 hours off to a strict 12/12 split—12 hours of light, 12 hours of uninterrupted darkness. Do this when your clones are 12 to 24 inches tall, have at least 6 to 8 nodes, and show healthy root development, typically 3 to 5 weeks after rooting.
Get this moment right and you set up the entire flowering cycle for success. Rush it, stall it, or botch the environment, and you’re fighting the plant for the next eight weeks. Here’s everything you need to know—from signs of readiness through the first six weeks of flower.
Key Takeaways
- Flip to flower when clones are 12 to 24 inches tall with 6 to 8 or more nodes and roots hitting the bottom of the container.
- Switch from an 18/6 vegetative light schedule to a 12/12 flowering schedule to trigger bud development in photoperiod strains.
- Expect plants to stretch 50% to 200% in height during weeks 1 to 3 of flower—plan your vertical space before you flip.
- Shift nutrients toward lower nitrogen and higher phosphorus and potassium at weeks 1 to 2 of flower.
- Drop humidity from 55% to 65% (veg) to 40% to 50% (early flower) and tighten to 35% to 45% in mid/late flower to prevent mold.
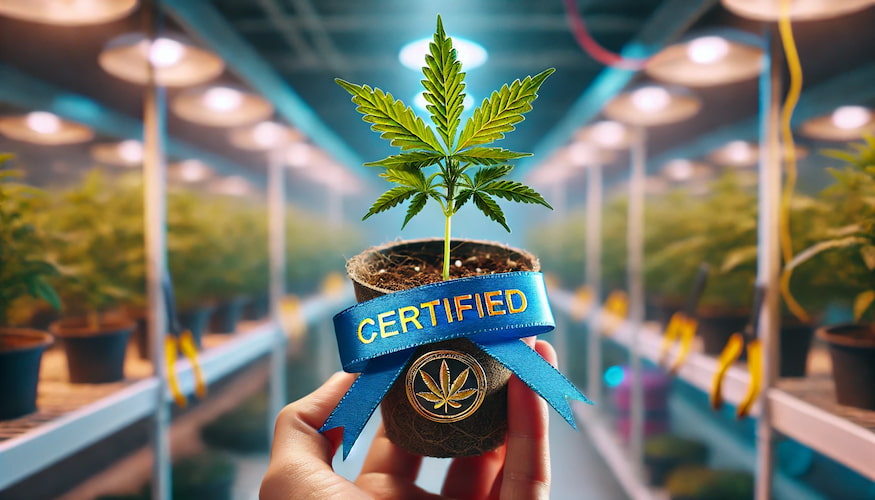
- Clones purchased from IWantClones.com are taken from verified female mothers—you will not get males, so no time wasted sexing plants.
When Are Cannabis Clones Ready for the Veg to Flower Transition?
Flipping too early is one of the most common mistakes home growers make. A clone that’s only 8 inches tall with four nodes will flower just fine—but you’ll end up with tiny plants that deliver a fraction of the yield you could have pulled. There are four things to check before you flip.
Size: 12 to 24 Inches Is the Target Window
For most strains in a typical 4×4 or 5×5 tent, you want clones somewhere between 12 and 24 inches tall before initiating the light flip. Why that range? Because plants in flower stretch—hard—during weeks 1 to 3. Depending on genetics, expect 50% to 200% height gain after the flip. A 12-inch clone might finish at 24 to 36 inches. A 24-inch clone can easily hit 4 to 5 feet. If your tent ceiling is at 6 feet with lights eating another 18 inches, you’re already doing the math.
Sativa-dominant and sativa-leaning hybrids stretch more aggressively than indica-dominant varieties. If you’re running a stretchy strain, flip earlier in that window. If you’re growing a stocky indica, you can let plants push closer to 24 inches before flipping.
Node Count: 6 to 8 or more Nodes Before You Flip
A node (the point on the stem where branches and leaves emerge) is a future bud site. You want at least 6 to 8 nodes developed before transitioning to flower. Below 6 nodes, the plant simply doesn’t have the architecture to support a full canopy. More nodes mean more lateral branches, more light exposure, and ultimately more flower sites.
If you’ve been doing any training—more on that below—you may have manipulated how those nodes are distributed. Either way, count what you’ve got before you flip. Fewer than 6 nodes usually means another week or two in veg is worth the wait.
Root Health: Roots Should Be at the Container Bottom
Healthy roots are the engine for everything that happens in flower. Before you flip, check that roots are reaching the bottom of the container or appearing at drainage holes. If you’re growing in fabric pots, give the pot a gentle squeeze—a dense, structured root ball feels firm. If the soil still collapses loosely, the root system isn’t developed enough to support the metabolic demands of flowering.
If you received clones from us, they arrive rooted and ready to transplant. By the time they’ve been in their final container for 2 to 3 weeks, root development is typically well underway. Understanding the full cannabis clone growth stages helps you track exactly where your plant is in development and when root health signals readiness to flip.
Veg Time: At Least 3 to 5 Weeks From Rooting
Even if a clone looks big, give it a minimum of 3 to 5 weeks in vegetative growth after rooting before you flip. This time allows the root system to fully colonize the growing medium, the stem to thicken and strengthen, and the plant to develop the internal resources it’ll need to fuel more than 8 weeks of flowering. Rushing veg to save time almost always costs you in flower—slower development, lighter yields, more susceptibility to stress.
The Light Flip: Switching to a 12/12 Schedule
The veg to flower transition is triggered by light—specifically, by extending the dark period. Here’s what those schedules actually mean and why the dark period is the critical variable.
What 18/6 and 12/12 Mean
18/6 means 18 hours of light followed by 6 hours of darkness, repeated daily. This is the standard vegetative light schedule for photoperiod cannabis—it mimics long summer days and keeps plants in a growth-only state. 12/12 means 12 hours of light and 12 hours of darkness. This mimics the shortening days of late summer and early fall and signals to the plant that the season is ending—time to reproduce.
For a deeper look at how these schedules work across the full grow cycle, see our guide on optimal light schedules for cannabis.
Why 12 Uninterrupted Dark Hours Trigger Flowering
Photoperiod cannabis plants measure the length of the dark period—not the light period—to determine whether to flower. Specifically, they monitor a light-sensitive protein called phytochrome. When the plant detects 12 or more consecutive hours of darkness, phytochrome signals the plant’s hormonal system to shift from vegetative to reproductive mode.
The word “uninterrupted” is critical. Even a brief flash of light during the dark period—a timer malfunction, a cracked tent seam, checking on your plants with a white light—can reset the clock and prevent or delay flowering. Light leaks are one of the most underestimated problems in indoor growing. Inspect your tent seams, vents, and any electrical displays before you flip. During the dark period, your grow space should be genuinely dark—as in, you should not be able to see your hand in front of your face.
For full details on light requirements across the plant’s lifecycle, our light requirements guide for cannabis clones covers spectrum, intensity, and photoperiod mechanics.
How To Execute the Flip
Set a reliable digital timer. Analog timers can drift and miss minutes; cheap plug-in timers can stick. Use a quality digital timer and verify it’s set correctly on day one. Your lights-on period should be consistent—same time every day. Pick a lights-off time that aligns with the coolest part of your day, since lights generate heat and running lights at night (when ambient temps are lower) can help regulate grow room temperatures.
There’s no need for a gradual transition. Go directly from 18/6 to 12/12. The plant will register the change within the first dark cycle.
Pre-Flip Preparation: What To Do Before You Flip
The 48 to 72 hours before you flip are some of the most productive in your grow. A few targeted actions here pay off for the entire flower cycle.
Pre-Flower Defoliation
Defoliation—removing fan leaves—is most effective right before or at the flip, not during mid-flower. The goal is to open the canopy: improve light penetration to lower bud sites and increase airflow to reduce humidity pockets that can lead to mold. Focus on large fan leaves blocking bud sites on the interior of the plant. You don’t need to strip the plant bare—remove 20% to 30% of the foliage, targeting leaves that are shading other areas rather than contributing to photosynthesis.
The plant will recover quickly in the first week of flower. A mild defoliation stress at this point is actually beneficial—it redirects energy toward bud development rather than maintaining shaded, unproductive leaves.
Last-Chance Training
LST (low-stress training) involves bending and tying branches to create a more horizontal canopy, which exposes more bud sites to direct light. Topping cuts the main stem above a node to create two main colas instead of one. Manifolding is a more structured technique that builds a symmetrical, multi-cola structure through a series of toppings and training steps.
All of these techniques are most effective in veg. If you’re going to top or manifold, it should be done well before the flip—at least 2 weeks prior—to give the plant time to recover and fill out. LST can continue into the first 1 to 2 weeks of flower, but avoid aggressive bending after week 2. At that point, stems become more rigid and the plant is committed to flowering—stressing it now only costs you yield.
A quick rule: if it involves cutting, do it before the flip or not at all. If it involves bending and tying, you have a short window into early flower.
The Stretch: What To Expect in Weeks 1 to 3 of Flower
The stretch is the rapid vertical growth that happens in the first 1 to 3 weeks after the light flip. It’s the plant’s final push to maximize its height and branch structure before it commits all resources to bud production. Some strains—particularly sativas and sativa-dominant hybrids—can double or even triple in height during this window.
Plan for the stretch before you flip, not after. Measure the distance between your canopy and your light at flip time. Most LED fixtures need 18 to 24 inches of clearance; HPS lights typically need 18 to 30 inches depending on wattage. If you flip with 24 inches between plant tops and lights and your strain stretches 18 inches, you’re fine. If your plant stretches 30 inches, you’ve got plants growing into the lights.
Manage the stretch by flipping earlier in the size window for aggressive stretchers, keeping lights adjustable, and using LST in weeks 1 to 2 to redirect vertical growth horizontally. Some growers also drop light intensity slightly in weeks 1 to 2 to slow the stretch, though this should be done carefully to avoid sacrificing light energy during a critical growth phase.
Shifting Nutrients for the Veg to Flower Transition
Nutrient needs change significantly when you flip. In veg, plants are building structure—stems, branches, leaves—and they need nitrogen (N) as the primary driver. In flower, the goal is bud development, and that requires a different macronutrient balance.
The Nutrient Shift at Weeks 1 to 2 of Flower
Start transitioning your nutrient program around weeks 1 to 2 of flower. Reduce nitrogen, and increase phosphorus (P) and potassium (K). Phosphorus supports root and flower development; potassium is critical for overall plant health, water uptake, and the density and weight of finished buds.
Most quality cannabis nutrient lines have a dedicated “bloom” formula that handles this ratio shift automatically. If you’re mixing your own, look for an N-P-K ratio that drops nitrogen significantly—something like 1-3-2 or 2-7-4 (N-P-K) versus the 3-1-2 or 4-2-3 ratios common in veg formulas.
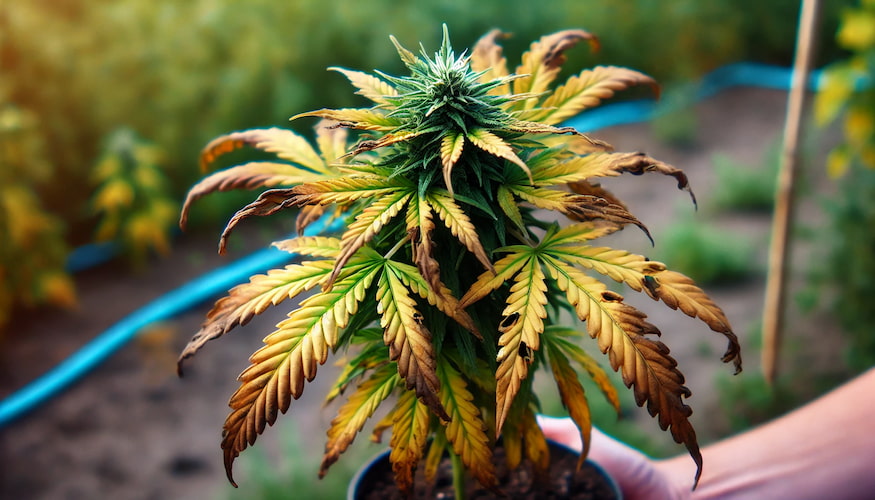
Watch your plants for signs of nitrogen toxicity (dark, clawed leaves, overly lush growth) or deficiency (yellowing from the bottom up, progressing too early in flower). Some yellowing of lower leaves in late flower is normal—that’s the plant pulling nitrogen back from older tissue. Early yellowing in weeks 1 to 4 is a sign your transition was too aggressive.
For a complete nutrient schedule with timing and dosing, see our comprehensive nutrient guide for cannabis clones.
Environment Changes: Humidity and Temperature
Your grow room environment should shift in step with your plants. The conditions that worked in veg are not optimal for flower, and letting humidity creep up in a dense flowering canopy is the fastest way to invite botrytis (bud rot) or powdery mildew.
Humidity Targets
In vegetative growth, keep relative humidity (RH) at 55% to 65%. This supports transpiration and leaf development. Once you flip, begin dropping humidity:
- Early flower (weeks 1 to 3): 40–50% RH
- Mid flower (weeks 4 to 6): 40–45% RH
- Late flower (weeks more than 7): 35–45% RH
As buds develop and the canopy gets denser, airflow becomes more important. Run an oscillating fan on the canopy—not pointing directly at the buds at high speed, but moving air consistently through the plant. Stagnant air around dense buds is a mold incubator.
Temperature
During the light period, maintain 70 to 80°F (21 to 27°C). In the dark period, a slight temperature drop of 5 to 10°F mimics the natural temperature differential between day and night in autumn—the seasonal change that triggers flowering in nature. This differential can also enhance terpene and resin production in late flower. Don’t let temps drop below 60°F, which can slow metabolism and stress the plant.
Week-by-Week Transition Timeline
Here’s what to expect and what to focus on across the first six weeks of flower after your veg to flower transition.
| Week | Light Schedule | Expected Plant Changes | Nutrient Focus | Environment / Humidity Target |
|---|---|---|---|---|
| Week 1 | 12/12 begins | Continued vegetative growth; pistils (white hairs) begin appearing at nodes; stretch starts | Begin reducing N; introduce bloom base at low dose | 50% to 55% RH; 72–78°F lights on; 65 to 70°F lights off |
| Week 2 | 12/12 | Rapid stretch; pistils proliferating; pre-flower structure becoming visible | Full transition to bloom nutrients; maintain P and K; cut N to minimal | 45% to 50% RH; 72–78°F lights on; 62 to 68°F lights off |
| Week 3 | 12/12 | Stretch slowing; early bud sites forming; resin glands beginning to develop | Full bloom formula; consider adding CalMag if on RO or soft water | 45% to 50% RH; 70–76°F lights on; 62 to 66°F lights off |
| Week 4 | 12/12 | Stretch complete; buds stacking; trichome production visible; strong aroma developing | Peak P and K; bloom boosters can be introduced; watch for nutrient burn | 40% to 45% RH; 70 to 76°F; dark period temp differential maintained |
| Week 5 | 12/12 | Dense bud formation; calyxes swelling; pistils beginning to darken and curl on some varieties | Continue high P/K; bloom booster at full dose; monitor run-off pH | 38% to 45% RH; airflow critical; inspect canopy daily for mold |
| Week 6 | 12/12 | Buds bulking significantly; trichomes shifting from clear to milky under a loupe | Taper bloom boosters; maintain base bloom; begin planning flush window | 35% to 45% RH; 68 to 75°F; dark period at 60 to 65°F |
Note: Most strains need 8 to 10 or more weeks of flower total. This table covers the transition and early-to-mid flower window. Continue your bloom nutrient program through week 7 to 8, then flush 1 to 2 weeks before harvest depending on your medium.
Clones Are Female—No Sexing Required
One of the biggest advantages of growing clones is that you already know the sex of your plants. Clones are genetic cuttings from a mother plant. If the mother is female—and all our mother plants at IWantClones.com are verified females—every clone from that mother is female. No males, no pollen, no seeded buds, and no wasted weeks finding out.
This is a meaningful difference from growing from seed, where even feminized seeds carry a small probability of hermaphroditism under stress. With clones, genetics are locked. If you want to understand more about why clones are always female, our article on whether cannabis clones are feminized explains the genetics in plain terms.
When you flip to 12/12, you’re not waiting and watching for male flowers to appear and pulling plants. You’re just watching for pistils and letting the females do their thing.
Common Mistakes During the Veg to Flower Transition
These are the errors we see most often from growers—especially those doing their first clone run. Knowing them ahead of time means you don’t have to learn them the hard way.
Flipping Too Early
The single most common mistake. A small plant at flip produces a small yield, full stop. Resist the pressure to flip because you’re excited or running out of patience. If your plants aren’t at 12 inches with more than 6 nodes and a solid root system, another week in veg is worth far more than a week saved.
Light Leaks During the Dark Period
Even a few minutes of light interruption per night can prevent plants from properly entering flowering mode or cause them to hermaphrodite—developing both male and female flowers—under chronic stress. Check your tent by standing inside it with lights off and your eyes adjusted to the dark. Any light visible from outside—from fans, timers, controllers, or tent seams—needs to be addressed before you flip. Use black electrical tape on indicator lights and reflective tape or foam weather stripping on seams.
Not Adjusting Nutrients at the Flip
Keeping plants on a high-nitrogen vegetative formula into flower produces soft, leafy growth instead of dense buds. Excess nitrogen in flower can also mask deficiencies in other nutrients, make plants more susceptible to pests, and reduce the quality of finished flowers. Make the nutrient switch at weeks 1 to 2 of flower. Your buds will thank you.
Ignoring the Stretch—Plants Hitting the Lights
This one causes real damage. When cannabis leaves contact a hot light source—particularly HPS or CMH—they bleach, burn, and die. Even LED light at close range causes light burn and bleaching. If you didn’t account for stretch and your plants are reaching toward the light, you have limited options: raise the light (if your tent allows), supercrop the tallest colas by gently pinching and bending them horizontal, or accept that your top buds will underperform. None of these are as good as planning ahead.
Skipping the Humidity Drop
Veg-level humidity (60% to 65%) in a dense flowering canopy is a mold setup. Botrytis can destroy a harvest in 48 hours once it takes hold in the center of a bud. Drop humidity as your plants enter flower and keep your VPD (vapor pressure deficit) in range for the flowering stage. If you’re not monitoring humidity, get a digital hygrometer. It’s the cheapest insurance in your grow room.
Training Too Late
Topping after week 2 of flower causes significant stress and rarely produces the intended result—plants are hormonally committed to flowering, not building new structure. LST can stretch into early flower with careful technique, but aggressive training in mid-flower mostly just stresses the plant and delays bud development. Do your structural work in veg.
A Note on Legality
Cannabis cultivation laws vary significantly by state and locality. On April 23, 2026, the DEA and DOJ moved FDA-approved marijuana products and state-licensed medical marijuana to Schedule III; recreational and adult-use cannabis remain Schedule I federally. A broader federal rescheduling hearing is scheduled for June 29–July 15, 2026. Always verify your state and local laws before growing cannabis. IWantClones.com ships within the United States only, to states where legal. It is your responsibility to know and comply with the laws in your jurisdiction.
Ready To Start Your Next Clone Run?
At IWantClones.com, every clone ships with a 3-day no-bullshit guarantee. If it doesn’t arrive alive and healthy, we make it right. Clones are $98.88, checkout is on SeedsHereNow.com, and we ship overnight. Browse available genetics and shop clones at IWantClones.com—then use this guide to take your next run through a clean, confident veg-to-flower transition.
Frequently Asked Questions
How long should cannabis clones veg before I flip to flower?
Most growers veg clones for 3 to 5 weeks after rooting before flipping to flower. This gives roots time to fully colonize the medium and plants time to develop 6–8+ nodes and reach 12 to 24 inches. Flipping earlier can work but typically reduces yield. Genetics, container size, and training style all affect optimal veg time.
What happens if there’s a light leak during the 12/12 dark period?
Even brief light interruptions during the dark period can delay flowering or trigger hermaphroditism—where a female plant develops male pollen sacs in response to stress. Chronic light leaks are one of the most common causes of seeded buds and failed flower cycles. Seal all light leaks before you flip and never enter the grow space with white light during dark hours.
Do I need to change nutrients when I flip to 12/12?
Yes. Transition your nutrient program at weeks 1 to 2 of flower. Reduce nitrogen and increase phosphorus and potassium to support bud development rather than vegetative growth. Most commercial cannabis nutrient lines include a dedicated bloom formula that handles this ratio shift. Staying on high-nitrogen veg nutrients into flower produces leafy, loose buds instead of dense, resinous flowers.
How much will my clones stretch after the light flip?
Expect 50% to 200% height gain during the stretch phase, which runs from weeks 1–3 of flower. Indica-dominant strains typically stretch 50–75%; sativa-dominant strains can double or triple in height. Plan your vertical space before you flip—measure the gap between your canopy and your light, and account for the maximum stretch your strain is known to produce.
Will I get any male plants from clones?
No. Clones are genetic copies of the mother plant. If the mother plant is female—which all IWantClones.com mother plants are — every clone is female. You will not get male plants from clones taken from a female mother. This is one of the primary advantages of clones over seeds, even feminized seeds, which carry a small hermaphroditism risk under stress.
Can I still train my plants after the light flip?
Light LST (bending and tying branches) can continue through weeks 1 to 2 of flower. Topping, fimming, and manifolding should be completed before the flip or not at all — these are high-stress techniques that work best during vegetative growth when recovery time is available. After week 3 of flower, avoid any significant training. Plants are committed to bud production and don’t respond well to structural manipulation at that stage.