Transplanting cannabis clones is straightforward once you know the two non-negotiables: the clone must have an established root system before it moves, and the transplant must happen with minimal root disturbance. Get those two things right and your clone will barely skip a beat. Rush either one and you risk days of transplant shock that set your grow back a full week or more.
Below you will find a complete, medium-by-medium breakdown—soil, coco coir, and hydro/DWC—covering timing, pot sizing, step-by-step technique, and the first-feed timing that most beginner guides skip entirely.
Key Takeaways
- Do not transplant a clone until roots are visibly emerging from the cube or plug—typically 10 to 18 days after cutting.
- Hardening off for 2 to 3 days before transplant dramatically reduces transplant shock in clones moved from a humidity dome.
- Soil, coco coir, and hydro each require a different approach to watering-in and first feeding after transplant.
- Start clones in a small vessel (3- to 4-inch pot or solo cup) and up-pot to a 1-gallon container once the root ball fills it—this prevents overwatering and promotes faster vegetative development.
- Avoid full-strength nutrients for the first 3 to 5 days after transplant; roots need to settle before they can handle salts.
- In DWC or NFT systems, net-pot transfers require the clone’s root tip to reach the nutrient solution or the water line to be raised temporarily.
When Is a Clone Ready To Transplant?
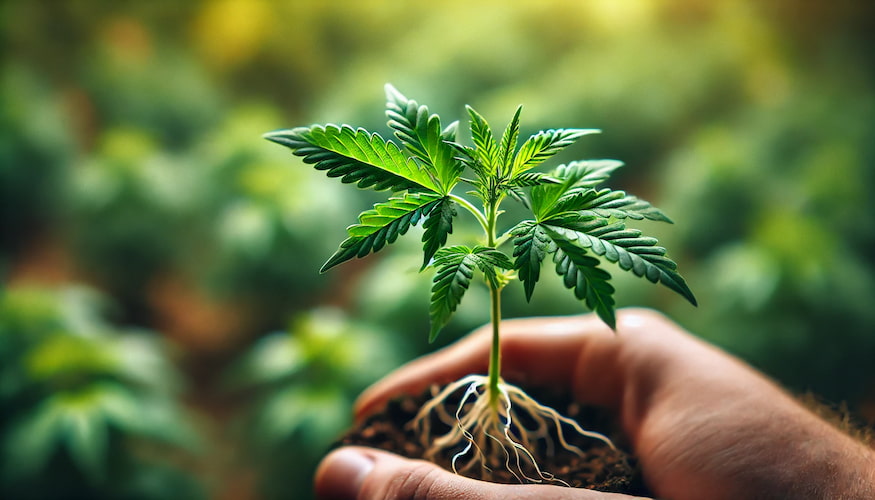
A clone is ready to transplant when it has developed enough roots to survive without the support of a humidity dome. The most reliable indicator is roots emerging from the bottom or sides of the propagation medium—whether that is a rockwool cube, a peat plug, or a rapid rooter. A single thread of white root visible at the base of the cube is enough. You do not need a full root mat to proceed.
Beyond visible roots, look for two additional signs:
- Upright, turgid leaves that do not wilt when the dome is removed for 30 minutes.
- New growth at the top—a clone that is pushing new nodes is allocating energy above ground, which means its roots are feeding it.
Timing typically runs 10 to 18 days from cutting for most indica-dominant and hybrid strains. Sativa-dominant genetics can take 14 to 21 days. If you ordered clones from us at IWantClones.com, your clone arrives already rooted and ready—the propagation phase is done for you.
Hardening Off First
Before the transplant itself, clones that have been living under a humidity dome need 2 to 3 days of hardening off. Hardening off cannabis clones means gradually exposing them to lower humidity and ambient airflow so their stomata learn to regulate moisture on their own. Skip this step and the clone will wilt immediately after transplant, even if its roots are healthy.
The process is simple: crack the dome 1 to 2 inches on day one, remove it for a few hours on day two, and pull it entirely on day three. If leaves stay turgid through the open-dome test, the clone is ready to move.
Choosing Your Growing Medium
The medium you choose affects everything downstream—watering frequency, nutrient availability, buffering capacity, and how forgiving the setup is for beginners. Each option has real trade-offs.
| Medium | Buffering Capacity | Watering Frequency | Root Oxygen | Best For | Difficulty |
|---|---|---|---|---|---|
| Quality potting soil | High—pH and nutrients naturally buffered | Every 2 to 4 days | Moderate | Beginners, organic grows | Easy |
| Coco coir | Low—inert, no nutrient buffering | Once or twice daily (or more) | High | Growers who want soil-like handling with faster growth | Intermediate |
| Rockwool / hydro (DWC) | Very low—fully inert | Continuous / automated | Very high | Experienced growers, maximum yield per day | Advanced |
| Perlite/soil mix (50/50) | Moderate—soil buffers, perlite drains | Every 2 to 3 days | High | Intermediate growers who want faster drainage | Easy–Intermediate |
| Promix HP / peat-based | Low-moderate—mycorrhizae inoculant helps | Every 1 to 2 days | High | Commercial-style grows that want soil-like handling | Intermediate |
Read our deep dive on the best soil types for cannabis if you are still deciding between amended organic soil, coco, or a professional peat mix. For hydroponic options, the hydroponic systems for cannabis cloning guide compares DWC, NFT, ebb-and-flow, and drip setups side by side.
Pot Sizing and the Up-Potting Sequence
One of the most common beginner mistakes is transplanting a fresh clone directly into a large final container. A 5-gallon pot filled with moist soil around a tiny root ball stays wet for days and invites root rot. Cannabis roots grow faster when they are slightly pot-bound—they push outward in search of new space, which accelerates vegetative development.
The recommended up-potting sequence for clones is:
- Propagation plug or rockwool cube → first transplant
- 3- to 4-inch pot or 16 oz solo cup (first transplant destination)
- 1-gallon pot (up-pot when roots circle the bottom of the small pot)
- 3- to 5-gallon pot (final container for most home grows) or larger for commercial runs
The timing between each stage depends on how fast your strain grows and how aggressive your feeding is, but expect roughly 1 to 2 weeks per stage during vegetative growth. Our complete guide to up-potting cannabis clones goes deeper on timing signals and container types (fabric vs. plastic vs. air pots).
How To Transplant Clones Into Soil: Step-by-Step
Soil is the most forgiving medium for first-time transplants. The organic matter and existing microbiology in a quality amended soil create a buffer that compensates for minor errors in watering or pH.
What You Need
- Rooted clone in its propagation plug or cube
- 3- to 4-inch plastic pot or solo cup with drainage holes
- Quality potting soil (pH 6.0 to 7.0 recommended)
- pH-adjusted water (6.2 to 6.8 for soil)
- Optional: mycorrhizal inoculant powder
The Transplant Process
- Pre-moisten the soil. Pack your pot loosely with slightly damp soil. Do not use soaking-wet soil—the root zone needs oxygen. The soil should hold its shape when squeezed but not drip water.
- Create a hole for the plug. Use your finger or a dibber to create a hole in the center of the pot that is slightly larger than your propagation cube. The top of the cube should sit about 0.5 inches below the soil surface once placed.
- Optional: dust with mycorrhizae. Sprinkle a small amount of mycorrhizal inoculant powder into the hole or directly onto the cube. Mycorrhizal fungi form a symbiotic relationship with cannabis roots and can significantly improve nutrient uptake and transplant recovery speed.
- Place the clone gently. Set the rooted plug into the hole without squeezing, twisting, or bending the roots. If roots are growing outward from the cube, let them hang naturally—do not fold them back in.
- Backfill lightly. Gently fill in the sides with soil. Do not pack tightly. Firm just enough so the clone stands upright.
- Water in slowly. Use pH-adjusted plain water (no nutrients yet) and water gently around the base of the plant. Use enough to wet the new soil around the plug—typically 100 to 150 ml for a 3-inch pot. You should see a small amount of runoff from the drainage holes.
- Place under appropriate light. Keep light intensity moderate for the first 48 hours—18 to 24 inches from an LED panel or under fluorescent/T5 lighting. Bright HID or high-intensity LEDs at close range can stress a freshly transplanted clone.
Post-Transplant Care for Soil
Do not water again until the top inch of soil is dry. Stick your finger into the soil—if it feels moist at the knuckle depth, wait. Overwatering freshly transplanted clones is the single most common reason they stall out. Let the plant signal thirst through very slight daytime droop before watering again in the first week.
Wait 3 to 5 days before introducing any nutrients. A quality amended soil has enough baseline fertility to carry a small clone through its first week without supplementation. When you do start feeding, begin at 25% to 50% of the manufacturer’s recommended dose and scale up over two weeks. See our cannabis clone feeding guide for a full nutrient timing schedule.
How To Transplant Clones Into Coco Coir
Coco coir is an increasingly popular medium for clones because it combines soil-like handling with the faster growth and higher oxygen levels you typically get from hydro. However, coco is inert—it contains zero nutrients of its own and has a high cation exchange capacity that means it will “lock up” calcium and magnesium if you are not feeding specifically for coco.
Key Differences From Soil
- pH target: 5.8 to 6.2 for coco (lower than soil)—stay in this range to maintain nutrient availability.
- Cal-Mag from day one: Even on the first watering, coco growers should add calcium-magnesium supplement because coco naturally sequesters these ions.
- Water more frequently: Coco dries out faster than soil. In the early vegetative stage, you may water once daily or even twice daily once the plant is larger.
- No buffering: pH swings and nutrient imbalances will show up faster in coco than in soil. Monitor runoff pH and EC starting at week two.
Coco Transplant Steps
- Pre-charge the coco. Before transplanting, water your coco pot with a light nutrient solution containing Cal-Mag at 200 to 300 ppm and pH-adjusted to 5.8 to 6.0. Let it drain fully. This charges the coco with calcium and magnesium before the roots arrive.
- Create the transplant hole the same way as soil—sized to fit the plug with 0.5 inches of coco covering the top.
- Place the clone and backfill with moist (not soaking) coco. Do not compress.
- Water in with dilute nutrients. Unlike soil, coco clones benefit from a light nutrient solution (Cal-Mag + a dilute base nutrient at 25% to 30% strength) immediately on transplant. Water until runoff, then stop.
- Return to light. Coco clones tend to recover from transplant faster than soil—you can often use your normal light intensity from day one if the clone was properly hardened off.
Watering Schedule After Transplant Into Coco
The key principle in coco is to keep the medium moist but never saturated. In the first few days after transplant with a small root ball, water a small amount (50 to 100 ml) around the base of the plug once or twice daily. As the roots expand into the surrounding coco, increase the volume and you can water the entire pot. Run 10% to 20% runoff with each watering to prevent salt buildup.
How To Transplant Clones Into Hydro and DWC Systems
Moving a rooted clone into a hydroponic system—particularly deep water culture (DWC) or net-pot-based systems—requires a slightly different mindset. You are not working with a solid medium; you are supporting the clone in a net pot while its roots grow down into nutrient solution.
Net-Pot Transfer for DWC
- Size the net pot correctly. A 2-inch net pot works for a fresh clone. Move to a 3- to 4-inch net pot if the root ball is already substantial.
- Support medium in the net pot. Fill the bottom half of the net pot with hydroton (clay pebbles), place the rooted rockwool cube or rapid rooter into the center, then fill around the sides with more hydroton.
- Check root-to-water distance. The roots emerging from the cube should be within 0.5 to 1 inch of the nutrient solution surface. If they are not, temporarily raise the water level in the reservoir so the roots touch the solution. Lower the water back to normal levels (1 to 2 inches below net pots) once roots have extended down into the reservoir—usually 3–7 days after transfer.
- Start nutrients at reduced strength. For fresh clones entering DWC, start with 300 to 400 ppm nutrient solution. Full-strength vegetative formulas (700 to 1,100 ppm) can burn young roots that are not yet acclimated.
- Maintain dissolved oxygen. Air stones and air pumps are not optional in DWC—roots need dissolved oxygen to avoid drowning. Target more than 8 mg/L dissolved oxygen, which means running air stones continuously and keeping reservoir temperature at 65 to 68°F (18 to 20°C). Warmer water holds less oxygen and invites pythium (root rot).
NFT and Flood-and-Drain Systems
In nutrient film technique (NFT) channels, place the rooted clone in a 2-inch net pot and position it over the channel. The thin film of solution flowing through the channel should just touch the root tips. In ebb-and-flow (flood and drain) tables, clones in net pots or small pots of hydroton simply sit on the table—the flood cycle delivers nutrients and the drain cycle restores oxygen. Set flood frequency to 2 to 4 times per day for young clones, adjusting based on root development and how quickly the medium dries.
For a comprehensive breakdown of each system’s advantages, our hydroponic systems guide covers setup, maintenance, and which systems are easiest to manage for first-time hydro growers.
Avoiding Transplant Shock
Transplant shock is the period of slowed or stalled growth that follows a disruptive transplant. It is not inevitable—it is mostly caused by preventable mistakes. Here are the most common causes and how to avoid each one.
Root Disturbance
The number one cause of serious transplant shock is damaging roots during the move. Never pull a clone out of its propagation medium by the stem. If a clone is rooted in a plastic cup, cut the cup away rather than inverting and shaking. If it is in a peat plug, support the entire plug from below when lifting. Do not break up or massage the root ball—let it stay intact as a unit and settle into the new medium on its own.
Environmental Mismatch
A clone that went straight from a 90% RH humidity dome to a 45% RH grow room with strong airflow will wilt dramatically, even with a healthy root system. The stomata have been trained to stay open under high humidity and are not ready to regulate moisture loss under ambient conditions. Hardening off—described earlier—is the fix. Even 48 hours of transitional hardening off cuts recovery time substantially.
Immediate High-Strength Nutrients
Roots that have just been disturbed and are trying to re-establish contact with a new medium cannot efficiently process salts. Watering in with full-strength nutrient solution draws water out of the root cells through osmosis and makes the whole transplant process harder on the plant. Keep first-water EC below 0.8 mS/cm (roughly 400 ppm) regardless of medium and let the plant settle for 3 to 5 days before stepping up.
Light Stress
Freshly transplanted clones are more sensitive to intense light than established vegetative plants. For the first 48 to 72 hours after transplant, dim your lights slightly or raise them to reduce intensity. A clone that is simultaneously dealing with root disturbance and intense photons has too many stressors at once.
Post-Transplant Feeding Timeline
Feeding timing varies by medium, but the general principle is the same across all three: let the plant settle before introducing full nutrition.
| Days After Transplant | Soil | Coco Coir | DWC / Hydro |
|---|---|---|---|
| Day 1 to 3 | Plain pH water only | Cal-Mag + 25% base nutrients | 300 to 400 ppm dilute nutrient solution |
| Day 4 to 7 | Begin light nutrients at 25% to 50% dose | Cal-Mag + 50% base nutrients | 500 to 600 ppm; add Cal-Mag if needed |
| Week more than 2 | Ramp to full vegetative feeding schedule | Full coco vegetative schedule (with daily Cal-Mag) | 700 to 900 ppm full vegetative solution |
The IWantClones.com feeding guide has week-by-week schedules for each medium with specific product dosages, macronutrient ratios, and flush timing.
Signs the Transplant Went Well
A successful transplant looks like this: within 24 hours, leaves are holding upright. Within 48 to 72 hours, new growth resumes at the top of the plant. By day 5 to 7, you can gently tug the clone and feel resistance from anchoring roots. By day 10 to 14, the plant is visibly in vegetative mode with robust new node development.
Contrast this with a troubled transplant: drooping that does not recover after 24 hours, yellowing of lower leaves, or stunted new growth that barely moves for more than 5 days. If you see those signs, check root health by carefully extracting the plug from the new medium—healthy roots are white and firm; rotted roots are brown and slimy.
Up-Potting Later in Veg
Transplanting is not a one-time event in most grows. Most growers will up-pot at least once more during vegetative growth as the plant outgrows its first container. The signals are the same: roots circling the drain holes, plant drying out faster than usual, or visible slowdown in growth that cannot be explained by nutrition.
Up-potting technique is the same as the initial transplant, but the root ball is now much larger and more established. That actually makes the process easier—the root ball holds together well and the transition is faster. Still avoid full-strength nutrients for 2 to 3 days after each up-pot. Review the full up-potting guide for pot-size recommendations by plant size and grow style.
Get Started With Rooted Clones
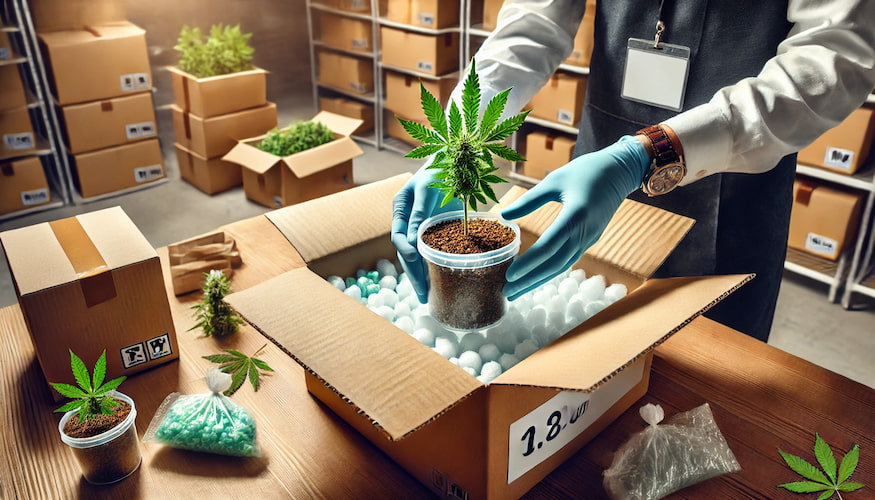
If you want to skip the propagation phase entirely and start with a healthy, already-rooted clone, browse our current selection at IWantClones.com. Every clone ships overnight, arrives rooted, and is backed by our 3-day guarantee. All you need to do is transplant—and now you know exactly how.
Frequently Asked Questions
When should I transplant cannabis clones?
Transplant cannabis clones when white roots are visibly emerging from the bottom or sides of the propagation plug, the leaves stay turgid without a humidity dome, and new growth is pushing at the top. This typically happens 10 to 18 days after taking a cutting. Clones purchased from IWantClones.com arrive already at this stage.
Can I transplant clones directly into a large pot?
Technically yes, but it is not recommended. A large volume of moist soil around a small root ball stays wet too long and dramatically increases the risk of root rot and overwatering. Start in a 3- to 4-inch pot or solo cup, then up-pot progressively as the root system fills each container—this drives faster vegetative growth.
What is the best soil mix for transplanting cannabis clones?
A well-draining, lightly amended potting soil at pH 6.2 to 6.8 works well for most home growers. Look for a mix with 20–30% perlite for drainage and aeration. Avoid hot soils with heavy nutrient loads for fresh clones—high salt content can burn young, sensitive roots. Our best soil types guide covers specific product recommendations.
How long does transplant shock last in cannabis clones?
Mild transplant shock—slight drooping and a brief growth pause — typically resolves within 24–72 hours when the transplant is done carefully. Serious shock from root damage or immediate exposure to high-intensity light and full-strength nutrients can stall a plant for 5 to 10 days. Proper hardening off and gentle handling keep shock to a minimum.
Do I need to add nutrients when transplanting clones into coco?
Yes. Unlike amended soil, coco coir is an inert medium with no inherent nutrients. It also sequesters calcium and magnesium. Water coco clones from day one with a dilute solution containing calcium-magnesium supplement and a light base nutrient—typically 25–30% of full-strength vegetative dose—pH-adjusted to 5.8 to 6.2.
How do I transplant a clone into a DWC hydro system?
Place the rooted clone in a net pot supported by hydroton clay pebbles. Position the net pot so root tips are within 0.5 to 1 inch of the nutrient solution. Temporarily raise the reservoir water level to bridge the gap if needed, then lower it once roots reach the solution—usually 3–7 days. Start with 300–400 ppm nutrient solution and increase gradually over two weeks.