
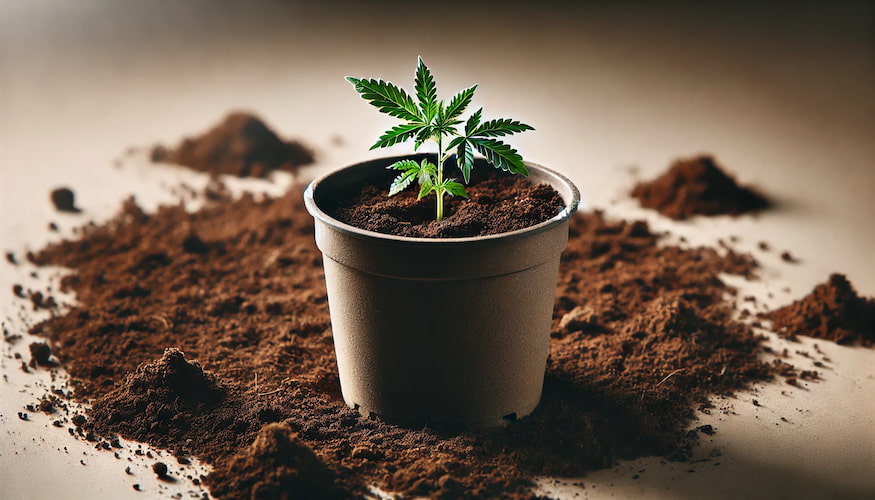
Nutrient Lockout & How to Flush Cannabis Plants

Nutrients and feeding for cannabis clones

Nutrient lockout happens when your cannabis plant cannot absorb nutrients that are already present in the root zone — the minerals are there, but a chemical or physical barrier prevents the roots from taking them up. The most common culprits are pH out of the target range and salt accumulation from overfeeding. Flushing with pH-corrected plain water dissolves built-up salts and resets the root environment so absorption can resume.

If your plants look deficient despite regular feeding, don’t automatically add more fertilizer. More nutrients into a locked-out medium makes the problem worse. Diagnose first, then flush.

Key Takeaways

  • Nutrient lockout is a root-zone problem, not a feeding problem — plants can’t absorb nutrients that are already in the medium.
  • pH out of range is the single most common cause: target 6.0–7.0 in soil, 5.5–6.5 in coco/hydro.
  • Salt buildup from repeated heavy feeding raises medium EC and blocks nutrient uptake even when input EC is correct.
  • Diagnose lockout by testing runoff EC and pH — high runoff EC or pH far from target confirms the problem.
  • Flushing means running 2–3x the pot volume of plain, pH-corrected water through the medium until runoff EC drops and pH stabilizes.
  • After flushing, resume feeding at a reduced dose (50–75% of normal) and recheck runoff at the next watering.

What Is Nutrient Lockout?

Nutrient lockout (also called nutrient block or nutrient unavailability) is the condition where cannabis roots cannot absorb mineral ions from the root zone. It is not the same as a nutrient deficiency caused by under-feeding. In lockout, the nutrients are physically present but chemically unavailable to the plant.

Roots absorb minerals through ion exchange — a process that is highly sensitive to pH. Each nutrient has a narrow pH window where it stays soluble and absorbable. Outside that window, nutrients precipitate into insoluble compounds or compete with each other for the same uptake channels. The plant shows deficiency symptoms because it genuinely cannot access what it needs, even though the soil or medium is loaded with fertilizer.

Understanding this distinction is critical. A grower who sees yellowing and adds more fertilizer without testing pH or runoff EC is making the root-zone chemistry worse, not better.

Common Causes of Nutrient Lockout

1. pH Out of the Target Range

pH is the primary driver of nutrient availability. In soil, the sweet spot is 6.0–7.0, with 6.2–6.8 being optimal for most macro and micronutrients. In coco coir and hydroponic systems, target 5.5–6.5, ideally 5.8–6.2.

When pH drifts below 5.5 (too acidic), iron, manganese, zinc, and copper become over-available, causing toxicity that blocks calcium and magnesium. When pH climbs above 7.0 (too alkaline), iron, manganese, boron, and zinc lock out almost completely. Calcium and magnesium are relatively available at higher pH, which is why lockout at high pH often first looks like iron or manganese deficiency — not a calcium problem.

Tap water varies widely. Many municipal supplies run pH 7.2–7.8 straight out of the tap. Watering with uncorrected tap water repeatedly will push your medium pH up over time. Always pH your input water before feeding or watering, every single time.

2. Salt Buildup from Overfeeding

Every fertilizer, synthetic or organic, adds mineral salts to the medium. If you feed at high rates without giving plain water intervals, or if you never flush between feeding cycles, those salts accumulate. The EC (electrical conductivity) of the root zone climbs above what you’re putting in.

High root-zone EC creates osmotic stress. Roots push water and nutrients out of the plant rather than absorbing them — think of pickling vegetables in brine. Even if individual nutrient concentrations look correct, the total salt load overwhelms the root’s ability to selectively uptake what it needs. This is why runoff EC much higher than input EC is a red flag for salt accumulation.

3. Nutrient Antagonism

Certain nutrients compete directly with each other for absorption. Excess calcium blocks magnesium uptake. Too much potassium locks out calcium and magnesium. High phosphorus ties up zinc and iron. Overloading one nutrient can functionally starve the plant of another even when pH is perfect. This is why chasing a deficiency by piling on a single nutrient without looking at the full feed profile often creates a new problem.

4. Root Zone Temperature Extremes

Root zone temps below 60°F (15°C) slow ion uptake dramatically — roots become stiff and the enzymatic processes that drive absorption nearly stop. Temps above 80°F (27°C) degrade oxygen levels in the medium, stress root hairs, and reduce uptake efficiency. Lockout symptoms can appear purely from temperature stress even when pH and EC are perfect. Keep root zone temps at 65–75°F (18–24°C).

5. Overwatering and Anaerobic Conditions

Waterlogged medium has no oxygen. Roots need oxygen to drive active nutrient transport. Chronically wet containers lead to root rot and anaerobic conditions that look identical to nutrient lockout because the root system is too damaged to absorb anything. If your medium smells sour or your roots are brown and slimy, the problem is more than a simple flush can fix.

Nutrient Lockout Symptoms

The confusing thing about lockout is that it mimics specific deficiencies. The leaves tell you what they can’t access, not why they can’t access it. Common symptom patterns include:

  • Interveinal yellowing on new growth — classic iron or manganese deficiency pattern, common with high pH
  • Yellowing starting on older, lower leaves — indicates mobile nutrients (nitrogen, phosphorus, magnesium) being locked out
  • Brown or bronze spots with yellowing margins — often calcium or magnesium unavailability
  • Leaf tips burning or curling down — can signal salt toxicity / root zone EC overload
  • Stunted growth despite good conditions — general nutrient unavailability slows everything
  • Pale, washed-out color across the whole canopy — severe or prolonged lockout affecting multiple nutrients

The key diagnostic clue is that these symptoms appear or worsen despite regular feeding. If you’re feeding on schedule at reasonable rates and plants are still deteriorating, run a runoff test before adding anything else. For a full breakdown of what individual deficiencies look like, see our guide to nutrient deficiency signs in cannabis clones.

Nutrient Lockout: Cause, Sign, and Fix

Cause Visible Sign Fix
pH too high (>7.0 in soil, >6.5 in coco) Interveinal yellowing on new growth; iron/manganese deficiency appearance Flush with pH 6.0 water (soil) or 5.8 water (coco) until runoff pH normalizes
pH too low (<6.0 in soil, <5.5 in coco) Calcium and magnesium deficiency signs; brown spots; leaf distortion Flush with pH 6.5 water to bring medium pH up; check input water pH
Salt buildup / overfeeding Leaf tip burn; overall decline despite feeding; runoff EC much higher than input EC Flush with 2–3x pot volume plain pH water; resume feeding at 50–75% dose
Nutrient antagonism (excess of one nutrient) Specific deficiency despite adequate supply (e.g., excess K locking out Ca/Mg) Flush medium; adjust feed ratios; use a balanced base nutrient before adding supplements
Root zone too cold (<60°F) Slow growth; purple stems; deficiency symptoms despite good pH and EC Warm the root zone (raise pot off cold floor, add a heat mat)
Overwatering / root rot Wilting despite wet medium; brown slimy roots; sour smell Improve drainage and aeration; treat root rot; allow medium to dry between waterings

How to Diagnose Nutrient Lockout with Runoff EC and pH

Don’t guess — test. Runoff EC and pH testing is the fastest way to confirm lockout and identify whether pH drift or salt buildup is driving it. This is one of the most important skills any soil or coco grower can develop. Our full guide on EC, PPM, and runoff in cannabis feeding walks through the whole process in detail.

What You Need

  • A calibrated pH meter (digital, not strips — strips aren’t accurate enough)
  • An EC or TDS/PPM meter
  • A tray or saucer to collect runoff
  • pH-corrected water for the test flush

Step-by-Step Runoff Test

  1. Water the plant until you get 10–20% runoff — collect it in a clean tray.
  2. Test the runoff pH. Compare it to your input water pH. A gap of more than 0.5 points, or a runoff pH outside your target range, confirms pH drift in the medium.
  3. Test the runoff EC. Compare it to your input nutrient solution EC. If runoff EC is more than 25–30% higher than input EC, salt is accumulating in the medium.
  4. Note both numbers as your baseline before flushing.

A runoff EC of 3.0+ mS/cm when you’re feeding at 1.8 mS/cm is a clear salt buildup signal. A runoff pH of 7.4 when your input is 6.5 tells you the medium has drifted alkaline and is locking out iron, manganese, and zinc.

How to Flush Cannabis Plants

Flushing means running a large volume of plain, pH-corrected water through the medium to dissolve and carry out accumulated salts and reset the root-zone pH. It is not complicated, but a few details matter.

Basic Flush Protocol

  1. Mix plain water to the correct pH. For soil, use pH 6.2–6.5. For coco, use pH 5.8–6.0. Do not add any nutrients or supplements.
  2. Water slowly and thoroughly. Pour water at a slow, steady rate to let it saturate the entire medium rather than channeling through one path.
  3. Use 2–3x the container volume. A 5-gallon pot needs 10–15 gallons of flush water to adequately clear salt accumulation. This is not a normal watering — you are actively washing salts out.
  4. Collect and test runoff as you go. Test runoff EC and pH partway through and at the end. You want runoff EC to drop significantly (ideally within 0.5 mS/cm of your input EC) and runoff pH to stabilize near your target range.
  5. Allow the medium to partially dry before resuming feeding. Flushing saturates the medium. Wait until the container feels notably lighter before the next watering.
  6. Resume feeding at 50–75% of your previous dose. Give the plant a chance to recover before returning to full-strength feeding. Test runoff at the next 2–3 waterings to confirm stability.

Flushing in Hydroponic Systems

In hydro, “flushing” means draining and replacing the reservoir with fresh, pH-corrected nutrient solution at a lower concentration — or plain water if you’re doing a hard reset. Run plain pH-corrected water through the system for 24–48 hours, then refill with a fresh nutrient solution at 50% strength. Clean the reservoir walls and any recirculating parts while you’re at it — salt crystals on surfaces re-dissolve and can spike EC again quickly.

Flush Products: Are They Worth It?

Commercial flushing agents like Florakleen, Flawless Finish, or Final Phase contain chelating agents and surfactants that help break up salt bonds and clear them from the medium more efficiently than plain water alone. They can be useful if you’re dealing with severe buildup or are flushing close to harvest when you want to work quickly. They are not magic — plain pH-corrected water works fine for most situations, especially if you catch the problem early. If you use a flush product, follow the manufacturer’s directions and still test runoff EC and pH to confirm the flush is working.

Recovery After Flushing

Recovery time depends on how long lockout was occurring and how stressed the plant became. In mild cases where you catch the problem early, you’ll see improvement in 3–5 days. New growth comes in healthy and the existing damaged leaves stabilize (they won’t recover — affected leaves stay affected, but no new damage occurs).

In severe cases with significant leaf loss or long-duration lockout, expect 1–2 weeks before the plant regains full vigor. Flowering plants are more sensitive — lockout during flower can affect bud development and final yield, so it’s worth preventing rather than fixing.

Keep environmental conditions stable during recovery: consistent temperature, appropriate humidity, and correct light intensity. Stressed plants don’t need additional environmental stressors. Our comprehensive cannabis nutrient feeding guide covers how to structure a post-flush feeding ramp-up.

Preventing Nutrient Lockout

pH Your Water Every Time

This is the non-negotiable baseline. Tap water pH varies by season and location. Your nutrient mix changes pH when you add it to water. Always measure and adjust pH after mixing nutrients, right before watering. A $20 digital pH meter calibrated with buffer solution is the most important piece of equipment in your grow room.

Water Between Feedings

Not every watering needs to be a feeding. Alternating nutrient solution waterings with plain pH-corrected water prevents salt accumulation between feed cycles. In coco, which has no buffering capacity, a plain water watering every 3–4 feedings is a good habit. In soil, the organic matter provides some buffering, but periodic plain water flushes still help. Read our full guide on how to water cannabis clones for a complete schedule.

Don’t Over-Feed

More nutrients does not mean faster growth. Most feeding charts from nutrient companies are written at the high end of safe dosing — starting at 75% of the recommended rate is a smart baseline, especially for clones in new medium. Watch the plants, test runoff, and only increase concentration if the plants are asking for more (deep green color, fast growth, runoff EC notably lower than input EC).

Test Runoff Regularly

Testing runoff EC and pH once a week is enough to catch drift before it becomes lockout. If runoff EC starts climbing more than 0.5 mS/cm above input EC two waterings in a row, flush proactively. Catching it early means a single flush and a feeding adjustment — not a full recovery period.

Know Your Medium

Different media behave differently. Coco coir is inert and has a high cation exchange capacity — it holds calcium and magnesium tightly and releases them slowly, which is why Cal-Mag supplementation is almost always required in coco. Soil buffers pH naturally but can build up organic salts over long vegetative periods. Perlite-heavy mixes drain fast and accumulate less salt but also dry out faster. Match your feeding frequency and volume to your medium’s actual capacity.

The End-of-Flower Flush Debate

Pre-harvest flushing is one of the most contested topics in cannabis cultivation. The traditional argument is that flushing the medium with plain water 1–2 weeks before harvest forces the plant to metabolize stored nutrients, resulting in a smoother, cleaner smoke. Many experienced growers swear by it.

The counter-argument, backed by some research including work from Washington State University, is that a 1–2 week flush does not meaningfully change the mineral content of the harvested flower — the plant’s internal nutrient cycling does not work that fast, and the biggest factors in smoke quality are genetics, dry/cure process, and combustion method, not a pre-harvest flush.

At IWantClones.com, we think the honest answer is: the science is inconclusive but the practice carries very little risk when done properly. If your medium has been well-managed throughout the grow with correct pH and moderate EC, a 7–10 day water-only finish before harvest is unlikely to hurt anything and may help. If your medium has significant salt buildup going into late flower, flushing it out is genuinely beneficial regardless of the harvest-quality debate.

What does matter definitively for end-of-flower: pH management throughout the grow, a proper harvest timing decision based on trichome maturity, and a slow dry and cure.

Nutrient Lockout vs. True Nutrient Deficiency

Because lockout mimics deficiency, it helps to have a decision tree:

  1. Are you feeding regularly at reasonable rates? If yes, test runoff before assuming under-feeding.
  2. What does runoff pH show? If it’s outside target range, you likely have lockout from pH drift.
  3. What does runoff EC show? If it’s significantly higher than input EC, salt buildup is driving the problem.
  4. Are both pH and EC fine? Then look at specific nutrient interactions (antagonism), root zone temperature, and watering frequency before assuming a true deficiency.
  5. Only after ruling out lockout should you add nutrients. And if you do add, add one thing at a time.

True nutrient deficiencies (actual under-supply) are less common than lockout in growers who are feeding regularly. Start with your pH meter, not your nutrient bottle.

Starting with Healthy Roots: Why Clone Quality Matters

The best time to prevent nutrient lockout problems is before the plant ever goes into your medium. A well-rooted clone with a healthy, white root system has the absorptive surface area to pull nutrients efficiently even when conditions are slightly imperfect. A clone with brown, compromised roots will show lockout symptoms at pH and EC levels that a healthy plant handles fine.

At IWantClones.com, our clones are rooted, inspected, and shipped with a 3-day no-bullshit guarantee. You get a plant that’s ready to go into its new home — not one that’s already fighting root stress before you even start feeding. Browse our current clone selection and see what’s available for overnight delivery to your door.

When your clones arrive and you’re setting up their first feeding schedule, our nutrient feeding guide is the right place to start — it covers what to feed, at what concentration, and how to read your plants to avoid overfeeding from day one.

Frequently Asked Questions

What is nutrient lockout in cannabis?

Nutrient lockout is when cannabis roots cannot absorb minerals already present in the growing medium. It’s caused by pH out of range, salt accumulation from overfeeding, or nutrient antagonism — not by a shortage of fertilizer. Adding more nutrients to a locked-out medium makes the problem worse. Test runoff pH and EC first.

How do I know if my plant has nutrient lockout or a real deficiency?

Test your runoff. If runoff pH is outside the target range (6.0–7.0 in soil, 5.5–6.5 in coco) or runoff EC is significantly higher than your input EC, lockout is the likely cause. A true deficiency occurs when the medium EC is low and pH is in range but the plant still shows signs — that’s when you add nutrients.

How do I flush cannabis plants to fix nutrient lockout?

Use plain, pH-corrected water (no nutrients). Run 2–3x the pot volume through the medium slowly, collecting and testing runoff. Flush until runoff EC drops near input EC and pH stabilizes in range. Allow the medium to partially dry, then resume feeding at 50–75% of your normal dose and recheck runoff over the next few waterings.

How long does it take for cannabis to recover from nutrient lockout?

Mild cases caught early show improvement in 3–5 days after a successful flush and pH correction. Severe or prolonged lockout — especially during flowering — can take 1–2 weeks for the plant to fully recover vigor. Damaged leaves don’t recover, but new growth should come in healthy once the root zone is corrected.

Should I flush cannabis before harvest?

The science is genuinely mixed on whether a pre-harvest flush improves smoke quality. It carries little risk when done with pH-corrected water 7–10 days before harvest. If you’ve maintained good pH and EC throughout the grow, the impact is minor. If you have significant salt buildup in late flower, a flush before harvest is worth doing for plant health regardless of the quality debate.

What pH should I use to flush cannabis plants?

In soil, flush with pH 6.2–6.5 water. In coco coir or hydro, flush with pH 5.8–6.0 water. If your medium has drifted alkaline (runoff pH above 7.0), start the flush at the lower end of the target range (6.0 in soil, 5.8 in coco) to help pull the medium pH down more efficiently.

Share

Comments are closed.

Also recommended

Nutrient Lockout & How to Flush Cannabis Plants

July 28, 2026
Nutrients and feeding for cannabis clones

Nutrient lockout happens when your cannabis plant cannot absorb nutrients that are already present in the root zone — the minerals are there, but a chemical or physical barrier prevents the roots from taking them up. The most common culprits are pH out of the target range and salt accumulation from overfeeding. Flushing with pH-corrected plain water dissolves built-up salts and resets the root environment so absorption can resume.

If your plants look deficient despite regular feeding, don’t automatically add more fertilizer. More nutrients into a locked-out medium makes the problem worse. Diagnose first, then flush.

Key Takeaways

  • Nutrient lockout is a root-zone problem, not a feeding problem — plants can’t absorb nutrients that are already in the medium.
  • pH out of range is the single most common cause: target 6.0–7.0 in soil, 5.5–6.5 in coco/hydro.
  • Salt buildup from repeated heavy feeding raises medium EC and blocks nutrient uptake even when input EC is correct.
  • Diagnose lockout by testing runoff EC and pH — high runoff EC or pH far from target confirms the problem.
  • Flushing means running 2–3x the pot volume of plain, pH-corrected water through the medium until runoff EC drops and pH stabilizes.
  • After flushing, resume feeding at a reduced dose (50–75% of normal) and recheck runoff at the next watering.

What Is Nutrient Lockout?

Nutrient lockout (also called nutrient block or nutrient unavailability) is the condition where cannabis roots cannot absorb mineral ions from the root zone. It is not the same as a nutrient deficiency caused by under-feeding. In lockout, the nutrients are physically present but chemically unavailable to the plant.

Roots absorb minerals through ion exchange — a process that is highly sensitive to pH. Each nutrient has a narrow pH window where it stays soluble and absorbable. Outside that window, nutrients precipitate into insoluble compounds or compete with each other for the same uptake channels. The plant shows deficiency symptoms because it genuinely cannot access what it needs, even though the soil or medium is loaded with fertilizer.

Understanding this distinction is critical. A grower who sees yellowing and adds more fertilizer without testing pH or runoff EC is making the root-zone chemistry worse, not better.

Common Causes of Nutrient Lockout

1. pH Out of the Target Range

pH is the primary driver of nutrient availability. In soil, the sweet spot is 6.0–7.0, with 6.2–6.8 being optimal for most macro and micronutrients. In coco coir and hydroponic systems, target 5.5–6.5, ideally 5.8–6.2.

When pH drifts below 5.5 (too acidic), iron, manganese, zinc, and copper become over-available, causing toxicity that blocks calcium and magnesium. When pH climbs above 7.0 (too alkaline), iron, manganese, boron, and zinc lock out almost completely. Calcium and magnesium are relatively available at higher pH, which is why lockout at high pH often first looks like iron or manganese deficiency — not a calcium problem.

Tap water varies widely. Many municipal supplies run pH 7.2–7.8 straight out of the tap. Watering with uncorrected tap water repeatedly will push your medium pH up over time. Always pH your input water before feeding or watering, every single time.

2. Salt Buildup from Overfeeding

Every fertilizer, synthetic or organic, adds mineral salts to the medium. If you feed at high rates without giving plain water intervals, or if you never flush between feeding cycles, those salts accumulate. The EC (electrical conductivity) of the root zone climbs above what you’re putting in.

High root-zone EC creates osmotic stress. Roots push water and nutrients out of the plant rather than absorbing them — think of pickling vegetables in brine. Even if individual nutrient concentrations look correct, the total salt load overwhelms the root’s ability to selectively uptake what it needs. This is why runoff EC much higher than input EC is a red flag for salt accumulation.

3. Nutrient Antagonism

Certain nutrients compete directly with each other for absorption. Excess calcium blocks magnesium uptake. Too much potassium locks out calcium and magnesium. High phosphorus ties up zinc and iron. Overloading one nutrient can functionally starve the plant of another even when pH is perfect. This is why chasing a deficiency by piling on a single nutrient without looking at the full feed profile often creates a new problem.

4. Root Zone Temperature Extremes

Root zone temps below 60°F (15°C) slow ion uptake dramatically — roots become stiff and the enzymatic processes that drive absorption nearly stop. Temps above 80°F (27°C) degrade oxygen levels in the medium, stress root hairs, and reduce uptake efficiency. Lockout symptoms can appear purely from temperature stress even when pH and EC are perfect. Keep root zone temps at 65–75°F (18–24°C).

5. Overwatering and Anaerobic Conditions

Waterlogged medium has no oxygen. Roots need oxygen to drive active nutrient transport. Chronically wet containers lead to root rot and anaerobic conditions that look identical to nutrient lockout because the root system is too damaged to absorb anything. If your medium smells sour or your roots are brown and slimy, the problem is more than a simple flush can fix.

Nutrient Lockout Symptoms

The confusing thing about lockout is that it mimics specific deficiencies. The leaves tell you what they can’t access, not why they can’t access it. Common symptom patterns include:

  • Interveinal yellowing on new growth — classic iron or manganese deficiency pattern, common with high pH
  • Yellowing starting on older, lower leaves — indicates mobile nutrients (nitrogen, phosphorus, magnesium) being locked out
  • Brown or bronze spots with yellowing margins — often calcium or magnesium unavailability
  • Leaf tips burning or curling down — can signal salt toxicity / root zone EC overload
  • Stunted growth despite good conditions — general nutrient unavailability slows everything
  • Pale, washed-out color across the whole canopy — severe or prolonged lockout affecting multiple nutrients

The key diagnostic clue is that these symptoms appear or worsen despite regular feeding. If you’re feeding on schedule at reasonable rates and plants are still deteriorating, run a runoff test before adding anything else. For a full breakdown of what individual deficiencies look like, see our guide to nutrient deficiency signs in cannabis clones.

Nutrient Lockout: Cause, Sign, and Fix

Cause Visible Sign Fix
pH too high (>7.0 in soil, >6.5 in coco) Interveinal yellowing on new growth; iron/manganese deficiency appearance Flush with pH 6.0 water (soil) or 5.8 water (coco) until runoff pH normalizes
pH too low (<6.0 in soil, <5.5 in coco) Calcium and magnesium deficiency signs; brown spots; leaf distortion Flush with pH 6.5 water to bring medium pH up; check input water pH
Salt buildup / overfeeding Leaf tip burn; overall decline despite feeding; runoff EC much higher than input EC Flush with 2–3x pot volume plain pH water; resume feeding at 50–75% dose
Nutrient antagonism (excess of one nutrient) Specific deficiency despite adequate supply (e.g., excess K locking out Ca/Mg) Flush medium; adjust feed ratios; use a balanced base nutrient before adding supplements
Root zone too cold (<60°F) Slow growth; purple stems; deficiency symptoms despite good pH and EC Warm the root zone (raise pot off cold floor, add a heat mat)
Overwatering / root rot Wilting despite wet medium; brown slimy roots; sour smell Improve drainage and aeration; treat root rot; allow medium to dry between waterings

How to Diagnose Nutrient Lockout with Runoff EC and pH

Don’t guess — test. Runoff EC and pH testing is the fastest way to confirm lockout and identify whether pH drift or salt buildup is driving it. This is one of the most important skills any soil or coco grower can develop. Our full guide on EC, PPM, and runoff in cannabis feeding walks through the whole process in detail.

What You Need

  • A calibrated pH meter (digital, not strips — strips aren’t accurate enough)
  • An EC or TDS/PPM meter
  • A tray or saucer to collect runoff
  • pH-corrected water for the test flush

Step-by-Step Runoff Test

  1. Water the plant until you get 10–20% runoff — collect it in a clean tray.
  2. Test the runoff pH. Compare it to your input water pH. A gap of more than 0.5 points, or a runoff pH outside your target range, confirms pH drift in the medium.
  3. Test the runoff EC. Compare it to your input nutrient solution EC. If runoff EC is more than 25–30% higher than input EC, salt is accumulating in the medium.
  4. Note both numbers as your baseline before flushing.

A runoff EC of 3.0+ mS/cm when you’re feeding at 1.8 mS/cm is a clear salt buildup signal. A runoff pH of 7.4 when your input is 6.5 tells you the medium has drifted alkaline and is locking out iron, manganese, and zinc.

How to Flush Cannabis Plants

Flushing means running a large volume of plain, pH-corrected water through the medium to dissolve and carry out accumulated salts and reset the root-zone pH. It is not complicated, but a few details matter.

Basic Flush Protocol

  1. Mix plain water to the correct pH. For soil, use pH 6.2–6.5. For coco, use pH 5.8–6.0. Do not add any nutrients or supplements.
  2. Water slowly and thoroughly. Pour water at a slow, steady rate to let it saturate the entire medium rather than channeling through one path.
  3. Use 2–3x the container volume. A 5-gallon pot needs 10–15 gallons of flush water to adequately clear salt accumulation. This is not a normal watering — you are actively washing salts out.
  4. Collect and test runoff as you go. Test runoff EC and pH partway through and at the end. You want runoff EC to drop significantly (ideally within 0.5 mS/cm of your input EC) and runoff pH to stabilize near your target range.
  5. Allow the medium to partially dry before resuming feeding. Flushing saturates the medium. Wait until the container feels notably lighter before the next watering.
  6. Resume feeding at 50–75% of your previous dose. Give the plant a chance to recover before returning to full-strength feeding. Test runoff at the next 2–3 waterings to confirm stability.

Flushing in Hydroponic Systems

In hydro, “flushing” means draining and replacing the reservoir with fresh, pH-corrected nutrient solution at a lower concentration — or plain water if you’re doing a hard reset. Run plain pH-corrected water through the system for 24–48 hours, then refill with a fresh nutrient solution at 50% strength. Clean the reservoir walls and any recirculating parts while you’re at it — salt crystals on surfaces re-dissolve and can spike EC again quickly.

Flush Products: Are They Worth It?

Commercial flushing agents like Florakleen, Flawless Finish, or Final Phase contain chelating agents and surfactants that help break up salt bonds and clear them from the medium more efficiently than plain water alone. They can be useful if you’re dealing with severe buildup or are flushing close to harvest when you want to work quickly. They are not magic — plain pH-corrected water works fine for most situations, especially if you catch the problem early. If you use a flush product, follow the manufacturer’s directions and still test runoff EC and pH to confirm the flush is working.

Recovery After Flushing

Recovery time depends on how long lockout was occurring and how stressed the plant became. In mild cases where you catch the problem early, you’ll see improvement in 3–5 days. New growth comes in healthy and the existing damaged leaves stabilize (they won’t recover — affected leaves stay affected, but no new damage occurs).

In severe cases with significant leaf loss or long-duration lockout, expect 1–2 weeks before the plant regains full vigor. Flowering plants are more sensitive — lockout during flower can affect bud development and final yield, so it’s worth preventing rather than fixing.

Keep environmental conditions stable during recovery: consistent temperature, appropriate humidity, and correct light intensity. Stressed plants don’t need additional environmental stressors. Our comprehensive cannabis nutrient feeding guide covers how to structure a post-flush feeding ramp-up.

Preventing Nutrient Lockout

pH Your Water Every Time

This is the non-negotiable baseline. Tap water pH varies by season and location. Your nutrient mix changes pH when you add it to water. Always measure and adjust pH after mixing nutrients, right before watering. A $20 digital pH meter calibrated with buffer solution is the most important piece of equipment in your grow room.

Water Between Feedings

Not every watering needs to be a feeding. Alternating nutrient solution waterings with plain pH-corrected water prevents salt accumulation between feed cycles. In coco, which has no buffering capacity, a plain water watering every 3–4 feedings is a good habit. In soil, the organic matter provides some buffering, but periodic plain water flushes still help. Read our full guide on how to water cannabis clones for a complete schedule.

Don’t Over-Feed

More nutrients does not mean faster growth. Most feeding charts from nutrient companies are written at the high end of safe dosing — starting at 75% of the recommended rate is a smart baseline, especially for clones in new medium. Watch the plants, test runoff, and only increase concentration if the plants are asking for more (deep green color, fast growth, runoff EC notably lower than input EC).

Test Runoff Regularly

Testing runoff EC and pH once a week is enough to catch drift before it becomes lockout. If runoff EC starts climbing more than 0.5 mS/cm above input EC two waterings in a row, flush proactively. Catching it early means a single flush and a feeding adjustment — not a full recovery period.

Know Your Medium

Different media behave differently. Coco coir is inert and has a high cation exchange capacity — it holds calcium and magnesium tightly and releases them slowly, which is why Cal-Mag supplementation is almost always required in coco. Soil buffers pH naturally but can build up organic salts over long vegetative periods. Perlite-heavy mixes drain fast and accumulate less salt but also dry out faster. Match your feeding frequency and volume to your medium’s actual capacity.

The End-of-Flower Flush Debate

Pre-harvest flushing is one of the most contested topics in cannabis cultivation. The traditional argument is that flushing the medium with plain water 1–2 weeks before harvest forces the plant to metabolize stored nutrients, resulting in a smoother, cleaner smoke. Many experienced growers swear by it.

The counter-argument, backed by some research including work from Washington State University, is that a 1–2 week flush does not meaningfully change the mineral content of the harvested flower — the plant’s internal nutrient cycling does not work that fast, and the biggest factors in smoke quality are genetics, dry/cure process, and combustion method, not a pre-harvest flush.

At IWantClones.com, we think the honest answer is: the science is inconclusive but the practice carries very little risk when done properly. If your medium has been well-managed throughout the grow with correct pH and moderate EC, a 7–10 day water-only finish before harvest is unlikely to hurt anything and may help. If your medium has significant salt buildup going into late flower, flushing it out is genuinely beneficial regardless of the harvest-quality debate.

What does matter definitively for end-of-flower: pH management throughout the grow, a proper harvest timing decision based on trichome maturity, and a slow dry and cure.

Nutrient Lockout vs. True Nutrient Deficiency

Because lockout mimics deficiency, it helps to have a decision tree:

  1. Are you feeding regularly at reasonable rates? If yes, test runoff before assuming under-feeding.
  2. What does runoff pH show? If it’s outside target range, you likely have lockout from pH drift.
  3. What does runoff EC show? If it’s significantly higher than input EC, salt buildup is driving the problem.
  4. Are both pH and EC fine? Then look at specific nutrient interactions (antagonism), root zone temperature, and watering frequency before assuming a true deficiency.
  5. Only after ruling out lockout should you add nutrients. And if you do add, add one thing at a time.

True nutrient deficiencies (actual under-supply) are less common than lockout in growers who are feeding regularly. Start with your pH meter, not your nutrient bottle.

Starting with Healthy Roots: Why Clone Quality Matters

The best time to prevent nutrient lockout problems is before the plant ever goes into your medium. A well-rooted clone with a healthy, white root system has the absorptive surface area to pull nutrients efficiently even when conditions are slightly imperfect. A clone with brown, compromised roots will show lockout symptoms at pH and EC levels that a healthy plant handles fine.

At IWantClones.com, our clones are rooted, inspected, and shipped with a 3-day no-bullshit guarantee. You get a plant that’s ready to go into its new home — not one that’s already fighting root stress before you even start feeding. Browse our current clone selection and see what’s available for overnight delivery to your door.

When your clones arrive and you’re setting up their first feeding schedule, our nutrient feeding guide is the right place to start — it covers what to feed, at what concentration, and how to read your plants to avoid overfeeding from day one.

Frequently Asked Questions

What is nutrient lockout in cannabis?

Nutrient lockout is when cannabis roots cannot absorb minerals already present in the growing medium. It’s caused by pH out of range, salt accumulation from overfeeding, or nutrient antagonism — not by a shortage of fertilizer. Adding more nutrients to a locked-out medium makes the problem worse. Test runoff pH and EC first.

How do I know if my plant has nutrient lockout or a real deficiency?

Test your runoff. If runoff pH is outside the target range (6.0–7.0 in soil, 5.5–6.5 in coco) or runoff EC is significantly higher than your input EC, lockout is the likely cause. A true deficiency occurs when the medium EC is low and pH is in range but the plant still shows signs — that’s when you add nutrients.

How do I flush cannabis plants to fix nutrient lockout?

Use plain, pH-corrected water (no nutrients). Run 2–3x the pot volume through the medium slowly, collecting and testing runoff. Flush until runoff EC drops near input EC and pH stabilizes in range. Allow the medium to partially dry, then resume feeding at 50–75% of your normal dose and recheck runoff over the next few waterings.

How long does it take for cannabis to recover from nutrient lockout?

Mild cases caught early show improvement in 3–5 days after a successful flush and pH correction. Severe or prolonged lockout — especially during flowering — can take 1–2 weeks for the plant to fully recover vigor. Damaged leaves don’t recover, but new growth should come in healthy once the root zone is corrected.

Should I flush cannabis before harvest?

The science is genuinely mixed on whether a pre-harvest flush improves smoke quality. It carries little risk when done with pH-corrected water 7–10 days before harvest. If you’ve maintained good pH and EC throughout the grow, the impact is minor. If you have significant salt buildup in late flower, a flush before harvest is worth doing for plant health regardless of the quality debate.

What pH should I use to flush cannabis plants?

In soil, flush with pH 6.2–6.5 water. In coco coir or hydro, flush with pH 5.8–6.0 water. If your medium has drifted alkaline (runoff pH above 7.0), start the flush at the lower end of the target range (6.0 in soil, 5.8 in coco) to help pull the medium pH down more efficiently.

Written by James Bean

Recent Posts

Nutrient Lockout & How to Flush Cannabis Plants

Nutrient lockout stops plants from absorbing food even when it’s present. Learn the causes, symptoms, how to diagnose with runoff EC/pH, and how to flush cannabis correctly.

Read More
Best Dessert & Sweet Cannabis Strains (Top Clones)

Shop the best dessert cannabis strains — Gelato, Runtz, Sundae Driver, Cookies and Cream & more. Verified clones shipped overnight from IWantClones.com.

Read More
Best Energizing Cannabis Strains for Daytime & Focus

Discover the best strains for energy — sativa-dominant clones with limonene, terpinolene & pinene. Shop Sour Diesel, Jack Herer & more. US shipping, 3-day guarantee.

Read More

Subscribe Today!

Get 10% off when you sign up for our weekly updates!

About Us

At IWantClones.com, we are dedicated to providing top-quality cannabis clones to growers of all levels.

Subscribe Today!

Subscribe our newsletter to get our latest update & news
We currently accept credit/debit card payments, cash, check, money order, bitcoin (BTC), litecoin (LTE), bitcoin cash (BCH), and dogecoin (DOGE).
© 2026 seedsherenow.com All Rights Reserved
magnifiercross linkedin facebook pinterest youtube rss twitter instagram facebook-blank rss-blank linkedin-blank pinterest youtube twitter instagram