
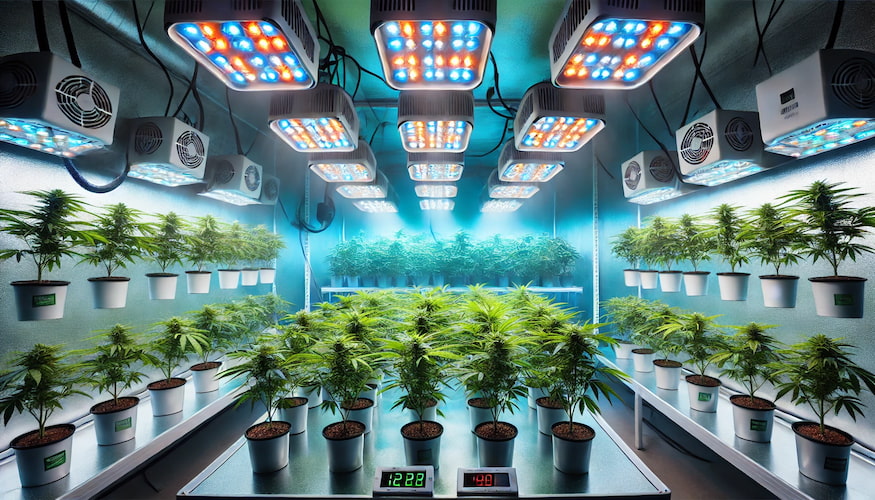
A beginner grow tent setup for cannabis clones needs five things: a tent, an LED light, an exhaust fan with carbon filter, a circulation fan, and a way to monitor temperature and humidity. A 4×4 tent with a 400–600W LED covers 4–6 plants comfortably and runs $400–800 for a complete beginner kit. If you have rooted clones from IWantClones.com on the way, here is exactly how to get your space ready before they arrive.
Key Takeaways
- A 4×4 tent with a 400–600W full-spectrum LED is the most practical starting point for 4–6 cannabis clones.
- Match your exhaust fan to tent size: 4-inch for 2×2 and 3×3 tents, 6-inch for 4×4 and 5×5.
- New clones need 70–80% relative humidity and temps of 70–77°F to settle in without stress.
- Clones from IWantClones.com arrive pre-rooted — they skip the propagation phase and go straight into veg.
- Run your tent empty for 30 minutes before putting any plants inside to verify temp and airflow are dialed in.
- A $15 digital thermo-hygrometer is one of the most important tools in your entire setup.
What You Need: The Complete Equipment List
Every item on this list does a specific job. Skip one and you will feel it — either in plant health, yield, or the neighbor knowing exactly what you are growing. We will walk through each piece and tell you what to look for, what to spend, and what to avoid.
a. Tent Size
Tent footprint determines how many clones you can grow at once. This is the first decision to make because every other piece of equipment is sized around it.
- 2×2 tent: 1–2 plants. Best for a single photoperiod clone or 2 autos. Tight on space once plants fill out.
- 3×3 tent: 2–4 plants. A solid step up without going overboard. Good for new growers who want a little room to grow into the hobby.
- 4×4 tent: 4–6 plants. The sweet spot for most beginners. Gives you enough canopy space to experiment with training, and the gear is easy to find at this size.
- 5×5 tent: 6–9 plants. This is a real grow. More output, but more to manage — ventilation, lighting, and watering all scale up.
Height matters too. Look for tents that are at least 6 feet tall — 6.5 to 7 feet is better. You need vertical room for the light, ducting, fans, and the plants themselves. Short tents back you into a corner fast once plants hit flowering stretch. For tight spaces, check out the best cannabis clones for small spaces — some strains are naturally compact and better suited to a 2×2 or 3×3.
b. LED Light
Lighting technology moved fast in the last five years. The old “blurple” panels — those cheap purple-pink LED boards — are inefficient compared to what is available today. Full-spectrum LEDs with Samsung LM301 diodes or similar are the modern standard. Brands like Spider Farmer, Mars Hydro, and HLG (Horticulture Lighting Group) lead the pack for hobbyist growers.
The number to pay attention to is true power draw, not the advertised wattage. A light advertised as “1000W” may only draw 200W from the wall. True draw is what matters for coverage.
- 2×2 tent: 100–150W true draw
- 3×3 tent: 200–300W true draw
- 4×4 tent: 400–600W true draw
- 5×5 tent: 600–800W true draw
For clones specifically, you will start at lower intensity and raise it gradually as plants establish. Full details on dialing in light intensity and spectrum are covered in our light requirements for cannabis clones guide.
c. Exhaust Fan + Carbon Filter
This combo does two jobs: it pulls hot air out of the tent and it eliminates odor before that air hits your room. Both matter. An exhaust fan alone without a carbon filter vents smell directly into your space. A carbon filter alone without a fan does nothing — it is just a canister of activated charcoal sitting there.
Size the fan to your tent:
- 4-inch inline fan: 2×2 and 3×3 tents. Look for 200–250 CFM.
- 6-inch inline fan: 4×4 and 5×5 tents. Look for 400–500 CFM.
The carbon filter goes inside the tent near the top, connected to the fan with ducting. The fan pulls air through the filter, scrubbing odor, then exhausts it out through a duct port in the tent wall. AC Infinity makes reliable, quiet inline fans at both sizes and pairs well with their own carbon filters. Vivosun is a budget-friendly alternative that gets the job done.
d. Circulation Fan
Your exhaust fan handles air exchange. The circulation fan handles airflow inside the tent. These are different things and you need both.
A small oscillating clip fan or a compact tower fan positioned inside the tent keeps air moving across the canopy. This does three things: it strengthens stems by creating light resistance (so plants develop stronger structure), it prevents hot spots under the light, and it reduces the stagnant air that mold and mildew love. Aim it at an angle across the canopy rather than directly at your clones — too much direct airflow stresses young plants.
e. Thermo-Hygrometer
This is a $15–25 device that reads temperature and relative humidity simultaneously. It sounds basic, but it is the single most important feedback tool in your tent. Without it, you are guessing.
Get a digital model with min/max memory so you can see the highest and lowest readings since you last checked. Inkbird and Govee both make reliable, affordable options. Govee’s Bluetooth models let you log readings on your phone, which is genuinely useful for catching overnight temperature drops or humidity spikes while you sleep.
Place it at canopy level — not on the floor, not near the light. Canopy level is where your plants live, and that is the reading that matters.
f. Pots and Growing Medium
For vegetative clones, 1–3 gallon pots work well. You can always up-pot into 5-gallon or 7-gallon containers when you flip to flower. Fabric pots are worth the minor price premium — they air-prune roots and reduce the risk of overwatering, which is the number one killer of clones from new growers.
On growing medium, you have two main paths:
- Soil: Easier for beginners. Fox Farm Ocean Forest (FFOF) and Roots Organics are both pre-amended with nutrients, so you can often go 2–4 weeks before needing to feed. More forgiving of pH swings and watering mistakes.
- Coco coir: Faster growth, more control over feeding, but requires more attention. You feed every watering and need to stay on top of pH consistently. Better for growers who want to dial in exactly what goes into the plant.
Clones from IWantClones.com typically arrive in solo cups or small starter containers. They will need to be up-potted soon after arrival. Read our full guide on what to do when clones arrive for a step-by-step on that transition.
g. Nutrients and pH Kit
pH is non-negotiable. Cannabis has a tight pH window for nutrient uptake — 6.0–7.0 in soil, 5.5–6.5 in coco. Outside that range, roots cannot absorb nutrients even if the nutrients are there. You end up with deficiencies caused by lockout, not absence.
You need:
- pH meter — a digital pen-style meter like the Bluelab pH Pen or Apera PC60. Avoid the cheap strips; they are not accurate enough.
- pH Up and pH Down — General Hydroponics makes the standard solutions most growers use.
- Base nutrients — General Hydroponics Flora Series (3-part) is the most widely used starter nutrient line. Clear instructions, predictable results. Start new clones at 1/4 strength and work up.
h. Timer
Your light needs to run on a consistent schedule. Cannabis is photoperiod-sensitive. Inconsistent light schedules stress plants and can trigger early flowering or hermaphroditism in photoperiod strains.
- Veg schedule: 18 hours on / 6 hours off (18/6)
- Flower schedule: 12 hours on / 12 hours off (12/12)
A mechanical outlet timer costs $8–12 and works perfectly. If you want remote control and scheduling from your phone, smart plugs (Kasa, TP-Link) work well and add convenience without complexity.
Recommended Gear by Tent Size
| Tent Size | Number of Clones | LED Wattage (True Draw) | Fan Size | Est. Total Cost |
|---|---|---|---|---|
| 2×2 | 1–2 plants | 100–150W | 4-inch | $300–500 |
| 3×3 | 2–4 plants | 200–300W | 4-inch | $400–600 |
| 4×4 | 4–6 plants | 400–600W | 6-inch | $500–800 |
| 5×5 | 6–9 plants | 600–800W | 6-inch | $700–1,100 |
These cost estimates assume mid-range equipment — not the cheapest available, not premium. Budget tents and lights exist at lower price points, but quality issues (light leaks, poor reflectivity, unreliable timers) show up quickly at the bottom end.
Step-by-Step Grow Tent Setup
Follow these steps in order. Each one builds on the last, and doing them out of sequence creates headaches — like realizing you can’t hang your light because your ducting is already in the way.
Step 1: Choose Your Tent Location
Before you unbox anything, pick your spot carefully. You need a room that stays between 60–85°F year-round (you will dial temp inside the tent, but starting from an extreme ambient temp makes that harder). You need access to a standard outlet — ideally a dedicated circuit if you are running a 4×4 or larger. And you need a way to exhaust air out of the room: through a window, into a closet with ventilation, or into an attic space.
Basements and spare bedrooms are common setups. Garages work in mild climates but can be brutal in summer and winter extremes. Avoid anywhere with wild temperature swings.
Step 2: Assemble the Tent
Lay out all the poles and connectors before you start. Every tent brand is slightly different, but the process is the same: build the frame from the bottom up, snap the corner connectors in, and then pull the fabric over. Zip all the panels closed before you move on.
Check that the reflective mylar interior is smooth and intact — tears or gaps reduce light efficiency. Most quality tents (Vivosun, AC Infinity, Mars Hydro) hold up fine out of the box.
Step 3: Mount the Exhaust Fan and Carbon Filter
The carbon filter lives inside the tent, near the top, connected by ducting to the inline fan. The fan can sit at the top of the tent or just outside the top duct port. Run the ducting from the filter, through or to the fan, and out through a duct port in the tent wall to exhaust outside the tent.
Use the rope ratchets or carabiners included with most filters to hang the filter from the top tent bars. Keep connections tight — loose ducting leaks air and reduces both airflow and odor scrubbing efficiency. Secure ducting joins with foil tape or hose clamps.
Step 4: Hang the LED Light
Most quality LEDs include adjustable ratchet ropes. Hook them to the top bars of the tent frame and hang the light. For clones and early veg, you will start with the light higher — 24–30 inches above the canopy — and lower it gradually as plants establish and can handle more intensity.
Plug the light in and confirm it works before you route all your cables. It is easier to swap or troubleshoot before everything is set up. Route the power cable through a port in the tent and to your timer, not directly to the wall.
Step 5: Mount the Circulation Fan
Clip a small fan to one of the tent poles at or just below canopy height. Angle it so airflow moves across the tops of the plants, not straight down at them. For a 4×4 tent, a 6-inch clip fan is sufficient. Bigger tents may need two fans positioned on opposite corners.
The goal is gentle, consistent movement — leaves should shimmer slightly, not whip around.
Step 6: Set Up the Timer
Plug the timer into the wall and the LED light power cable into the timer. Set the on/off schedule before you start — 18 hours on, 6 hours off for vegetative growth. If you are using a mechanical timer, count the slots carefully (each slot usually represents 30 minutes). If you are using a smart plug, use the app to confirm the schedule is correct.
Decide whether you want lights on during the day or at night. Lights generate heat, so some growers run lights at night in summer when ambient temps are lower. Either works — just stay consistent once you set it.
Step 7: Place the Thermo-Hygrometer at Canopy Level
Hang or clip your temp/humidity monitor at the height where your plant canopy will be. This is the most accurate reading for what your plants are actually experiencing. If you place it near the floor or near the light, you will get misleading numbers.
If your meter has an external probe (like some Inkbird models), position the probe at canopy level and keep the display outside the tent so you can read it without opening the zip.
Step 8: Run Empty for 30 Minutes, Then Check
Zip everything up, turn on all the equipment, and walk away for 30 minutes. Come back and check your readings. Temp should be somewhere in the 70–80°F range. If it is running hot, check that your exhaust fan is actually pulling air through — sometimes ducting is kinked or a zip is partially blocking airflow. If temp is fine, you are ready for plants.
This dry run catches problems before they stress your clones. It takes 30 minutes and it is worth every minute.
Dialing in the Environment for Clones
Clones have different environmental needs depending on where they are in their lifecycle. Get this wrong and plants look rough even when everything else is perfect. Get it right and clones from IWantClones.com will take off fast in their first week.
Temperature
- Clones and early veg: 70–77°F (21–25°C). This range keeps metabolism active without stressing fresh root systems.
- Late veg: 70–80°F. More flexibility as plants establish.
- Flower: 65–80°F. Cooler temps in late flower can improve color and terpene development in some strains.
Avoid temperature swings greater than 10–15°F between the light-on and light-off periods. Big swings stress plants and can create condensation issues that lead to mold.
Humidity (Relative Humidity / RH)
- Freshly arrived or rooting clones: 70–80% RH. Clones without an established root system absorb water through their leaves — high humidity reduces transpiration stress.
- Established veg clones: 50–65% RH. As roots develop, you can step humidity down.
- Flower: 40–50% RH. Lower humidity in flower is critical for preventing bud rot and mold in dense canopies.
If your grow space is dry (common in winter with heat running), a small ultrasonic humidifier inside or just outside the tent solves the problem. If humidity is consistently too high, your exhaust fan may not be moving enough air — try running it at a higher speed setting.
For a deeper look at VPD (vapor pressure deficit) — the more precise way to dial in the relationship between temp and humidity — check out our VPD guide for cannabis clones. It is the next level after you have the basics down. For a full breakdown of environment management, see climate and environment for cannabis clones.
Airflow
Circulation should be gentle, consistent, and indirect for fresh clones. Do not aim the fan directly at newly transplanted clones — they lose moisture quickly and you can dry out the root zone before it has a chance to establish. Aim across the canopy at an angle and let the tent fill with moving air rather than blasting one spot.
Light Height and Intensity
New clones need light, but they can be overwhelmed if you hit them with full intensity from day one. Start with the LED 24–30 inches above the canopy and at 50–70% power if your light has a dimmer. Over the first week, gradually lower the light and increase intensity as you see new growth emerging — that is your signal that roots are established and the plant is ready for more.
Full guidance on managing light for clones across the veg and flower cycle is in our cannabis clone light requirements guide.
Why Clones Skip the Hard Part
Here is something worth understanding clearly: the hardest phase of growing cannabis from scratch is propagation. Getting a cutting to root — keeping it alive, maintaining a sterile environment, managing humidity in a dome, watching for rot — takes skill, time, and a fair amount of failure before you get consistent results.
Clones from IWantClones.com arrive pre-rooted. That phase is already done. When your order shows up, you are skipping directly to veg. Your tent does not need a propagation dome. You do not need rooting gel or a heat mat (though a heat mat can help if your ambient temps run cold). You set up the tent for veg conditions, transplant from the shipping container into your pots, and let them grow.
This is the biggest practical advantage of buying clones over starting seeds or taking your own cuts. The failure rate in propagation can run 20–50% for new growers. Buying pre-rooted clones eliminates that entirely. You are starting from a known-good place with a verified genetic.
Make sure you read our guide on what to do when clones arrive before your order ships — it covers the first 48 hours in detail.
First-Grow Checklist
Run through this before you put a single plant in the tent. Everything should be checked off. If something is not ready, fix it first — stressed clones in the first 48 hours recover slowly.
- Tent assembled, all poles secure, zippers closing cleanly
- LED hung, plugged in, and confirmed working
- Exhaust fan and carbon filter connected, fan running, airflow confirmed at duct exit
- Circulation fan positioned and running at gentle speed
- Timer set and confirmed: 18 hours on / 6 hours off for veg
- Thermo-hygrometer placed at canopy level (not floor, not near the light)
- Temperature confirmed: 72–77°F after 30-minute dry run
- RH confirmed: 70–80% (or humidity dome available for first 24–48 hours if needed)
- Pots filled with growing medium, pre-moistened and ready
- pH meter calibrated using calibration solution (not just rinsed)
- pH Up and pH Down on hand, water source pH tested and adjusted
- Nutrients mixed at 1/4 strength and pH adjusted before first watering
Common Beginner Mistakes
1. Overwatering Right Out of the Gate
New clones have a small root system. They cannot process large volumes of water. Water in a circle around the base of the plant, not the entire pot surface — you are trying to encourage roots to spread outward in search of water. Let the top inch of soil dry out before watering again. Pick up the pot when it feels light; water when that weight drops noticeably.
2. Ignoring pH Until Something Goes Wrong
pH problems look like nutrient deficiencies — yellow leaves, purple stems, spots. New growers often reach for more nutrients when the issue is actually pH lockout. Check and adjust pH every watering. It takes 30 seconds and prevents weeks of troubleshooting.
3. Running the Light Too Close Too Soon
LEDs are efficient and powerful. At 18 inches with full power, a quality 400W LED can bleach or stress new clones. Start high and dim, work your way down over the first week as plants show new growth. The PPFD (light intensity) sweet spot for early veg is 300–500 µmol/m²/s — most light manufacturers publish a distance chart that gets you there.
4. Skipping the Carbon Filter
People do this to save $60–80. Then the plants hit week 5 of flower and the entire house smells like a dispensary. Carbon filters are not optional if odor control matters. Buy it at setup, not as an emergency response mid-grow.
5. Not Monitoring Temps Overnight
Lights-off temps drop. If your ambient room gets cold at night, your tent can drop below 60°F when the light is off. That stresses plants significantly, slows growth, and makes them vulnerable to mold. The min/max feature on your thermo-hygrometer tells you exactly how cold it got. Check it every morning in your first week.
6. Putting Too Many Plants in a Small Space
More plants in less space means more competition for light, more restricted airflow, and higher mold risk when canopies overlap. The plant count guidelines in the gear table above are honest maximums — starting with fewer plants and giving them room to develop is smarter than cramming in extra plants that underperform. University of California Cooperative Extension research on controlled environment agriculture consistently shows that plant density directly affects airflow and disease pressure in enclosed growing systems.
Frequently Asked Questions
How long does it take to set up a grow tent for the first time?
Most first-time growers complete a full 4×4 setup in 2–4 hours. The tent assembly itself takes 30–45 minutes. Hanging the light, fan, and filter takes another hour. The remaining time is routing cables, setting the timer, and running the 30-minute dry check before plants go in.
Do I need a humidifier for my grow tent?
It depends on your climate. If your ambient room humidity runs below 40%, you will need one — especially for fresh clones that need 70–80% RH. If you live somewhere naturally humid or your basement stays moist, you may not need it in early veg. A small ultrasonic humidifier ($30–60) is cheap insurance if you are unsure.
Can I use any LED light in a grow tent, or does brand matter?
Brand matters in the sense that cheap blurple-style LED panels deliver far less usable light per watt than modern quantum board LEDs. You do not need to spend top dollar on HLG, but you should look for lights using Samsung LM301B or LM301H diodes. Spider Farmer and Mars Hydro offer good performance at mid-range prices and are used widely in home grows.
What is the difference between an exhaust fan and a circulation fan?
An exhaust fan (inline fan) moves air out of the tent entirely — it handles air exchange and, when paired with a carbon filter, odor control. A circulation fan moves air around inside the tent without exhausting it. Both are necessary. The exhaust fan manages temperature and air freshness; the circulation fan strengthens stems and prevents stagnant pockets where mold can develop.
Should I use soil or coco coir for my first grow with clones?
Soil is the better choice for most beginners. A quality pre-amended soil like Fox Farm Ocean Forest has buffering capacity — it tolerates minor pH swings and holds nutrients in a way that forgives small mistakes. Coco coir is essentially inert and requires precise feeding every watering, which adds complexity. Once you have a grow or two under your belt, coco is worth exploring for the faster growth rates it enables.