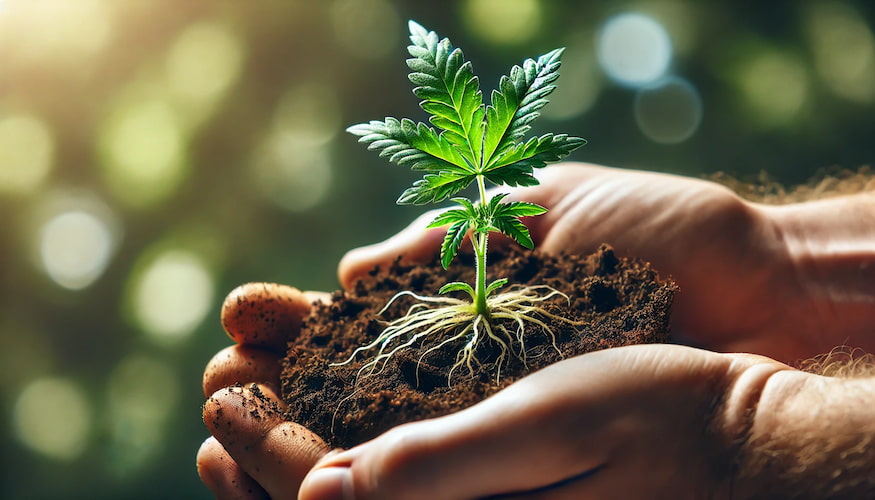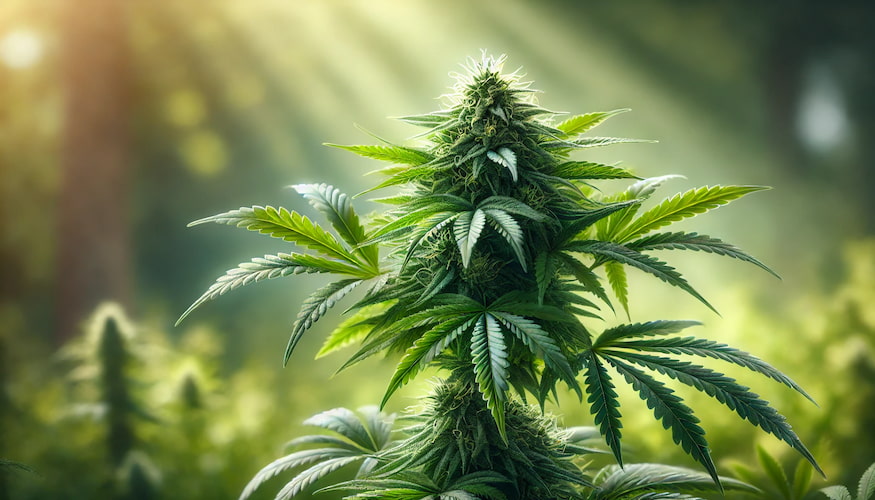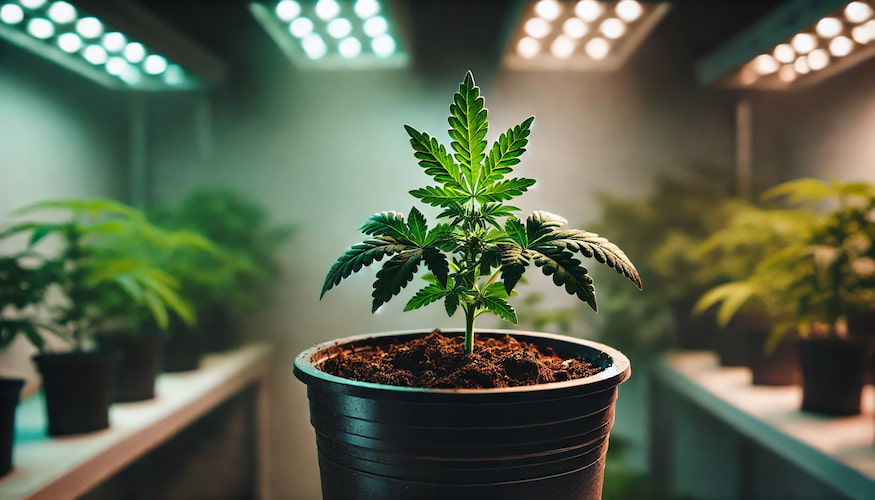
When your cannabis clones arrive, open the box immediately, inspect every cutting for pests or damage, give them a light misting, and place them under low-intensity lighting (150 to 250 µmol/m²/s) with a humidity dome. Within 48 hours, most clones stabilize and are ready for their first transplant. The biggest mistake new growers make is skipping this acclimation window—clones that go straight under full-power lights or get fed on day one often stall for a week or more.
At IWantClones.com, we ship rooted clones overnight in protective packaging so they arrive alive and ready to grow. But even the best-packed clone needs a proper landing. Here is exactly what to do, hour by hour, in the first 48 hours after your clones arrived.
- Open and inspect within minutes of delivery—transit stress worsens if clones sit in a closed box.
- Do not feed for the first 24 to 48 hours—roots are stressed and cannot uptake nutrients efficiently yet.
- Start with low light (150 to 250 µmol/m²/s)—then ramp to full intensity over 3 to 4 days.
- Target 70% to 80% relative humidity under a dome for the first 24 hours to prevent wilting.
- Transplant timing matters—wait until the clone shows new growth before moving to a larger container.
- Our 3-day guarantee covers clones that arrive dead or diseased—contact us within 72 hours of delivery.
Key Takeaways
- Unbox and inspect your clones immediately on arrival, checking for pests, wilting, and root health.
- Start clones under low light (around 150 µmol) and ramp intensity up over several days.
- Keep humidity high with a dome at first, and do not feed nutrients during the first 48 hours.
- Harden off gradually before transplanting into the final medium.
- Report any issues within IWantClones’ 3-day no-bullshit guarantee window.
- The first 48 hours set the tone for the entire grow—prioritize stability over speed.
Step 1: Unbox Immediately and Inspect Every Clone
Do not let the box sit on a counter for hours. Cannabis clones are living plants and the CO₂ level inside a sealed shipping box rises quickly. The moment the package arrives, open it in a clean workspace with good lighting.
Remove each clone carefully from its packaging. Hold the plug or cube—not the stem—and set it upright on a clean, flat surface. You are looking for four things in this first inspection pass:
- Root condition: Healthy roots are white to cream-colored and firm. Brown, mushy, or foul-smelling roots indicate rot.
- Stem integrity: The stem should be firm and green. Soft, collapsed, or black-spotted stems suggest botrytis (gray mold) or transit crush damage.
- Leaf color: Some yellowing of lower leaves is normal during shipping. Widespread yellowing, spots, or necrotic edges warrant closer inspection.
- Pest evidence: Check the undersides of leaves under a loupe (30×). Look for spider mite stippling, fungus gnat eggs near the medium, or thrips silver streaking. If you find pests, quarantine the affected clone before it touches anything else in your grow space.
See our detailed guide on ensuring clone quality and sourcing reliability if you have questions about what a healthy arrival looks like.
What “Clones Arrived—What To Do” Actually Means: Normal Stress vs. Real Problems
Transit stress is real. Clones spend 12 to 24 hours in a dark box with limited airflow. Some symptoms are completely normal and resolve within hours. Others require action. Here is how to tell the difference.
| Symptom | Normal / Temporary? | What to Do |
|---|---|---|
| Slight wilting or drooping leaves | Yes—common after dark transit | Mist lightly, dome for 12 to 24 hrs, leaves usually perk up |
| 1 to 2 yellow lower fan leaves | Yes—plant redirects energy | Remove the yellow leaves, no further action needed |
| Slightly pale green color overall | Yes—low-light shipping environment | Introduce light gradually; color returns in 48 hrs |
| Roots appear slightly dry | Yes—normal moisture loss in transit | Mist the medium gently; do not soak |
| Widespread yellowing (more than 3 leaves) | No—possible nitrogen issue or root problem | Inspect roots; contact us if more than 30% of foliage affected |
| Brown/mushy stem base | No—botrytis or damping off | Photograph and contact IWantClones within 72 hrs for replacement |
| White webbing or small crawling insects | No—active pest infestation | Quarantine immediately; do not introduce to grow space |
| Root tips are tan to light brown | Maybe—check for sliminess | If firm, it is likely oxidation; if slimy, it is root rot |
Step 2: Hydrate Without Overwatering
The impulse after seeing a slightly wilted clone is to water it heavily. Resist that. Overwatering a stressed clone is one of the most common first-timer mistakes and it delays recovery by days.
Instead, use a clean spray bottle filled with plain, pH-adjusted water (6.0 to 6.5 for soil/coco; 5.8 to 6.0 for hydro). Mist the leaves lightly—just enough to coat the surface—and dampen (do not soak) the growing medium. The goal is to raise local humidity and give the plant surface hydration while the roots re-establish.
If your clones are in rockwool cubes, check that the cube is moist but not dripping. Squeeze gently: a well-hydrated rockwool cube should release just a few drops. If it pours water, it is too wet and anaerobic conditions will threaten the roots.
Step 3: Light Reintroduction—Start Low, Ramp Up
Clones that spent 12 to 24 hours in a dark box will suffer photooxidative stress if you blast them with more than 800 µmol/m²/s the moment they arrive. Light reintroduction is a critical step that most beginner guides skip entirely.
For the first 24 hours, target 150 to 250 µmol/m²/s (approximately 18 to 24 inches under a 200W LED panel, or a T5 fluorescent fixture). This is roughly equivalent to a bright cloudy day—enough for photosynthesis without burning stressed tissue.
From hours 24 to 48, you can increase to 300 to 450 µmol/m²/s. By day 3 or 4, most clones are ready for your normal vegetative intensity (500 to 700 µmol/m²/s for LED grows).
Keep the photoperiod at 18 hours on, 6 hours off during acclimation. Do not run 24 hours of continuous light on newly arrived clones—dark periods allow stomata to recover and reduce transpiration stress. Our full guide on light requirements for cannabis clones covers target PPFD ranges by growth stage in detail.
Step 4: Humidity and the Dome—Why It Matters
Rooted clones still rely partially on foliar (leaf-surface) moisture uptake while their roots settle into a new environment. A humidity dome—a clear plastic or polycarbonate cover placed over the clone tray—keeps relative humidity (RH) at 70% to 80% and dramatically reduces transplant shock.
Here is the simple dome protocol for newly arrived clones:
- Place clones in a tray and cover with a dome immediately after misting.
- Leave small ventilation slits open (or crack the dome 1/4 inch)—stagnant 100% RH encourages mold.
- After 12 hours, open the dome for 10 minutes every few hours to exchange air.
- After 24 hours, begin gradually reducing humidity: open the dome wider each day.
- By hour 48 to 72, most clones with good root structure no longer need the dome.
If you do not have a dome, a clear plastic bag over each clone works in a pinch. Poke a few holes in the top for gas exchange.
Step 5: Do NOT Feed for the First 24 to 48 Hours
This is the rule most eager growers break. Nutrients in a stressed root zone cause osmotic imbalance—essentially fertilizer burn on roots that are already struggling. A freshly arrived clone has everything it needs stored in its tissue to survive the first day or two.
Plain, pH-adjusted water is all you need for the first 24 hours. After 48 hours, if the clone has perked up and roots look healthy, you can introduce a very light feeding—roughly 25% of your normal starting dose—with an emphasis on root-zone biology rather than heavy nitrogen. A rooting supplement like diluted kelp or mycorrhizal inoculant is a better first feed than a 3-part nutrient blend.
When you are ready to begin a full feeding program, our comprehensive cannabis clone nutrient guide walks through exactly what to feed, in what ratios, and at what growth stages.
The 48-Hour Timeline: Hour by Hour
| Timeframe | Action | Key Parameters |
|---|---|---|
| 0 to 30 minutes | Unbox, inspect every clone for pests, damage, root health | Clean workspace; loupe for pests; photograph any damage |
| 30 to 60 minutes | Light mist with pH-adjusted plain water; place under dome | pH 6.0 to 6.5 (soil/coco) or 5.8 to 6.0 (hydro); RH 70% to 80% |
| 1 to 4 hours | Introduce low-intensity light; monitor for further wilting | 150 to 250 µmol/m²/s; 75 to 78°F; no direct fan on plants yet |
| 4 to 12 hours | Check dome moisture; crack vents if condensation is heavy | RH 70% to 80%; avoid stagnant air pockets |
| 12 to 24 hours | Begin opening dome periodically (10 min/hr); observe leaf recovery | Leaves should be visibly firming up; no new yellowing |
| 24 hours | Assess: are leaves turgid? Roots white? Increase light slightly | 250 to 350 µmol/m²/s; plain water only if roots look dry |
| 24 to 36 hours | Remove dome if RH in room is above 55%; ramp light further | 300 to 450 µmol/m²/s; 70 to 76°F; gentle airflow acceptable |
| 36 to 48 hours | First light feeding if clone looks healthy (optional) | 25% strength rooting formula; pH 6.0 to 6.5 |
| 48 to 72 hours | Evaluate for transplant readiness; look for new growth tips | Roots emerging from plug/cube = transplant-ready signal |
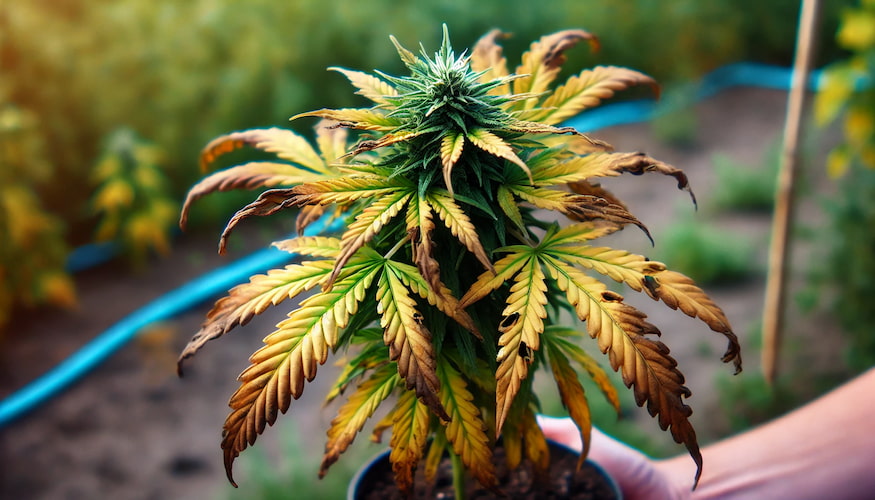
Common Arrival Stress Symptoms and How To Fix Them
Wilting That Does Not Recover After 24 Hours
If a clone is still severely wilted after 24 hours under a dome with adequate humidity, the problem is likely root-related rather than surface moisture. Gently remove the clone from its medium and inspect the root mass. White, healthy roots mean the wilting is likely due to a blocked stomata response—increase dome time and verify your temperature is not above 82°F. Dark, slimy roots indicate root rot, which is very difficult to reverse in a small clone. Document with photos and contact us within our 72-hour guarantee window.
Leaves Turning Yellow Rapidly
Rapid post-arrival yellowing, especially moving from the lower leaves upward, usually points to one of three causes: nitrogen lockout from pH drift, overwatering, or a magnesium deficiency triggered by transit stress. Check your medium’s pH first. If pH is correct, let the medium dry down slightly and hold off on feeding for another 24 hours.
Leaves Curling Down (Clawing)
Downward leaf curl—often called “the claw”—after arrival typically means nitrogen toxicity or overwatering. Since you should not be feeding yet, the overwatering diagnosis is more likely. Allow the medium to dry and improve airflow. If you did feed early, flush with plain pH-adjusted water. See our cannabis clone troubleshooting guide for a full symptom-to-cause reference chart.
Brown Spots or Crispy Leaf Edges
Crispy brown edges on newly arrived clones almost always indicate one of two things: windburn from a fan pointed directly at tender foliage, or potassium deficiency that was present at the source nursery. In the first 48 hours, keep fans set to indirect circulation only. Do not aim a fan directly at clones during acclimation.
Hardening Off: The Step Between Arrival and Full-Power Veg
Hardening off is the process of gradually exposing a clone to progressively more intense light, airflow, and VPD (vapor pressure deficit) over 3 to 5 days. Think of it as a re-boot sequence for the plant’s stress-response systems.
A solid hardening-off schedule after arrival looks like this:
- Day 1: 150 to 250 µmol/m²/s, dome on, minimal airflow, RH 70% to 80%
- Day 2: 250 to 400 µmol/m²/s, dome cracked, gentle indirect fan, RH 65% to 75%
- Day 3: 400 to 550 µmol/m²/s, dome removed, indirect airflow, RH 55% to 65%
- Day 4: 550 to 700 µmol/m²/s, normal veg airflow, RH 50% to 60%
- Day more than 5: Full vegetative program begins
Skipping hardening off and going straight to 800 to 1000 µmol/m²/s on day one causes bleaching of the newest growth tips, stunted early veg growth, and a recovery lag that can cost you 5 to 7 days of vegetative development. The 3 to 5 days you invest in hardening off always pay back double.
When To Do the First Transplant
The most common question after arrival is: when do I transplant? The honest answer is—not yet, and probably not on day two.
A clone is ready for its first transplant when:
- Roots are visibly emerging from the bottom or sides of the plug or cube.
- New vegetative growth is appearing at the growing tips (typically day 3 to 5 post-arrival).
- The plant is turgid and upright without needing a dome.
- You have not seen any new wilting in the past 24 hours.
When those conditions are met, transplant into your first container—usually a 1-gallon pot for the start of veg. Do not jump from a rooted plug straight into a 5-gallon container. Cannabis roots develop faster and more evenly when they fill a small container before moving to a larger one. Our complete guide to up-potting cannabis clones covers container sizing, transplant technique, and the timing for each subsequent pot up through flower.
After transplanting, the clone will often pause for 12 to 24 hours while its roots explore the new medium. This is normal. Keep the humidity slightly elevated (55% to 65% RH) for the first day after each transplant.
The IWantClones.com 3-Day Guarantee: What It Covers and How To Use It
We stand behind every clone we ship with a no-bullshit 3-day guarantee. Here is exactly how it works:
If your clones arrive dead, diseased, or with an active pest infestation that was not caused by your handling, you are eligible for a replacement or store credit. The clock starts at the confirmed delivery timestamp on your tracking notification—not when you open the box, not the next morning. You have 72 hours from that delivery timestamp to contact us.
To file a claim:
- Photograph every affected clone immediately. Close-up shots of roots, stems, and leaves provide the documentation we need.
- Do not discard the packaging. Shipping damage claims may require the original box and packing materials.
- Contact our team with your order number, photos, and a brief description of the issue.
- We will review and respond within one business day. Legitimate claims result in replacement clones shipped at no charge on the next available shipping window.
What the guarantee does NOT cover: clones that were healthy on arrival and were damaged by grower error (overfeeding, overwatering, light burn, pest introduction from your grow space). When in doubt, photograph and contact us—we will work with you.
For more context on how we source and vet our genetics, visit our page on ensuring the quality of cannabis clones.
Equipment Checklist Before Your Clones Arrive
The best time to prepare is before the box lands on your doorstep. If you ordered clones and have not set up your acclimation station yet, here is the minimum viable setup:
- Clean spray bottle with pH-adjusted water ready to go
- Humidity dome or clear plastic covers for your clone tray
- Hygrometer to confirm RH readings
- Low-intensity light source (T5 fluorescent, small LED propagation panel, or dim setting on your main fixture)
- pH meter and pH adjustment solutions (up and down)
- 1-gallon containers and your preferred growing medium, pre-staged for transplant
- A loupe (30×) for pest inspection
If you are wondering what growing medium is best for your first transplant, our guide to best soil types for cannabis compares options including amended soils, coco coir, and peat-based mixes.
Long-Term Success Starts in the First 48 Hours
Everything you do in the first two days after your clones arrive sets the trajectory for the entire grow. Growers who nail the unboxing inspection, give their plants time to acclimate under low light, and resist the urge to feed immediately consistently produce healthier plants with stronger root systems going into veg.
The good news: it is not complicated. Open the box, inspect, mist, dome, low light, wait. That is the whole formula. Follow the 48-hour timeline in this guide and your new clones will be rooting vigorously and showing fresh green growth before the week is out.
Ready to get started? Browse our current clone inventory—we carry a rotating selection of elite genetics, shipped overnight directly to your door.
Frequently Asked Questions
How soon should I open the box when my cannabis clones arrive?
Open the box immediately upon delivery—within minutes, not hours. CO₂ levels rise inside sealed packaging and plants are already stressed from transit. Getting them into fresh air, light, and a humidity dome as quickly as possible is the single most important step you can take after delivery.
Why shouldn’t I feed my clones right when they arrive?
Newly arrived clones have stressed root systems that cannot uptake nutrients efficiently. Applying fertilizer to a stressed root zone creates osmotic imbalance and causes fertilizer burn. Plain, pH-adjusted water for the first 24 to 48 hours allows roots to stabilize before you introduce any nutrients.
How do I know if my clone is in shock or actually dying?
Normal transit shock produces drooping leaves and slight paleness that resolves within 12 to 24 hours under a humidity dome. Genuine death or disease looks like brown mushy stems, widespread black spotting, foul-smelling roots, or complete collapse that does not respond to rehydration. Photograph and contact IWantClones.com within 72 hours if you suspect the latter.
What light intensity should I use for newly arrived clones?
Start at 150 to 250 µmol/m²/s for the first 24 hours, then gradually ramp to 300–450 µmol/m²/s by hour 48. Reach normal vegetative intensity (500 to 700 µmol/m²/s) by day 4 or 5. Skipping gradual light reintroduction causes photooxidative bleaching on tender new growth.
How long before I should transplant a newly arrived clone?
Wait until roots are visibly emerging from the plug or cube and the plant shows new vegetative growth—typically 3–5 days after arrival. Transplanting too early disrupts root establishment. Moving into a 1-gallon container first, rather than jumping to a 5-gallon pot, produces stronger root development in early veg.
What does the IWantClones.com 3-day guarantee cover?
The guarantee covers clones that arrive dead, diseased, or with an active pest infestation present at the time of delivery. You must contact us within 72 hours of the delivery timestamp with photos. Clones damaged after arrival due to grower error are not covered. Legitimate claims receive replacement clones or store credit.