
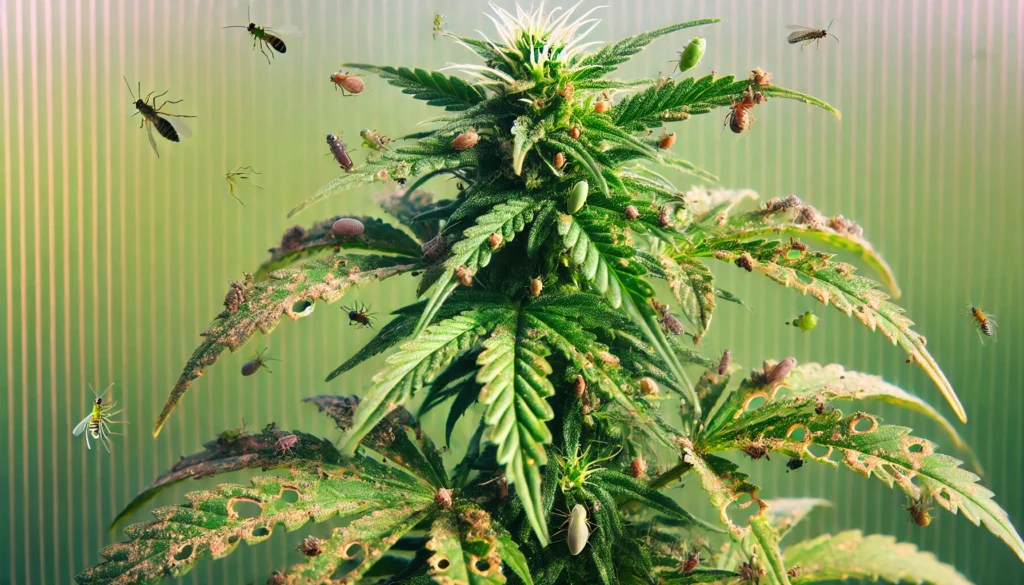
Spider Mites, Thrips & Fungus Gnats: ID & Control on Cannabis

Pest and disease management for cannabis clones

Cannabis spider mites, thrips, and fungus gnats are the three most common pest threats home and small-commercial cannabis growers face — and each one requires a different identification approach, different lifecycle understanding, and different control strategy. Getting the ID right before you spray anything is the most important step in any successful pest control program.

All three pests can be managed effectively with an integrated pest management (IPM) approach that combines environmental controls, beneficial organisms, and targeted treatments. None of them should be a crop-ending emergency if caught early and addressed systematically.

Key Takeaways

  • Spider mites (most commonly Tetranychus urticae, the two-spotted spider mite) reproduce explosively in warm, dry conditions — a population can double in as little as 3–5 days, making early detection and fast response critical.
  • Thrips damage appears as silvery streaking and stippling on leaf surfaces; they also vector plant viruses and their larvae develop in growing media, requiring both foliar and medium treatment.
  • Fungus gnats are primarily a root health threat, not a foliage one — adult gnats are nuisances, but larvae feed on roots and root hairs, causing nutrient lockout symptoms that are often mistaken for deficiencies.
  • Integrated Pest Management (IPM) — combining prevention, beneficials, and targeted treatments — is substantially more effective than reactive spraying alone and avoids resistance development.
  • Incoming clones are a primary pest vector; quarantine all new genetics and inspect thoroughly before introducing to your garden.
  • Most spray treatments become unacceptable in late flower due to residue, flavor impact, and inhalation risk — starting an IPM program early prevents the need for late-stage chemical intervention.

Spider Mites on Cannabis

Identification

The two-spotted spider mite (Tetranychus urticae) is the species most commonly found on cannabis, though russet mites (Aculops cannabicola) are an increasingly problematic secondary pest that requires different management. Knowing which mite you have changes your approach.

Two-spotted spider mites are visible to the naked eye as tiny moving dots on the underside of leaves — yellowish-green or reddish-brown depending on life stage. Under a 10–30x loupe, they are recognizable by the two dark spots on their oval bodies. The most visible sign of infestation is the characteristic stippling on the upper leaf surface: hundreds of tiny white or yellow puncture wounds where mites have fed. As populations grow, fine webbing appears on leaf surfaces and between leaves — this is the definitive “red flag” sign of a serious spider mite infestation.

Russet mites are far smaller — essentially invisible without a 60x or higher magnification tool. They infest the upper canopy and cause characteristic upward-curling of young leaf margins and a bronzing or russeting of stem and leaf surfaces. Russet mites are often misidentified as pH problems, light stress, or other environmental issues, and they are more difficult to control than two-spotted mites. If you are seeing upper-leaf curl and bronzing without obvious mites under a loupe, suspect russet mites and use a hand microscope for confirmation.

Lifecycle

Two-spotted spider mite lifecycle (egg → larva → nymph → adult) completes in as little as 5–7 days at 80°F (27°C). A single female lays 100–200 eggs over her lifetime. This explosive reproductive rate means that a small population missed on Monday can be a full infestation by the following weekend. Temperature and humidity are the primary drivers: hot (above 75°F), dry (below 50% RH) conditions accelerate the lifecycle and create ideal mite conditions. This is why spider mites are so common in summer and in grow tents where temperatures run high.

Spider mites overwinter as diapausing females — reddish-orange, non-feeding — hiding in cracks, in media, on pot surfaces, and in tent material. This is why a room that “had mites” can erupt again the following season without any new introduction.

Damage

Early damage: fine yellow stippling on upper leaf surface, barely visible mites on leaf undersides. Mid-stage: visible webbing, significant leaf yellowing and loss of vigor as photosynthetic capacity is reduced. Late stage: severe webbing across multiple plants, significant defoliation, dramatically reduced yield potential. Heavily infested plants in late flower may produce unmarketable buds covered in webbing and mite frass.

Control

Environmental: Lower temperature to 68–74°F and raise RH to 55–65% — this alone significantly slows mite reproduction without harming your plants. Mites thrive in hot, dry conditions. Do not let your grow room become the perfect mite habitat.

Beneficials: Predatory mites are the most effective biological control for spider mites and are safe to use throughout the entire growth cycle, including flower. The most commonly used species:

  • Phytoseiulus persimilis — aggressive predator of two-spotted spider mites; works best when mites are already present (it needs prey)
  • Neoseiulus californicus — broader range; effective preventively and curative; persists longer without prey than P. persimilis
  • Neoseiulus fallacis — cold-tolerant; good choice for cooler environments

Sprays (early veg through early flower):

  • Rosemary oil / essential oil-based sprays (Essentria IC3, Trifecta Crop Control) — low residue, effective against all life stages including eggs
  • Insecticidal soap (potassium salts of fatty acids) — kills mites on contact; must coat the mites directly; repeat every 3 days for 2+ weeks to break the lifecycle
  • Pyrethrin-based sprays (Pyganic) — contact kill; fast-acting; minimal residue if not used near harvest
  • Spinosad — effective against thrips and some mite species; use with caution and rotation to avoid resistance

Do not use in flower (weeks 4 onward): Neem oil (residue + flavor), avermectin/abamectin (not harvest-safe), synthetic acaricides (not legal for cannabis in most states, serious inhalation risk).

Thrips on Cannabis

Identification

Thrips are slender, elongated insects roughly 1–1.5mm long — just visible to the naked eye as tiny moving slivers on leaf surfaces. Western flower thrips (Frankliniella occidentalis) is the most common species on cannabis. Adults are yellowish-tan to brown; larvae are pale yellow or whitish and found on leaf undersides and in growing media.

Thrips feeding damage appears as distinctive silvery-white or bronze streaks and patches on leaf surfaces where they have lacerated cells and consumed the contents. You will often see small black dots (frass/excrement) alongside the silver streaking. Leaves that look “scratched” or silvery without obvious insect activity are a strong indicator of thrips — inspect the leaf undersides carefully with a loupe.

Thrips are also significant plant virus vectors. Tomato spotted wilt virus (TSWV) and impatiens necrotic spot virus (INSV) are both transmitted by western flower thrips, though their prevalence in cannabis is less well-documented than in other crops. Any unusual systemic symptoms (ring spots, necrotic patches, distorted growth) in a garden with active thrips warrants investigation.

Lifecycle

Western flower thrips have a 20–30 day complete lifecycle (egg → first instar larva → second instar larva → prepupa → pupa → adult) at 70–80°F. Unlike mites, thrips pupate in the growing medium or soil rather than on the plant, which means soil treatments are essential for breaking the lifecycle — foliar sprays alone will not eliminate thrips if the medium is harboring pupae.

Thrips are capable fliers and enter grow rooms easily through ventilation, on clothing, and via incoming plant material. Incoming clones are a primary vector — a thrips-infested clone from an outside source can seed an entire grow room within days.

Damage

Silver streaking and stippling on foliage reduce photosynthetic capacity and create stress that slows growth. In flower, thrips will feed on bud tissue, leaving surface damage and frass deposits that reduce bag appeal and quality. Heavy infestations cause significant leaf loss, stunted growth, and in worst cases, transmission of viral diseases that can systemically affect the entire plant.

Control

Environmental: Sticky yellow cards hung at canopy height monitor adult populations and catch some adults (blue sticky cards are specifically attractive to western flower thrips). Monitor card catch rates to track whether populations are rising or falling in response to treatments.

Beneficials:

  • Amblyseius cucumeris (also sold as Neoseiulus cucumeris) — predatory mite that feeds on thrips first-instar larvae; highly effective as a preventive release; apply as slow-release sachets hung throughout the canopy
  • Amblyseius swirskii — broader predator; effective against thrips larvae, broad mites, and whitefly eggs; works well in warmer grow environments (above 72°F)
  • Orius insidiosus (minute pirate bug) — aggressive predator that attacks all thrips life stages including adults; effective in larger spaces
  • Steinernema feltiae (beneficial nematodes) — applied as a soil drench; attacks thrips pupae in the growing medium; essential for complete lifecycle disruption

Sprays:

  • Spinosad (Monterey Garden Insect Spray) — highly effective against thrips; rotate with other modes of action to prevent resistance; avoid applying when beneficials are active
  • Pyrethrin sprays — contact kill of adults and larvae on plant surfaces
  • Insecticidal soap — effective contact kill; must reach thrips directly; apply at 3–4 day intervals

Medium treatment for pupae: Drench growing medium with beneficial nematodes (Steinernema feltiae) or with Beauveria bassiana (Botanigard, BotaniGard 22WP) at labeled rates. This is the step most growers miss, and it is why thrips seem to “keep coming back” despite foliar treatments — you are killing adults but not addressing the pupae developing in your medium.

Fungus Gnats on Cannabis

Identification

Fungus gnats (Bradysia spp.) are small (2–4mm), dark, delicate-winged flies that hover around growing media and congregate near wet soil surfaces. Adults look like tiny mosquitoes and are often first noticed flying around lights or clustered on sticky yellow cards. Adults are nuisances but do not directly damage plants — they are indicators that larvae are present in your medium.

Fungus gnat larvae are the actual problem. They are small (up to 5mm), white, worm-like insects with black heads. They live in the top 2–3 inches of growing medium, feeding on decaying organic matter, root hairs, and — in large numbers — primary roots. To confirm larvae, press a cut potato piece into the growing medium surface and check it after 24–48 hours; larvae will aggregate on the potato, making them visible.

Larvae damage is frequently misdiagnosed as nutrient deficiencies. When root hairs are destroyed by larvae feeding, nutrient uptake is impaired even when adequate nutrients are present in the medium — leading to yellowing, interveinal chlorosis, and growth slowdown that looks exactly like a calcium, magnesium, or nitrogen deficiency. If your plants are showing deficiency symptoms that do not respond to feeding adjustments, check for fungus gnat larvae.

Lifecycle

Fungus gnat complete lifecycle (egg → 4 larval instars → pupa → adult) takes approximately 3–4 weeks at 72°F. Adults live 7–10 days and lay 100–200 eggs each in moist growing media. A single egg-laying female can establish a persistent colony in a wet, organically-rich medium within days. The lifecycle and population explosion is favored by:

  • Consistently wet or waterlogged growing medium
  • High organic matter content in soil (peat, coco, compost-heavy mixes)
  • Warm medium temperatures (68–77°F)
  • Any decaying plant material on or in the medium surface

Control

Cultural (the most effective control): Allow the top 1–2 inches of growing medium to dry completely between waterings. Fungus gnat larvae require moisture to survive in the top soil layer — consistent dry-down eliminates the habitat they need. This is the single most effective fungus gnat control available and costs nothing. Most growers who have chronic gnat problems are also overwatering.

Sticky cards: Yellow sticky cards at medium level (not canopy height) catch significant numbers of adults and reduce egg-laying populations. Replace weekly.

Beneficials:

  • Steinernema feltiae (beneficial nematodes) — soil drench; highly effective against fungus gnat larvae; apply as a root zone drench at 2–3 week intervals; works best in moist soil immediately after application
  • Hypoaspis miles (now Stratiolaelaps scimitus) — predatory soil mite that lives in the top 1 inch of growing medium and feeds on fungus gnat larvae; apply as a preventive measure when first transplanting into new medium
  • Bacillus thuringiensis var. israelensis (Bti) — bacterial pesticide that kills fungus gnat larvae after ingestion; available as mosquito dunks (Bacillus thuringiensis israelensis); soak dunks in water overnight and use the solution as a root drench; highly effective, organically approved, no resistance issues

Sprays and drenches:

  • BTi drench (as above) — preferred biological control; repeat every 7–14 days
  • Spinosad drench — effective against larvae in medium; do not apply to wet media (reduce watering first)
  • Hydrogen peroxide drench (3% food-grade, diluted to 1 part H2O2 in 4 parts water) — kills larvae on contact; oxygenates root zone simultaneously; safe for plants; repeat 3–4 times at 7-day intervals

IPM Program: A Systematic Approach

Integrated Pest Management (IPM) is a framework that prioritizes prevention, monitors pest populations systematically, uses biological controls first, and reserves chemical intervention for outbreak situations — using the least harmful effective option. IPM is superior to reactive spraying for several reasons: it prevents resistance development, maintains beneficial insect populations, keeps your grow room environment safer, and produces cleaner end product.

Prevention Layer

The foundation of any IPM program is preventing pest establishment in the first place:

  • Quarantine incoming genetics: Every clone from an outside source should spend 2–4 days in an isolated space before entering your main garden. Inspect carefully for mites, thrips, and gnat adults. Our what to do when clones arrive guide walks through the complete receiving and inspection process.
  • Environmental control: Maintain 65–78°F and 50–65% RH in veg; 68–80°F and 40–55% RH in flower. These ranges are suboptimal for all three pest species while remaining ideal for cannabis.
  • Clean room protocols: Change shoes or use footbaths before entering the grow room; avoid bringing in cut flowers, fruits, or vegetables from outside; change clothes if you have been in another garden environment.
  • Medium management: Allow proper dry-down between waterings; avoid leaving standing water in catch trays; remove decaying plant material promptly.

Monitoring Layer

  • Hang yellow sticky cards (1–2 per 4×4 ft canopy area) and inspect them every 3–4 days. Track what you catch and watch for trend changes.
  • Weekly loupe inspection of 5–10 leaf undersides across multiple plants — look for mite eggs, nymphs, and thrips larvae.
  • Monthly potato slice test for fungus gnat larvae in any soil-based or organic medium.
  • Keep a simple log: date, pest species, population estimate (low/medium/high). Trends are more useful than single data points.

Biological Controls Layer

Establish a base layer of beneficial organisms preventively — before you see pests — rather than waiting for an outbreak. Beneficial packages to run throughout the grow:

  • Neoseiulus californicus sachets — preventive spider mite control; rehang every 4–6 weeks
  • Amblyseius cucumeris sachets — preventive thrips larvae control; rehang every 4–6 weeks
  • Stratiolaelaps scimitus — apply to medium surface once at transplant; populations establish and self-sustain if not disrupted by drenches
  • BTi dunks in standing water — prevent fungus gnat adult populations near your water source or any standing water

Our organic pest control methods guide details specific beneficial products, suppliers, and application protocols for cannabis cultivation.

Chemical/Spray Intervention Layer

When preventive measures and beneficials are insufficient, targeted spray intervention is appropriate. Key principles:

  • Always identify the pest before spraying — spraying for the wrong pest wastes product, harms beneficials, and delays effective treatment
  • Rotate modes of action between applications to prevent resistance development
  • Follow label rates exactly — higher concentration does not mean better results and often harms plants
  • Stop all foliar spray applications by week 4–5 of flower to prevent residue on consumable flower
  • Apply sprays during lights-off when possible to reduce evaporation and minimize worker exposure

Pest Comparison and Control Reference Table

Pest Visible Signs Where to Look Primary Damage Best Beneficial Best Spray (early) Late Flower Option
Spider mites (T. urticae) Stippling, webbing, moving dots on leaf undersides Leaf undersides, mainly lower canopy first Reduced photosynthesis; leaf death; bud webbing Phytoseiulus persimilis, N. californicus Rosemary oil, insecticidal soap, pyrethrin Predatory mites only; no sprays
Russet mites (A. cannabicola) Upper leaf curl, bronzing, invisible without 60x scope Upper canopy, growing tips, stems Severe growth distortion; potency reduction; possible HLVd vectoring N. californicus, A. swirskii Sulfur (vaporizer), rosemary oil Predatory mites; no sprays
Thrips (F. occidentalis) Silver streaking, black frass dots on leaf surfaces Leaf upper and undersides; base of bud sites Leaf damage; virus transmission; bud surface damage A. cucumeris, Orius spp., S. feltiae (drench) Spinosad, pyrethrin, insecticidal soap Spinosad drench to medium; predatory mites on plant
Fungus gnats (Bradysia spp.) Adults flying around medium; larvae in top 2″ of medium Growing medium surface, near lights, on sticky cards Root hair destruction; nutrient uptake impairment; damping off in seedlings BTi drench, S. feltiae, S. scimitus BTi drench, hydrogen peroxide drench, spinosad drench BTi drench safe throughout; reduce watering

Clones and Incoming Pest Risk

The most common way pests enter a clean grow room is through incoming clone material. A clone cut from a garden with spider mites will have mite eggs on the underside of its leaves. A clone from a thrips-infested facility will carry thrips larvae. Fungus gnat eggs will be present in any growing medium that has had adult gnat activity.

Proper quarantine protocol for incoming clones:

  1. Place clones in a separate space — different room, different tent, physically separated from your main garden
  2. Inspect all leaves with a 30x loupe immediately on arrival, focusing on undersides
  3. Apply a preventive beneficial mite sachet (N. californicus) to the quarantine space immediately
  4. Hold for 4–7 days minimum before moving to the main garden, re-inspecting at 48-hour intervals
  5. If any pests are detected, treat in quarantine before introduction and extend the quarantine period

This protocol is detailed further in our what to do when clones arrive guide and in the common pests in cannabis clones overview.

Beyond quarantine, the quality and growing practices of your clone source significantly affect the pest risk of incoming plant material. Clones from operations with documented IPM programs and sanitation protocols bring substantially less pest pressure than clones from environments where mites, thrips, or gnats are simply part of the landscape. When you order clones through IWantClones.com, you are working with genetics from a supply network backed by more than 15 years of expertise in cannabis plant health.

If clones arrive and you suspect pest damage or stress, our cannabis clone troubleshooting guide helps distinguish pest symptoms from shipping stress, nutrient issues, and environmental adjustment responses.

Organic and Low-Residue Approaches

Many growers prefer to keep their pest management programs fully organic — particularly important for medical users and for those concerned about residue on consumed flower. The good news is that the most effective IPM tools for cannabis are already predominantly biological and organic:

  • Beneficial mites and insects are the most residue-free pest control available
  • BTi is organically certified and leaves no residue
  • Potassium silicate (silica) supplementation strengthens plant cell walls, making plants less susceptible to piercing-sucking insects like mites and thrips — an underused preventive tool
  • Diatomaceous earth applied to the medium surface creates a physical barrier that impedes fungus gnat larvae movement and punctures soft-bodied insects
  • Neem cake (not oil) worked into the growing medium releases neem compounds into the root zone, discouraging root pests and gnats — safe for medium application unlike foliar neem oil near harvest

A complete discussion of organic pest control options, product recommendations, and application schedules is available in our organic pest control guide.

For growers facing cannabis pest challenges alongside broader troubleshooting questions — rooting problems, nutrient issues, environmental stress — our comprehensive cannabis clone troubleshooting guide covers the full diagnostic process for clones from arrival through harvest.

Frequently Asked Questions

How do I know if I have spider mites or thrips on my cannabis?

Spider mites cause stippling (tiny white dots) on the upper leaf surface with visible mites and webbing on leaf undersides. Thrips cause silvery-white streaking and scratched-looking patches with small black frass deposits. Under a loupe, mites are oval and 8-legged; thrips are elongated and 6-legged. Both require prompt treatment but respond to some different controls.

What kills spider mites on cannabis without harming the plants?

Insecticidal soap, rosemary oil, and pyrethrin sprays kill spider mites on contact and are safe for cannabis plants in veg and early flower. Predatory mites (Neoseiulus californicus, Phytoseiulus persimilis) are safe throughout the entire grow including late flower and provide ongoing control that sprays cannot match. Avoid neem oil in flower due to residue and flavor impact.

Are fungus gnats harmful to cannabis or just annoying?

Adult fungus gnats are mostly nuisances, but their larvae cause real damage. Gnat larvae feed on root hairs and roots in the top 2–3 inches of growing medium, impairing nutrient and water uptake. The resulting nutrient deficiency symptoms are commonly misdiagnosed as pH or feeding problems. Persistent nutrient issues in plants that don’t respond to feeding corrections should prompt a larval inspection.

Can I use neem oil on cannabis in flower?

No — neem oil should not be applied to cannabis in the flower stage. Neem leaves oily residue on bud surfaces that affects flavor, aroma, and the quality of smoke or vapor. Inhaling neem-coated flower can also cause respiratory irritation. Stop all oil-based foliar treatments by week 3–4 of flower at the latest. Use predatory mites and BTi drenches for pest control in late flower instead.

How do beneficial insects work for cannabis pest control?

Beneficial predatory insects and mites eat pest insects as their food source. Predatory mites like Neoseiulus californicus hunt and eat spider mite eggs and nymphs. Amblyseius cucumeris consumes thrips larvae. Stratiolaelaps scimitus eats fungus gnat larvae in the growing medium. Applied preventively and maintained with slow-release sachets, they establish self-sustaining populations that provide ongoing protection without residue.

What is the most effective way to prevent pests in a cannabis clone grow?

Quarantine all incoming clones for 4–7 days, inspect thoroughly with a hand loupe, and apply preventive beneficial mite sachets before clones enter your main garden. Maintain proper environmental conditions (68–78°F, 50–60% RH, strong airflow) that favor plant health over pest reproduction. Source clones from suppliers with documented IPM practices — incoming plant material is the primary introduction vector for all three major pest species.

Share

Comments are closed.

Also recommended

Spider Mites, Thrips & Fungus Gnats: ID & Control on Cannabis

July 26, 2026
Pest and disease management for cannabis clones

Cannabis spider mites, thrips, and fungus gnats are the three most common pest threats home and small-commercial cannabis growers face — and each one requires a different identification approach, different lifecycle understanding, and different control strategy. Getting the ID right before you spray anything is the most important step in any successful pest control program.

All three pests can be managed effectively with an integrated pest management (IPM) approach that combines environmental controls, beneficial organisms, and targeted treatments. None of them should be a crop-ending emergency if caught early and addressed systematically.

Key Takeaways

  • Spider mites (most commonly Tetranychus urticae, the two-spotted spider mite) reproduce explosively in warm, dry conditions — a population can double in as little as 3–5 days, making early detection and fast response critical.
  • Thrips damage appears as silvery streaking and stippling on leaf surfaces; they also vector plant viruses and their larvae develop in growing media, requiring both foliar and medium treatment.
  • Fungus gnats are primarily a root health threat, not a foliage one — adult gnats are nuisances, but larvae feed on roots and root hairs, causing nutrient lockout symptoms that are often mistaken for deficiencies.
  • Integrated Pest Management (IPM) — combining prevention, beneficials, and targeted treatments — is substantially more effective than reactive spraying alone and avoids resistance development.
  • Incoming clones are a primary pest vector; quarantine all new genetics and inspect thoroughly before introducing to your garden.
  • Most spray treatments become unacceptable in late flower due to residue, flavor impact, and inhalation risk — starting an IPM program early prevents the need for late-stage chemical intervention.

Spider Mites on Cannabis

Identification

The two-spotted spider mite (Tetranychus urticae) is the species most commonly found on cannabis, though russet mites (Aculops cannabicola) are an increasingly problematic secondary pest that requires different management. Knowing which mite you have changes your approach.

Two-spotted spider mites are visible to the naked eye as tiny moving dots on the underside of leaves — yellowish-green or reddish-brown depending on life stage. Under a 10–30x loupe, they are recognizable by the two dark spots on their oval bodies. The most visible sign of infestation is the characteristic stippling on the upper leaf surface: hundreds of tiny white or yellow puncture wounds where mites have fed. As populations grow, fine webbing appears on leaf surfaces and between leaves — this is the definitive “red flag” sign of a serious spider mite infestation.

Russet mites are far smaller — essentially invisible without a 60x or higher magnification tool. They infest the upper canopy and cause characteristic upward-curling of young leaf margins and a bronzing or russeting of stem and leaf surfaces. Russet mites are often misidentified as pH problems, light stress, or other environmental issues, and they are more difficult to control than two-spotted mites. If you are seeing upper-leaf curl and bronzing without obvious mites under a loupe, suspect russet mites and use a hand microscope for confirmation.

Lifecycle

Two-spotted spider mite lifecycle (egg → larva → nymph → adult) completes in as little as 5–7 days at 80°F (27°C). A single female lays 100–200 eggs over her lifetime. This explosive reproductive rate means that a small population missed on Monday can be a full infestation by the following weekend. Temperature and humidity are the primary drivers: hot (above 75°F), dry (below 50% RH) conditions accelerate the lifecycle and create ideal mite conditions. This is why spider mites are so common in summer and in grow tents where temperatures run high.

Spider mites overwinter as diapausing females — reddish-orange, non-feeding — hiding in cracks, in media, on pot surfaces, and in tent material. This is why a room that “had mites” can erupt again the following season without any new introduction.

Damage

Early damage: fine yellow stippling on upper leaf surface, barely visible mites on leaf undersides. Mid-stage: visible webbing, significant leaf yellowing and loss of vigor as photosynthetic capacity is reduced. Late stage: severe webbing across multiple plants, significant defoliation, dramatically reduced yield potential. Heavily infested plants in late flower may produce unmarketable buds covered in webbing and mite frass.

Control

Environmental: Lower temperature to 68–74°F and raise RH to 55–65% — this alone significantly slows mite reproduction without harming your plants. Mites thrive in hot, dry conditions. Do not let your grow room become the perfect mite habitat.

Beneficials: Predatory mites are the most effective biological control for spider mites and are safe to use throughout the entire growth cycle, including flower. The most commonly used species:

  • Phytoseiulus persimilis — aggressive predator of two-spotted spider mites; works best when mites are already present (it needs prey)
  • Neoseiulus californicus — broader range; effective preventively and curative; persists longer without prey than P. persimilis
  • Neoseiulus fallacis — cold-tolerant; good choice for cooler environments

Sprays (early veg through early flower):

  • Rosemary oil / essential oil-based sprays (Essentria IC3, Trifecta Crop Control) — low residue, effective against all life stages including eggs
  • Insecticidal soap (potassium salts of fatty acids) — kills mites on contact; must coat the mites directly; repeat every 3 days for 2+ weeks to break the lifecycle
  • Pyrethrin-based sprays (Pyganic) — contact kill; fast-acting; minimal residue if not used near harvest
  • Spinosad — effective against thrips and some mite species; use with caution and rotation to avoid resistance

Do not use in flower (weeks 4 onward): Neem oil (residue + flavor), avermectin/abamectin (not harvest-safe), synthetic acaricides (not legal for cannabis in most states, serious inhalation risk).

Thrips on Cannabis

Identification

Thrips are slender, elongated insects roughly 1–1.5mm long — just visible to the naked eye as tiny moving slivers on leaf surfaces. Western flower thrips (Frankliniella occidentalis) is the most common species on cannabis. Adults are yellowish-tan to brown; larvae are pale yellow or whitish and found on leaf undersides and in growing media.

Thrips feeding damage appears as distinctive silvery-white or bronze streaks and patches on leaf surfaces where they have lacerated cells and consumed the contents. You will often see small black dots (frass/excrement) alongside the silver streaking. Leaves that look “scratched” or silvery without obvious insect activity are a strong indicator of thrips — inspect the leaf undersides carefully with a loupe.

Thrips are also significant plant virus vectors. Tomato spotted wilt virus (TSWV) and impatiens necrotic spot virus (INSV) are both transmitted by western flower thrips, though their prevalence in cannabis is less well-documented than in other crops. Any unusual systemic symptoms (ring spots, necrotic patches, distorted growth) in a garden with active thrips warrants investigation.

Lifecycle

Western flower thrips have a 20–30 day complete lifecycle (egg → first instar larva → second instar larva → prepupa → pupa → adult) at 70–80°F. Unlike mites, thrips pupate in the growing medium or soil rather than on the plant, which means soil treatments are essential for breaking the lifecycle — foliar sprays alone will not eliminate thrips if the medium is harboring pupae.

Thrips are capable fliers and enter grow rooms easily through ventilation, on clothing, and via incoming plant material. Incoming clones are a primary vector — a thrips-infested clone from an outside source can seed an entire grow room within days.

Damage

Silver streaking and stippling on foliage reduce photosynthetic capacity and create stress that slows growth. In flower, thrips will feed on bud tissue, leaving surface damage and frass deposits that reduce bag appeal and quality. Heavy infestations cause significant leaf loss, stunted growth, and in worst cases, transmission of viral diseases that can systemically affect the entire plant.

Control

Environmental: Sticky yellow cards hung at canopy height monitor adult populations and catch some adults (blue sticky cards are specifically attractive to western flower thrips). Monitor card catch rates to track whether populations are rising or falling in response to treatments.

Beneficials:

  • Amblyseius cucumeris (also sold as Neoseiulus cucumeris) — predatory mite that feeds on thrips first-instar larvae; highly effective as a preventive release; apply as slow-release sachets hung throughout the canopy
  • Amblyseius swirskii — broader predator; effective against thrips larvae, broad mites, and whitefly eggs; works well in warmer grow environments (above 72°F)
  • Orius insidiosus (minute pirate bug) — aggressive predator that attacks all thrips life stages including adults; effective in larger spaces
  • Steinernema feltiae (beneficial nematodes) — applied as a soil drench; attacks thrips pupae in the growing medium; essential for complete lifecycle disruption

Sprays:

  • Spinosad (Monterey Garden Insect Spray) — highly effective against thrips; rotate with other modes of action to prevent resistance; avoid applying when beneficials are active
  • Pyrethrin sprays — contact kill of adults and larvae on plant surfaces
  • Insecticidal soap — effective contact kill; must reach thrips directly; apply at 3–4 day intervals

Medium treatment for pupae: Drench growing medium with beneficial nematodes (Steinernema feltiae) or with Beauveria bassiana (Botanigard, BotaniGard 22WP) at labeled rates. This is the step most growers miss, and it is why thrips seem to “keep coming back” despite foliar treatments — you are killing adults but not addressing the pupae developing in your medium.

Fungus Gnats on Cannabis

Identification

Fungus gnats (Bradysia spp.) are small (2–4mm), dark, delicate-winged flies that hover around growing media and congregate near wet soil surfaces. Adults look like tiny mosquitoes and are often first noticed flying around lights or clustered on sticky yellow cards. Adults are nuisances but do not directly damage plants — they are indicators that larvae are present in your medium.

Fungus gnat larvae are the actual problem. They are small (up to 5mm), white, worm-like insects with black heads. They live in the top 2–3 inches of growing medium, feeding on decaying organic matter, root hairs, and — in large numbers — primary roots. To confirm larvae, press a cut potato piece into the growing medium surface and check it after 24–48 hours; larvae will aggregate on the potato, making them visible.

Larvae damage is frequently misdiagnosed as nutrient deficiencies. When root hairs are destroyed by larvae feeding, nutrient uptake is impaired even when adequate nutrients are present in the medium — leading to yellowing, interveinal chlorosis, and growth slowdown that looks exactly like a calcium, magnesium, or nitrogen deficiency. If your plants are showing deficiency symptoms that do not respond to feeding adjustments, check for fungus gnat larvae.

Lifecycle

Fungus gnat complete lifecycle (egg → 4 larval instars → pupa → adult) takes approximately 3–4 weeks at 72°F. Adults live 7–10 days and lay 100–200 eggs each in moist growing media. A single egg-laying female can establish a persistent colony in a wet, organically-rich medium within days. The lifecycle and population explosion is favored by:

  • Consistently wet or waterlogged growing medium
  • High organic matter content in soil (peat, coco, compost-heavy mixes)
  • Warm medium temperatures (68–77°F)
  • Any decaying plant material on or in the medium surface

Control

Cultural (the most effective control): Allow the top 1–2 inches of growing medium to dry completely between waterings. Fungus gnat larvae require moisture to survive in the top soil layer — consistent dry-down eliminates the habitat they need. This is the single most effective fungus gnat control available and costs nothing. Most growers who have chronic gnat problems are also overwatering.

Sticky cards: Yellow sticky cards at medium level (not canopy height) catch significant numbers of adults and reduce egg-laying populations. Replace weekly.

Beneficials:

  • Steinernema feltiae (beneficial nematodes) — soil drench; highly effective against fungus gnat larvae; apply as a root zone drench at 2–3 week intervals; works best in moist soil immediately after application
  • Hypoaspis miles (now Stratiolaelaps scimitus) — predatory soil mite that lives in the top 1 inch of growing medium and feeds on fungus gnat larvae; apply as a preventive measure when first transplanting into new medium
  • Bacillus thuringiensis var. israelensis (Bti) — bacterial pesticide that kills fungus gnat larvae after ingestion; available as mosquito dunks (Bacillus thuringiensis israelensis); soak dunks in water overnight and use the solution as a root drench; highly effective, organically approved, no resistance issues

Sprays and drenches:

  • BTi drench (as above) — preferred biological control; repeat every 7–14 days
  • Spinosad drench — effective against larvae in medium; do not apply to wet media (reduce watering first)
  • Hydrogen peroxide drench (3% food-grade, diluted to 1 part H2O2 in 4 parts water) — kills larvae on contact; oxygenates root zone simultaneously; safe for plants; repeat 3–4 times at 7-day intervals

IPM Program: A Systematic Approach

Integrated Pest Management (IPM) is a framework that prioritizes prevention, monitors pest populations systematically, uses biological controls first, and reserves chemical intervention for outbreak situations — using the least harmful effective option. IPM is superior to reactive spraying for several reasons: it prevents resistance development, maintains beneficial insect populations, keeps your grow room environment safer, and produces cleaner end product.

Prevention Layer

The foundation of any IPM program is preventing pest establishment in the first place:

  • Quarantine incoming genetics: Every clone from an outside source should spend 2–4 days in an isolated space before entering your main garden. Inspect carefully for mites, thrips, and gnat adults. Our what to do when clones arrive guide walks through the complete receiving and inspection process.
  • Environmental control: Maintain 65–78°F and 50–65% RH in veg; 68–80°F and 40–55% RH in flower. These ranges are suboptimal for all three pest species while remaining ideal for cannabis.
  • Clean room protocols: Change shoes or use footbaths before entering the grow room; avoid bringing in cut flowers, fruits, or vegetables from outside; change clothes if you have been in another garden environment.
  • Medium management: Allow proper dry-down between waterings; avoid leaving standing water in catch trays; remove decaying plant material promptly.

Monitoring Layer

  • Hang yellow sticky cards (1–2 per 4×4 ft canopy area) and inspect them every 3–4 days. Track what you catch and watch for trend changes.
  • Weekly loupe inspection of 5–10 leaf undersides across multiple plants — look for mite eggs, nymphs, and thrips larvae.
  • Monthly potato slice test for fungus gnat larvae in any soil-based or organic medium.
  • Keep a simple log: date, pest species, population estimate (low/medium/high). Trends are more useful than single data points.

Biological Controls Layer

Establish a base layer of beneficial organisms preventively — before you see pests — rather than waiting for an outbreak. Beneficial packages to run throughout the grow:

  • Neoseiulus californicus sachets — preventive spider mite control; rehang every 4–6 weeks
  • Amblyseius cucumeris sachets — preventive thrips larvae control; rehang every 4–6 weeks
  • Stratiolaelaps scimitus — apply to medium surface once at transplant; populations establish and self-sustain if not disrupted by drenches
  • BTi dunks in standing water — prevent fungus gnat adult populations near your water source or any standing water

Our organic pest control methods guide details specific beneficial products, suppliers, and application protocols for cannabis cultivation.

Chemical/Spray Intervention Layer

When preventive measures and beneficials are insufficient, targeted spray intervention is appropriate. Key principles:

  • Always identify the pest before spraying — spraying for the wrong pest wastes product, harms beneficials, and delays effective treatment
  • Rotate modes of action between applications to prevent resistance development
  • Follow label rates exactly — higher concentration does not mean better results and often harms plants
  • Stop all foliar spray applications by week 4–5 of flower to prevent residue on consumable flower
  • Apply sprays during lights-off when possible to reduce evaporation and minimize worker exposure

Pest Comparison and Control Reference Table

Pest Visible Signs Where to Look Primary Damage Best Beneficial Best Spray (early) Late Flower Option
Spider mites (T. urticae) Stippling, webbing, moving dots on leaf undersides Leaf undersides, mainly lower canopy first Reduced photosynthesis; leaf death; bud webbing Phytoseiulus persimilis, N. californicus Rosemary oil, insecticidal soap, pyrethrin Predatory mites only; no sprays
Russet mites (A. cannabicola) Upper leaf curl, bronzing, invisible without 60x scope Upper canopy, growing tips, stems Severe growth distortion; potency reduction; possible HLVd vectoring N. californicus, A. swirskii Sulfur (vaporizer), rosemary oil Predatory mites; no sprays
Thrips (F. occidentalis) Silver streaking, black frass dots on leaf surfaces Leaf upper and undersides; base of bud sites Leaf damage; virus transmission; bud surface damage A. cucumeris, Orius spp., S. feltiae (drench) Spinosad, pyrethrin, insecticidal soap Spinosad drench to medium; predatory mites on plant
Fungus gnats (Bradysia spp.) Adults flying around medium; larvae in top 2″ of medium Growing medium surface, near lights, on sticky cards Root hair destruction; nutrient uptake impairment; damping off in seedlings BTi drench, S. feltiae, S. scimitus BTi drench, hydrogen peroxide drench, spinosad drench BTi drench safe throughout; reduce watering

Clones and Incoming Pest Risk

The most common way pests enter a clean grow room is through incoming clone material. A clone cut from a garden with spider mites will have mite eggs on the underside of its leaves. A clone from a thrips-infested facility will carry thrips larvae. Fungus gnat eggs will be present in any growing medium that has had adult gnat activity.

Proper quarantine protocol for incoming clones:

  1. Place clones in a separate space — different room, different tent, physically separated from your main garden
  2. Inspect all leaves with a 30x loupe immediately on arrival, focusing on undersides
  3. Apply a preventive beneficial mite sachet (N. californicus) to the quarantine space immediately
  4. Hold for 4–7 days minimum before moving to the main garden, re-inspecting at 48-hour intervals
  5. If any pests are detected, treat in quarantine before introduction and extend the quarantine period

This protocol is detailed further in our what to do when clones arrive guide and in the common pests in cannabis clones overview.

Beyond quarantine, the quality and growing practices of your clone source significantly affect the pest risk of incoming plant material. Clones from operations with documented IPM programs and sanitation protocols bring substantially less pest pressure than clones from environments where mites, thrips, or gnats are simply part of the landscape. When you order clones through IWantClones.com, you are working with genetics from a supply network backed by more than 15 years of expertise in cannabis plant health.

If clones arrive and you suspect pest damage or stress, our cannabis clone troubleshooting guide helps distinguish pest symptoms from shipping stress, nutrient issues, and environmental adjustment responses.

Organic and Low-Residue Approaches

Many growers prefer to keep their pest management programs fully organic — particularly important for medical users and for those concerned about residue on consumed flower. The good news is that the most effective IPM tools for cannabis are already predominantly biological and organic:

  • Beneficial mites and insects are the most residue-free pest control available
  • BTi is organically certified and leaves no residue
  • Potassium silicate (silica) supplementation strengthens plant cell walls, making plants less susceptible to piercing-sucking insects like mites and thrips — an underused preventive tool
  • Diatomaceous earth applied to the medium surface creates a physical barrier that impedes fungus gnat larvae movement and punctures soft-bodied insects
  • Neem cake (not oil) worked into the growing medium releases neem compounds into the root zone, discouraging root pests and gnats — safe for medium application unlike foliar neem oil near harvest

A complete discussion of organic pest control options, product recommendations, and application schedules is available in our organic pest control guide.

For growers facing cannabis pest challenges alongside broader troubleshooting questions — rooting problems, nutrient issues, environmental stress — our comprehensive cannabis clone troubleshooting guide covers the full diagnostic process for clones from arrival through harvest.

Frequently Asked Questions

How do I know if I have spider mites or thrips on my cannabis?

Spider mites cause stippling (tiny white dots) on the upper leaf surface with visible mites and webbing on leaf undersides. Thrips cause silvery-white streaking and scratched-looking patches with small black frass deposits. Under a loupe, mites are oval and 8-legged; thrips are elongated and 6-legged. Both require prompt treatment but respond to some different controls.

What kills spider mites on cannabis without harming the plants?

Insecticidal soap, rosemary oil, and pyrethrin sprays kill spider mites on contact and are safe for cannabis plants in veg and early flower. Predatory mites (Neoseiulus californicus, Phytoseiulus persimilis) are safe throughout the entire grow including late flower and provide ongoing control that sprays cannot match. Avoid neem oil in flower due to residue and flavor impact.

Are fungus gnats harmful to cannabis or just annoying?

Adult fungus gnats are mostly nuisances, but their larvae cause real damage. Gnat larvae feed on root hairs and roots in the top 2–3 inches of growing medium, impairing nutrient and water uptake. The resulting nutrient deficiency symptoms are commonly misdiagnosed as pH or feeding problems. Persistent nutrient issues in plants that don’t respond to feeding corrections should prompt a larval inspection.

Can I use neem oil on cannabis in flower?

No — neem oil should not be applied to cannabis in the flower stage. Neem leaves oily residue on bud surfaces that affects flavor, aroma, and the quality of smoke or vapor. Inhaling neem-coated flower can also cause respiratory irritation. Stop all oil-based foliar treatments by week 3–4 of flower at the latest. Use predatory mites and BTi drenches for pest control in late flower instead.

How do beneficial insects work for cannabis pest control?

Beneficial predatory insects and mites eat pest insects as their food source. Predatory mites like Neoseiulus californicus hunt and eat spider mite eggs and nymphs. Amblyseius cucumeris consumes thrips larvae. Stratiolaelaps scimitus eats fungus gnat larvae in the growing medium. Applied preventively and maintained with slow-release sachets, they establish self-sustaining populations that provide ongoing protection without residue.

What is the most effective way to prevent pests in a cannabis clone grow?

Quarantine all incoming clones for 4–7 days, inspect thoroughly with a hand loupe, and apply preventive beneficial mite sachets before clones enter your main garden. Maintain proper environmental conditions (68–78°F, 50–60% RH, strong airflow) that favor plant health over pest reproduction. Source clones from suppliers with documented IPM practices — incoming plant material is the primary introduction vector for all three major pest species.

Written by James Bean

Recent Posts

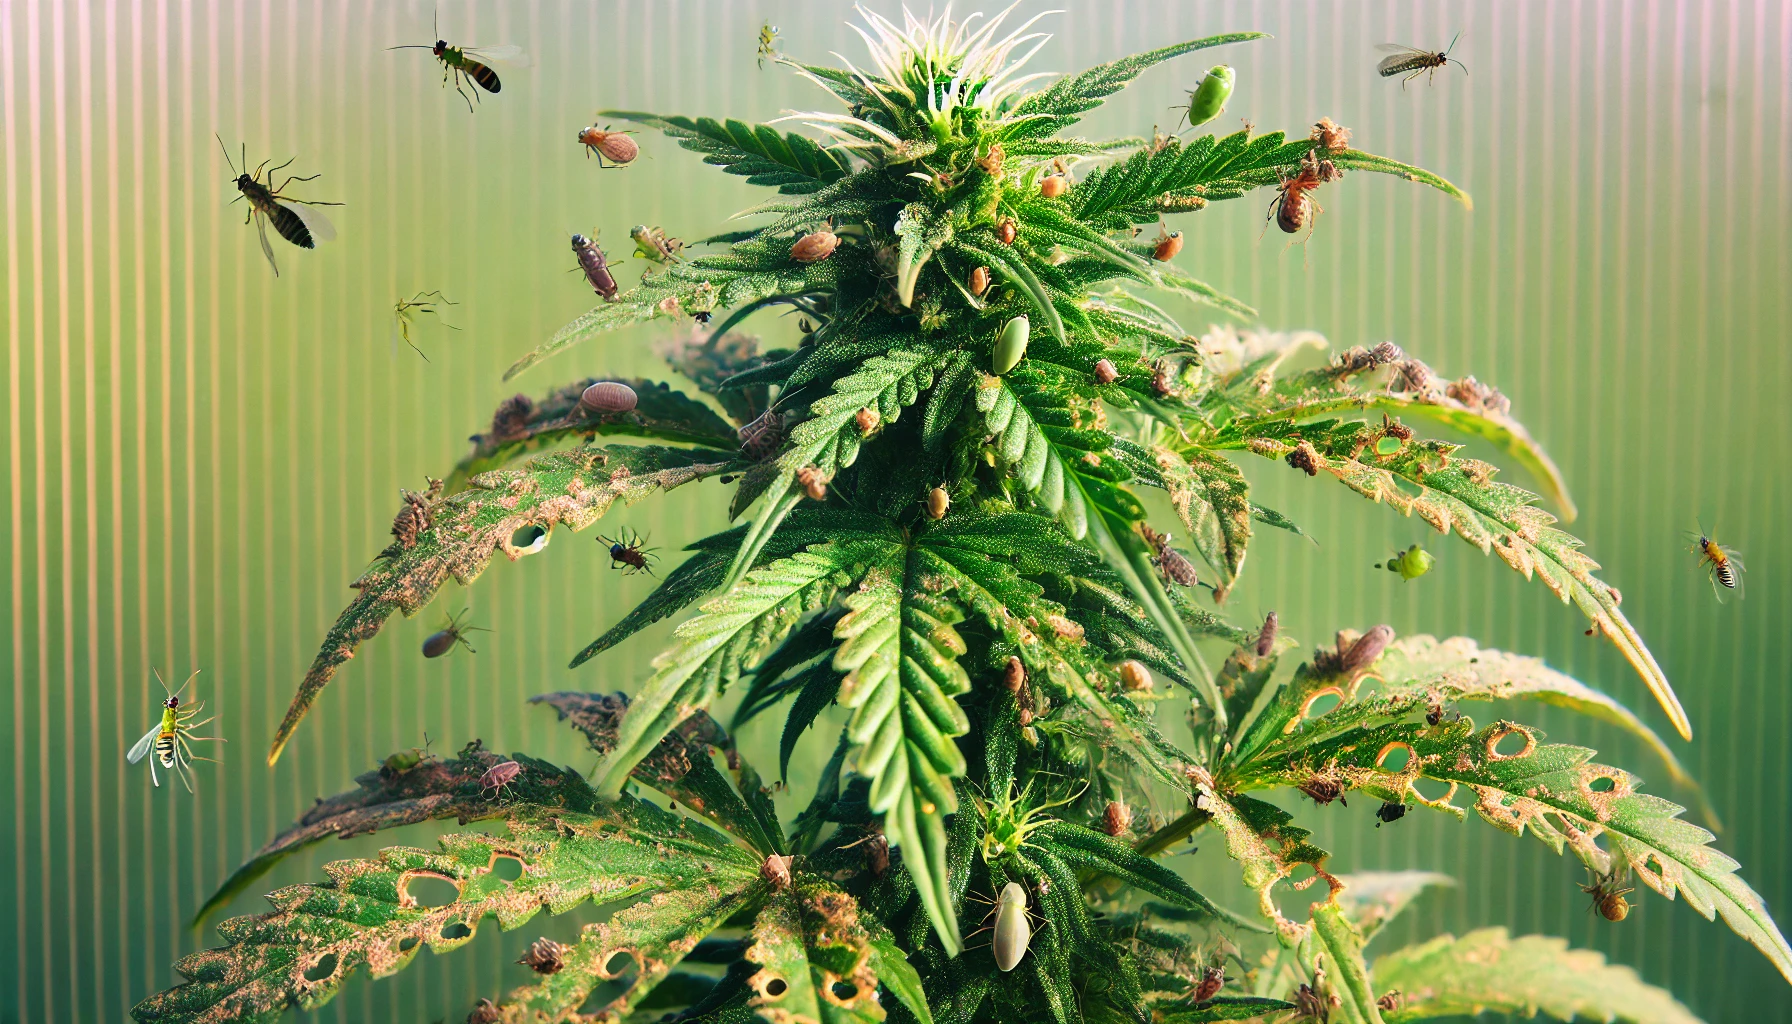
Spider Mites, Thrips & Fungus Gnats: ID & Control on Cannabis

Cannabis spider mites, thrips, and fungus gnats ID’d and controlled. Learn lifecycle, damage signs, and proven IPM strategies to protect your grow.

Read More
Motor Breath Strain & Clone Grow Guide (Motorbreath 15)

Motor breath strain decoded: lineage, terpenes, potency, and a full clone grow guide for Motorbreath 15 by Pisces Genetics. Order clones today.

Read More
Cannabis Grow Glossary: 50 Terms Every Grower Should Know

Master 50 essential cannabis growing terms — from phenotype and VPD to SCROG and HLVd. The definitive glossary for beginner and intermediate growers. Learn more at IWantClones.com.

Read More

Subscribe Today!

Get 10% off when you sign up for our weekly updates!

About Us

At IWantClones.com, we are dedicated to providing top-quality cannabis clones to growers of all levels.

Subscribe Today!

Subscribe our newsletter to get our latest update & news
We currently accept credit/debit card payments, cash, check, money order, bitcoin (BTC), litecoin (LTE), bitcoin cash (BCH), and dogecoin (DOGE).
© 2026 seedsherenow.com All Rights Reserved
magnifiercross linkedin facebook pinterest youtube rss twitter instagram facebook-blank rss-blank linkedin-blank pinterest youtube twitter instagram