
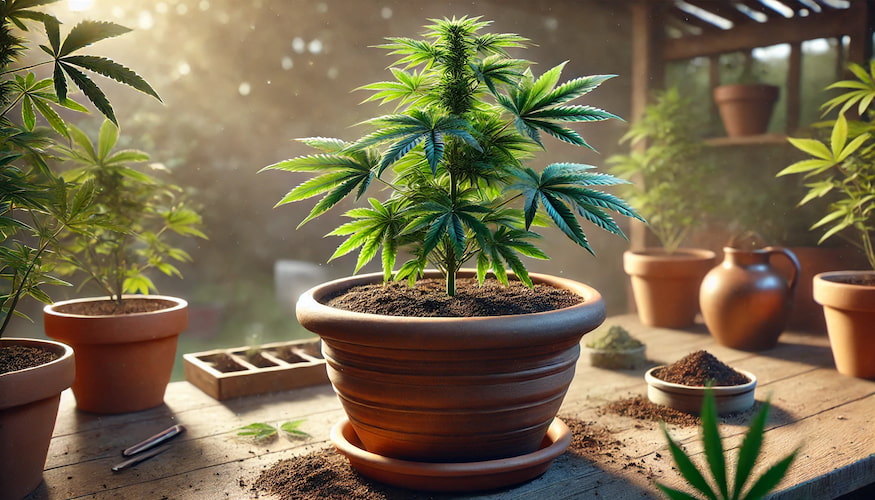
2026 Outdoor Cannabis Grow Season Guide: When to Plant Clones by Region

Best soil types for cannabis

For most of the continental US, the outdoor cannabis grow season runs from a May or June transplant through a September or October harvest. The exact window depends on your region’s last frost date, your local climate, and the strain you’re growing. Photoperiod cannabis — which makes up the majority of popular strains — begins flowering when nights stretch past roughly 12 hours of uninterrupted darkness, a shift that happens naturally after the summer solstice on June 21. Plan your transplant around that timeline and your local climate, and the season nearly runs itself.

This guide covers every major US region, gives you a full grow calendar, explains how daylight drives flowering, walks you through hardening off your clones properly, and addresses pest management, harvest timing, and legal compliance. Whether you’re in the Pacific Northwest, the Southwest desert, the Midwest, or Hawaii, we’ve got your season mapped out.

Key Takeaways

  • Transplant cannabis clones outdoors after the last frost, once overnight lows stay consistently above 50°F — typically May to June for most of the US.
  • Photoperiod cannabis flowers when nights reach approximately 12 hours of uninterrupted darkness, which occurs naturally after the summer solstice in late June.
  • Clones from indoor cultivation must be hardened off over 7 to 10 days before full outdoor sun exposure — skipping this step causes light shock and sets plants back significantly.
  • Most photoperiod outdoor plants begin showing pre-flowers in July and enter full flower in August, with harvest falling in September or October depending on region and strain.
  • Autoflowering cannabis flowers by age rather than light cycle, enabling earlier or later runs and multiple harvests per season in mild climates.
  • Always verify your state and local cultivation laws before planting — plant count limits, visibility requirements, and setback rules vary widely across legal states.

The Outdoor Cannabis Timeline: How the Season Works

Outdoor cannabis growing is fundamentally seasonal. The sun sets the schedule, and the best outdoor growers work with that schedule rather than fighting it. Here’s the big picture of how a typical outdoor season unfolds for photoperiod cannabis in the continental US.

Spring (March–May): Prepare your soil or containers, source your clones, and wait for the last frost to pass. Once overnight lows hold reliably above 50°F, it’s time to start thinking about transplanting. Don’t rush this. A late frost can devastate newly transplanted clones that haven’t had time to establish their root systems outdoors.

Early Summer (May–June): This is transplant window for most of the US. Long summer days — 14 to 16+ hours of light — keep photoperiod plants in vigorous vegetative growth. Cannabis loves this period. With access to direct sun, warm temperatures, and increasing root space, plants put on significant size during these weeks. This is where outdoor plants develop the structural foundation that supports their eventual yield.

Midsummer (July): The summer solstice has passed. Days begin shortening — slowly at first, then more noticeably. Most photoperiod cannabis starts showing pre-flowers in July, a sign that the plant is sensing the change and beginning to prepare for reproduction. The plant transitions from putting all energy into growth to preparing for flowering.

Late Summer to Early Fall (August–September): Full flower mode. This is when terpenes develop, buds fill out, and resin production peaks. The plants need all the sun they can get during this period. They’re also at their most vulnerable to pests and mold — particularly powdery mildew and botrytis — as days grow shorter and nights cooler and sometimes wetter.

Harvest (September–October): Most photoperiod strains in the continental US finish outdoor harvest between late September and mid-October. Northern regions and high elevations may push harvests into early October, with early frost risk as a hard deadline. Southern and coastal regions may run through late October or November. Read your trichomes, watch the weather, and harvest when the plant tells you — not when the calendar says.

Why Daylight Hours Drive Everything

Cannabis is a photoperiod-sensitive plant. That means it uses the length of the dark period — not the light period — to determine when to shift from vegetative growth into reproductive (flowering) mode. This is one of the most important things to understand about outdoor growing.

During the long days of summer, cannabis stays in vegetative growth. It grows roots, branches, and leaves but doesn’t start producing buds. The plant is reading the night length. As long as nights are short — say, 8 to 10 hours — the plant reads this as “summer” and keeps growing vegetatively.

After the summer solstice on June 21, days begin to shorten and nights begin to lengthen. The change is gradual at first — just a few minutes per day — but it accumulates quickly. By late July and into August, nights in most of the continental US have lengthened enough (typically past 11 to 12 hours, though the exact threshold varies by strain) that the plant reads this as “fall approaching” and triggers the flowering hormone cascade.

This is predictable and consistent year to year because it’s driven by the Earth’s axial tilt and orbit, not by weather. You can count on roughly the same light schedule every year in your location. Use it to plan. If you know your strain takes 9 weeks to flower, count back 9 weeks from your typical first frost date and make sure the plant will have hit its flowering trigger by then. For most of the continental US, that math works out naturally — but it’s worth confirming for your specific region and strain.

Use the USDA Plant Hardiness Zone Map to understand your region’s typical frost and temperature patterns. It’s an invaluable free resource for any outdoor grower planning their season around climate data.

Hardening Off Your Clones: Don’t Skip This Step

This is where many first-time outdoor growers make a costly mistake. Clones arrive from indoor cultivation. They’ve been growing under controlled artificial lighting — typically 18 hours of relatively gentle LED or fluorescent light per day. They have never seen direct sun. Their leaves, cuticle layers, stomata, and internal processes are calibrated for indoor conditions.

Move them directly into full outdoor summer sun and you will cause light shock. It looks like bleaching — leaves turn pale yellow or white, sometimes brown at the tips. Plants wilt despite adequate water. Growth stalls. In severe cases, a clone can be set back by two weeks or more from a single day of unprotected outdoor sun exposure. It’s not fatal, but it’s avoidable and it costs you time.

The solution is a deliberate hardening off your cannabis clones before outdoor exposure process spread over 7 to 10 days. Here’s exactly how to do it right.

The Hardening Off Process

  1. Days 1–2: Start with morning sun only. Morning sun (before noon) is gentler than afternoon sun. Give your clones just 2 hours of direct morning exposure, then move them to full shade or back indoors. The UV intensity at 8 a.m. is dramatically lower than at 2 p.m.
  2. Days 3–4: Extend to 4 hours. Add another hour or two of sun exposure. If possible, use 30–50% shade cloth as a buffer. It softens the intensity without eliminating the benefit of natural light and UV adaptation.
  3. Days 5–6: Move to 6 hours of direct sun. By this point, the plant’s cuticle is thickening, its stomata are adapting, and its chloroplasts are adjusting to higher light intensity. Watch for any signs of stress — leaf curl, bleaching, dramatic wilting — and back off by an hour if you see it.
  4. Days 7–8: Up to 8 hours, including some midday sun. Midday sun is the most intense. Introduce it gradually rather than going straight to a full midday session.
  5. Days 9–10: Full outdoor sun, all day. By now the plant is adapted. It can handle direct summer sun without stress, and it will respond to full sun with noticeably accelerated growth.

Watch your plants throughout the process. Signs to back off immediately: leaves bleaching white or yellow, dramatic afternoon wilting that doesn’t recover overnight, leaf margins burning brown. A healthy hardening-off process shows gradual darkening of leaf color (the plant is producing more chlorophyll to handle higher light intensity) and upright, vigorous new growth by the end of week one.

Pay attention to climate and environment considerations for cannabis clones throughout the season — not just at transplant.

Regional Outdoor Grow Calendar for 2026

Every region in the US has a different outdoor cannabis grow season driven by its climate, elevation, and proximity to large bodies of water. Use this calendar as your planning baseline. Note the disclaimer below the table — local variation matters.

US Region Last Frost (Approx.) Transplant Window Vegetative Growth Flowering Begins Harvest Window
Pacific Northwest (WA, OR) Late March–April May–June June–July August–September October–November
Northern California February–March April–May May–July August September–October
Southern California January–February March–April April–July August September
Southwest / Desert (AZ, NM, NV) March–April April–May May–July August–September October (watch extreme heat in summer)
Mountain West (CO, UT, ID) April–May Late May–June June–July August September–October (early frost risk at elevation)
Midwest (IL, OH, MO, MN, etc.) April–May May–June June–July August September–October
Southeast (GA, FL, SC, TX) February–March March–April April–July August September–October
Mid-Atlantic / Northeast (NY, NJ, PA, MA) April–May May–June June–July August–September October
Hawaii Year-round possible January–March for Oct–Nov harvest Varies by run Varies October–December (multiple runs per year possible)

Note: These are general windows based on typical climate patterns. Local elevation, microclimates, urban heat islands, and year-to-year weather variation all affect actual dates. Always check your specific local last frost date from the USDA or your county extension office before making planting decisions. Mountain growers especially should verify local data — elevation creates dramatically different conditions than valley floors just a few miles away.

Pots vs. In-Ground for Outdoor Cannabis

One of the first decisions you’ll make is whether to grow your clones in containers or directly in the ground. Both approaches work. Each has real advantages and real trade-offs.

Growing in Containers (Pots)

Container growing gives you control and flexibility. You can move the plant indoors if a late frost threatens, wheel it into a garage during an unexpected storm, or shift it to a sunnier or shadier spot as conditions change. For outdoor growers in regions with unpredictable spring and fall weather — the Mountain West, the Midwest, the Northeast — this mobility is genuinely valuable.

Container growing also gives you full control over your growing medium. You choose the soil, the amendments, the drainage. You’re not dealing with whatever native soil, pH levels, or pathogens exist in your ground. Pest management is also easier when the plant isn’t rooted into an existing soil ecosystem.

The downsides are real too. Containers need watering more frequently than in-ground plants because they dry out faster and have less soil mass to retain moisture. Root space is limited — use at minimum 15-gallon containers for any serious outdoor plant, and 25 to 30 gallons if you want a genuinely large plant. Container plants also need more consistent fertilization because they’re not drawing on soil nutrients the way in-ground plants can.

Growing In-Ground

In-ground growing unleashes a plant’s full potential. Remove the container and you remove the root ceiling. In-ground cannabis plants in good soil with a full season of growth can reach 10 to 15 feet tall and yield multiple pounds of dried flower per plant under ideal conditions. That’s the ceiling of what’s possible outdoors, and containers simply can’t match it.

In-ground plants also draw water from a larger soil volume, meaning they often need less frequent watering in climates with reasonable rainfall. Their roots interact with the existing soil ecosystem — beneficial fungi, bacteria, and organisms that support plant health in ways that container growing doesn’t replicate as easily.

The trade-offs are equally real. You can’t move an in-ground plant if a frost comes early or a storm rolls in. Controlling soil pH and nutrient levels is harder when you’re working with existing native soil. And because roots are interacting with the soil ecosystem, existing pathogens, nematodes, and pests can become issues that are harder to manage than in a fresh container mix.

Most experienced outdoor growers who have the space prefer in-ground for their main season plants, with containers reserved for backup runs, late starts, or regions with highly unpredictable weather.

Light Deprivation: Taking Control of the Flowering Timeline

If you want to harvest before October — or run a second crop in the same season — light deprivation is the technique that makes it possible.

Light deprivation (light dep) works by manually extending the dark period each day using a blackout tarp or a purpose-built greenhouse with blackout panels. By covering plants at a set time each afternoon and uncovering them the following morning, you can create 12 or more hours of uninterrupted darkness starting whenever you want — not just when the natural light cycle gets there on its own.

This lets you trigger flowering weeks or even months ahead of the natural schedule. Run light dep starting in May and you can harvest in June or July instead of September. That’s an entirely different market window, and in commercial and semi-commercial growing, it’s enormously valuable. Many licensed California outdoor farms run two or even three light dep cycles per season using this approach.

Light dep requires a frame or greenhouse structure that supports a blackout covering. It’s more common in commercial and semi-commercial settings because of the infrastructure investment, but home growers with a basic hoop structure and quality blackout tarps can absolutely run a successful light dep cycle. The key is consistency — even a small amount of light during the dark period can interrupt the flowering trigger and cause stress or re-vegging.

Autoflowering Cannabis Clones Outdoors

Photoperiod genetics are the most popular, but they’re not the only option for outdoor growers. Autoflowering cannabis flowers by age — typically 70 to 90 days from rooting — rather than by light cycle. That changes the planning math entirely.

With autos, you don’t have to worry about photoperiod timing. You don’t have to calculate when nights will be long enough to trigger flowering. You transplant, the plant grows, and it flowers and finishes on its own schedule regardless of whether you’re in June or August. This makes autos genuinely useful for growers who miss the ideal transplant window, live at high elevation with a short season, or want to run a late-season crop that finishes before the first frost.

In mild climates — Southern California, Hawaii, coastal Florida, the Gulf Coast — autoflowering genetics make two or even three outdoor runs per season possible. Plant a run in March, harvest in June. Plant a second run in July, harvest in October. The math works, the plants cooperate, and the only limit is your space and your appetite for work.

The trade-offs with autos are real. They’re smaller plants than photoperiod genetics under most conditions. Yield per plant is lower, sometimes significantly so. And the terpene and potency ceiling has historically been lower for autoflowering genetics than for elite photoperiod cuts — though modern auto breeding has closed that gap considerably in recent years.

Browse our selection of autoflowering cannabis clones if you want to add a fast, flexible option to your outdoor season.

Pest and Mold Management for Outdoor Grows

Outdoor growing puts your plants in contact with an entire ecosystem of potential threats. Pests and pathogens that an indoor grower never encounters are a normal part of outdoor cultivation. The growers who navigate this successfully are the ones who scout daily, intervene early, and prevent problems rather than fighting them once they’ve taken hold.

Spider Mites

Spider mites are tiny arachnids that feed on the undersides of cannabis leaves, leaving telltale stippling patterns and fine webbing. They thrive in hot, dry conditions and can blow in on the wind from nearby plants or disturbed soil. Check leaf undersides weekly — or daily in hot weather — starting in early veg. Early infestations respond well to predatory insects like Phytoseiulus persimilis or targeted miticides like spinosad. Wait too long and you’re chasing them through flower, which is a much harder problem.

Aphids

Aphids cluster on new growth and stems, sucking plant sap and excreting sticky honeydew that attracts secondary problems like sooty mold. They reproduce rapidly and can overwhelm a plant in days under warm conditions. Intervene early with insecticidal soap or diluted neem oil applied to affected areas. Introduce beneficial insects like ladybugs if you have the means. Don’t spray oil-based products in full sun or you’ll burn the foliage — apply in the early morning or evening.

Caterpillars and Budworms

Caterpillars — particularly the larvae of moths that lay eggs on cannabis buds — are one of the most destructive outdoor pests in the flowering stage. They burrow into buds and eat from the inside, leaving frass (waste) and creating entry points for botrytis. By the time you see the damage, the caterpillar has often moved on. Inspect buds daily in late flower. Bacillus thuringiensis (Bt), an organic biocontrol, kills caterpillar larvae when applied to the plant surface. It degrades quickly in sunlight, so reapply after rain or every 5 to 7 days.

Powdery Mildew

Powdery mildew (PM) shows up as a white, powdery coating on leaf surfaces. It thrives in moderate temperatures (65–75°F) with high humidity and poor airflow — exactly the conditions that hit many outdoor grows in late summer. Prevention is far easier than treatment: prune for airflow, especially in the canopy interior, and apply preventive sulfur-based sprays or potassium bicarbonate early in the season. Once PM is established in a grow, controlling it without damaging the crop becomes very difficult. Train your eye to catch it at the first white spots.

Botrytis (Bud Rot)

Botrytis cinerea — gray mold, or bud rot — is the nightmare of outdoor flower growers in wet climates. It starts inside dense buds, invisible from the outside, and spreads rapidly. By the time you see the gray fuzz or notice buds that are slimy or discolored when you open them, the damage is done and spreading. Remove affected bud material immediately, cutting well below the visible infection. Preventive measures — strategic defoliation to improve airflow, avoiding overhead watering late in the day, and using oscillating fans in greenhouse settings — matter more than any spray. Botrytis thrives where air is still and humidity is consistently high. Make those conditions hard to maintain and you reduce your risk significantly.

Check plants daily in the last four weeks of flower. This is when pest and mold pressure peaks, when the stakes are highest, and when your intervention timing matters most. An hour of daily scouting in late flower has saved more crops than any single product on the market.

When to Harvest Outdoors

The harvest window is one of the most consequential decisions of the season. Harvest too early and you leave potency, terpene development, and yield on the table. Harvest too late and you risk trichome degradation, botrytis in wet weather, and frost damage. Read the plant, not the calendar.

Primary Signal: Trichome Color

Trichomes are the resin glands covering cannabis flowers. Under magnification — use a jeweler’s loupe (60–100x) or a digital microscope — you can see individual trichome heads and read their color to assess maturity.

  • Clear trichomes: The plant isn’t done. THC is still being produced. Harvest now and you’ll get an underdeveloped product.
  • Milky/cloudy trichomes: THC is at or near peak concentration. This is when most growers targeting maximum potency begin to seriously consider harvest.
  • Amber trichomes: THC is beginning to degrade into CBN, a less psychoactive compound. Some amber is normal and desirable. Many experienced growers target 80–90% milky with early amber (10–20%) for a balanced peak-potency harvest.

Most outdoor growers make their first loupe check when the large fan leaves begin to yellow and fall naturally — a sign the plant is finishing. Then check every few days from that point forward. When you’re seeing mostly milky with the first amber appearing, you’re in your window.

Secondary Signal: Pistil Color Change

Pistils — the small hair-like structures on buds — start white and shift to orange, red, or brown as the plant matures. When 70–80% or more of your pistils have changed color, you’re approaching harvest readiness. Use this as a rough secondary check, not your primary harvest trigger. Trichomes are a more accurate indicator of actual chemical maturity.

Weather as a Harvest Trigger

In outdoor growing, approaching frost is a hard harvest trigger. Frost — 32°F or below — destroys trichomes, damages bud structure, and can ruin a crop overnight. If you’re looking at a frost in your forecast, harvest immediately regardless of what the trichomes say. A slightly early harvest is far better than a frost-damaged crop. Monitor your extended forecast aggressively in the final weeks of the season.

Have your drying space ready before you cut. A wet October in the Pacific Northwest or Northeast can catch unprepared growers with wet flower and no controlled drying environment. That’s a recipe for botrytis in the dry room. Prepare your drying setup — 60°F, 60% relative humidity, good airflow, darkness — before the first cut comes down. Check out our full cannabis harvest timing guide for a deeper breakdown of the process.

Legal Compliance: Know Before You Grow

Cannabis cultivation law in the US is in active transition. On April 23, 2026, the DOJ and DEA moved FDA-approved marijuana products and state-licensed medical marijuana into Schedule III under the Controlled Substances Act. However, recreational and adult-use cannabis — even where state-legal — and all unlicensed activity remain Schedule I federally. This matters for outdoor growers who might think federal law has been fully liberalized. It has not been.

At the state level, home cultivation rules vary significantly. Always verify current law in your state before planting outdoors. Common rules in state-legal home grow jurisdictions include:

  • Plant count limits, typically 3 to 6 plants per adult, sometimes per household
  • Requirements that plants be completely out of public view — not visible from public roads, sidewalks, or neighboring properties
  • Setback requirements from schools, parks, daycare facilities, or property lines
  • Secure storage requirements for harvested flower
  • Prohibitions on outdoor cultivation even in some states with otherwise permissive home grow laws

Local ordinances can be more restrictive than state law. A city or county can prohibit outdoor cultivation even when the state permits it. Check both levels of law. Check if growing clones is legal in your state in 2026 before you place an order.

We can’t provide legal advice, and laws change. Do your own research, verify with a local attorney if you’re uncertain, and always grow responsibly for legal adult use where permitted.

Getting Your Clones from IWantClones.com

Planning your outdoor season starts with quality genetics. At IWantClones.com, we ship elite pheno-hunted clones overnight to your door — every clone at $98.88, backed by our 3-day no-bullshit guarantee. If your clones don’t arrive healthy and ready to establish, we make it right.

Our clones come from proven mother plants selected through the kind of deep genetic work that SeedsHereNow.com — our parent operation — has been doing for 15+ years with more than 70 breeders worldwide. You’re not getting mystery plants or mass-produced generic cuts. You’re getting the result of real selection, real expertise, and real accountability.

Order early in the season. Clones sell out. The best genetics don’t sit around waiting. Visit the IWantClones.com shop now and lock in your outdoor season stock while the top selections are still available.

Frequently Asked Questions About Outdoor Cannabis Growing

When should I plant cannabis clones outdoors?

Plant cannabis clones outdoors after your last frost date and once overnight lows stay consistently above 50°F. For most of the continental US, that means May through early June. In warmer southern regions like Southern California, Florida, and the Gulf Coast, you can transplant as early as March or April. Always check your specific local frost dates before committing — late frosts can kill newly transplanted clones.

What temperature is too cold for cannabis clones outdoors?

Cannabis clones struggle below 50°F and can suffer serious damage at or below 40°F. Frost — 32°F or below — can kill a clone outright, especially one that hasn’t fully hardened off to outdoor conditions. Even a brief overnight frost can damage new growth, stall root development, and stress the plant enough to set it back by weeks. Always watch the overnight forecast carefully during early season and late season.

How long does an outdoor cannabis plant take from clone to harvest?

From transplant outdoors, most photoperiod cannabis plants take 5 to 7 months to reach harvest — including vegetative growth under long summer days followed by an 8 to 11 week flowering period triggered by shortening nights. Autoflowering clones finish much faster, typically 70 to 90 days from transplant regardless of light cycle, making them an excellent option for growers with shorter seasons or later starts.

Can I grow autoflowering cannabis clones outdoors in any region?

Yes. Autoflowering cannabis clones flower by age rather than light cycle, making them viable in nearly every US region where the growing season is long enough for their 70 to 90 day finish time. In mild climates like Southern California, Hawaii, and Florida, two or even three outdoor auto runs per season are possible with proper planning and back-to-back scheduling.

What’s the biggest mistake outdoor growers make with clones?

Moving clones directly from indoor cultivation into full outdoor sun without hardening them off first. Clones arrive adapted to artificial lighting — sudden exposure to direct summer sun causes light shock, bleaching, wilting, and significant stress that sets plants back by days or weeks. A proper 7 to 10 day hardening-off process, starting with just 2 hours of morning sun and building gradually, prevents this entirely and costs nothing but a little patience.

Share

Comments are closed.

Also recommended

2026 Outdoor Cannabis Grow Season Guide: When to Plant Clones by Region

July 20, 2026
Best soil types for cannabis

For most of the continental US, the outdoor cannabis grow season runs from a May or June transplant through a September or October harvest. The exact window depends on your region’s last frost date, your local climate, and the strain you’re growing. Photoperiod cannabis — which makes up the majority of popular strains — begins flowering when nights stretch past roughly 12 hours of uninterrupted darkness, a shift that happens naturally after the summer solstice on June 21. Plan your transplant around that timeline and your local climate, and the season nearly runs itself.

This guide covers every major US region, gives you a full grow calendar, explains how daylight drives flowering, walks you through hardening off your clones properly, and addresses pest management, harvest timing, and legal compliance. Whether you’re in the Pacific Northwest, the Southwest desert, the Midwest, or Hawaii, we’ve got your season mapped out.

Key Takeaways

  • Transplant cannabis clones outdoors after the last frost, once overnight lows stay consistently above 50°F — typically May to June for most of the US.
  • Photoperiod cannabis flowers when nights reach approximately 12 hours of uninterrupted darkness, which occurs naturally after the summer solstice in late June.
  • Clones from indoor cultivation must be hardened off over 7 to 10 days before full outdoor sun exposure — skipping this step causes light shock and sets plants back significantly.
  • Most photoperiod outdoor plants begin showing pre-flowers in July and enter full flower in August, with harvest falling in September or October depending on region and strain.
  • Autoflowering cannabis flowers by age rather than light cycle, enabling earlier or later runs and multiple harvests per season in mild climates.
  • Always verify your state and local cultivation laws before planting — plant count limits, visibility requirements, and setback rules vary widely across legal states.

The Outdoor Cannabis Timeline: How the Season Works

Outdoor cannabis growing is fundamentally seasonal. The sun sets the schedule, and the best outdoor growers work with that schedule rather than fighting it. Here’s the big picture of how a typical outdoor season unfolds for photoperiod cannabis in the continental US.

Spring (March–May): Prepare your soil or containers, source your clones, and wait for the last frost to pass. Once overnight lows hold reliably above 50°F, it’s time to start thinking about transplanting. Don’t rush this. A late frost can devastate newly transplanted clones that haven’t had time to establish their root systems outdoors.

Early Summer (May–June): This is transplant window for most of the US. Long summer days — 14 to 16+ hours of light — keep photoperiod plants in vigorous vegetative growth. Cannabis loves this period. With access to direct sun, warm temperatures, and increasing root space, plants put on significant size during these weeks. This is where outdoor plants develop the structural foundation that supports their eventual yield.

Midsummer (July): The summer solstice has passed. Days begin shortening — slowly at first, then more noticeably. Most photoperiod cannabis starts showing pre-flowers in July, a sign that the plant is sensing the change and beginning to prepare for reproduction. The plant transitions from putting all energy into growth to preparing for flowering.

Late Summer to Early Fall (August–September): Full flower mode. This is when terpenes develop, buds fill out, and resin production peaks. The plants need all the sun they can get during this period. They’re also at their most vulnerable to pests and mold — particularly powdery mildew and botrytis — as days grow shorter and nights cooler and sometimes wetter.

Harvest (September–October): Most photoperiod strains in the continental US finish outdoor harvest between late September and mid-October. Northern regions and high elevations may push harvests into early October, with early frost risk as a hard deadline. Southern and coastal regions may run through late October or November. Read your trichomes, watch the weather, and harvest when the plant tells you — not when the calendar says.

Why Daylight Hours Drive Everything

Cannabis is a photoperiod-sensitive plant. That means it uses the length of the dark period — not the light period — to determine when to shift from vegetative growth into reproductive (flowering) mode. This is one of the most important things to understand about outdoor growing.

During the long days of summer, cannabis stays in vegetative growth. It grows roots, branches, and leaves but doesn’t start producing buds. The plant is reading the night length. As long as nights are short — say, 8 to 10 hours — the plant reads this as “summer” and keeps growing vegetatively.

After the summer solstice on June 21, days begin to shorten and nights begin to lengthen. The change is gradual at first — just a few minutes per day — but it accumulates quickly. By late July and into August, nights in most of the continental US have lengthened enough (typically past 11 to 12 hours, though the exact threshold varies by strain) that the plant reads this as “fall approaching” and triggers the flowering hormone cascade.

This is predictable and consistent year to year because it’s driven by the Earth’s axial tilt and orbit, not by weather. You can count on roughly the same light schedule every year in your location. Use it to plan. If you know your strain takes 9 weeks to flower, count back 9 weeks from your typical first frost date and make sure the plant will have hit its flowering trigger by then. For most of the continental US, that math works out naturally — but it’s worth confirming for your specific region and strain.

Use the USDA Plant Hardiness Zone Map to understand your region’s typical frost and temperature patterns. It’s an invaluable free resource for any outdoor grower planning their season around climate data.

Hardening Off Your Clones: Don’t Skip This Step

This is where many first-time outdoor growers make a costly mistake. Clones arrive from indoor cultivation. They’ve been growing under controlled artificial lighting — typically 18 hours of relatively gentle LED or fluorescent light per day. They have never seen direct sun. Their leaves, cuticle layers, stomata, and internal processes are calibrated for indoor conditions.

Move them directly into full outdoor summer sun and you will cause light shock. It looks like bleaching — leaves turn pale yellow or white, sometimes brown at the tips. Plants wilt despite adequate water. Growth stalls. In severe cases, a clone can be set back by two weeks or more from a single day of unprotected outdoor sun exposure. It’s not fatal, but it’s avoidable and it costs you time.

The solution is a deliberate hardening off your cannabis clones before outdoor exposure process spread over 7 to 10 days. Here’s exactly how to do it right.

The Hardening Off Process

  1. Days 1–2: Start with morning sun only. Morning sun (before noon) is gentler than afternoon sun. Give your clones just 2 hours of direct morning exposure, then move them to full shade or back indoors. The UV intensity at 8 a.m. is dramatically lower than at 2 p.m.
  2. Days 3–4: Extend to 4 hours. Add another hour or two of sun exposure. If possible, use 30–50% shade cloth as a buffer. It softens the intensity without eliminating the benefit of natural light and UV adaptation.
  3. Days 5–6: Move to 6 hours of direct sun. By this point, the plant’s cuticle is thickening, its stomata are adapting, and its chloroplasts are adjusting to higher light intensity. Watch for any signs of stress — leaf curl, bleaching, dramatic wilting — and back off by an hour if you see it.
  4. Days 7–8: Up to 8 hours, including some midday sun. Midday sun is the most intense. Introduce it gradually rather than going straight to a full midday session.
  5. Days 9–10: Full outdoor sun, all day. By now the plant is adapted. It can handle direct summer sun without stress, and it will respond to full sun with noticeably accelerated growth.

Watch your plants throughout the process. Signs to back off immediately: leaves bleaching white or yellow, dramatic afternoon wilting that doesn’t recover overnight, leaf margins burning brown. A healthy hardening-off process shows gradual darkening of leaf color (the plant is producing more chlorophyll to handle higher light intensity) and upright, vigorous new growth by the end of week one.

Pay attention to climate and environment considerations for cannabis clones throughout the season — not just at transplant.

Regional Outdoor Grow Calendar for 2026

Every region in the US has a different outdoor cannabis grow season driven by its climate, elevation, and proximity to large bodies of water. Use this calendar as your planning baseline. Note the disclaimer below the table — local variation matters.

US Region Last Frost (Approx.) Transplant Window Vegetative Growth Flowering Begins Harvest Window
Pacific Northwest (WA, OR) Late March–April May–June June–July August–September October–November
Northern California February–March April–May May–July August September–October
Southern California January–February March–April April–July August September
Southwest / Desert (AZ, NM, NV) March–April April–May May–July August–September October (watch extreme heat in summer)
Mountain West (CO, UT, ID) April–May Late May–June June–July August September–October (early frost risk at elevation)
Midwest (IL, OH, MO, MN, etc.) April–May May–June June–July August September–October
Southeast (GA, FL, SC, TX) February–March March–April April–July August September–October
Mid-Atlantic / Northeast (NY, NJ, PA, MA) April–May May–June June–July August–September October
Hawaii Year-round possible January–March for Oct–Nov harvest Varies by run Varies October–December (multiple runs per year possible)

Note: These are general windows based on typical climate patterns. Local elevation, microclimates, urban heat islands, and year-to-year weather variation all affect actual dates. Always check your specific local last frost date from the USDA or your county extension office before making planting decisions. Mountain growers especially should verify local data — elevation creates dramatically different conditions than valley floors just a few miles away.

Pots vs. In-Ground for Outdoor Cannabis

One of the first decisions you’ll make is whether to grow your clones in containers or directly in the ground. Both approaches work. Each has real advantages and real trade-offs.

Growing in Containers (Pots)

Container growing gives you control and flexibility. You can move the plant indoors if a late frost threatens, wheel it into a garage during an unexpected storm, or shift it to a sunnier or shadier spot as conditions change. For outdoor growers in regions with unpredictable spring and fall weather — the Mountain West, the Midwest, the Northeast — this mobility is genuinely valuable.

Container growing also gives you full control over your growing medium. You choose the soil, the amendments, the drainage. You’re not dealing with whatever native soil, pH levels, or pathogens exist in your ground. Pest management is also easier when the plant isn’t rooted into an existing soil ecosystem.

The downsides are real too. Containers need watering more frequently than in-ground plants because they dry out faster and have less soil mass to retain moisture. Root space is limited — use at minimum 15-gallon containers for any serious outdoor plant, and 25 to 30 gallons if you want a genuinely large plant. Container plants also need more consistent fertilization because they’re not drawing on soil nutrients the way in-ground plants can.

Growing In-Ground

In-ground growing unleashes a plant’s full potential. Remove the container and you remove the root ceiling. In-ground cannabis plants in good soil with a full season of growth can reach 10 to 15 feet tall and yield multiple pounds of dried flower per plant under ideal conditions. That’s the ceiling of what’s possible outdoors, and containers simply can’t match it.

In-ground plants also draw water from a larger soil volume, meaning they often need less frequent watering in climates with reasonable rainfall. Their roots interact with the existing soil ecosystem — beneficial fungi, bacteria, and organisms that support plant health in ways that container growing doesn’t replicate as easily.

The trade-offs are equally real. You can’t move an in-ground plant if a frost comes early or a storm rolls in. Controlling soil pH and nutrient levels is harder when you’re working with existing native soil. And because roots are interacting with the soil ecosystem, existing pathogens, nematodes, and pests can become issues that are harder to manage than in a fresh container mix.

Most experienced outdoor growers who have the space prefer in-ground for their main season plants, with containers reserved for backup runs, late starts, or regions with highly unpredictable weather.

Light Deprivation: Taking Control of the Flowering Timeline

If you want to harvest before October — or run a second crop in the same season — light deprivation is the technique that makes it possible.

Light deprivation (light dep) works by manually extending the dark period each day using a blackout tarp or a purpose-built greenhouse with blackout panels. By covering plants at a set time each afternoon and uncovering them the following morning, you can create 12 or more hours of uninterrupted darkness starting whenever you want — not just when the natural light cycle gets there on its own.

This lets you trigger flowering weeks or even months ahead of the natural schedule. Run light dep starting in May and you can harvest in June or July instead of September. That’s an entirely different market window, and in commercial and semi-commercial growing, it’s enormously valuable. Many licensed California outdoor farms run two or even three light dep cycles per season using this approach.

Light dep requires a frame or greenhouse structure that supports a blackout covering. It’s more common in commercial and semi-commercial settings because of the infrastructure investment, but home growers with a basic hoop structure and quality blackout tarps can absolutely run a successful light dep cycle. The key is consistency — even a small amount of light during the dark period can interrupt the flowering trigger and cause stress or re-vegging.

Autoflowering Cannabis Clones Outdoors

Photoperiod genetics are the most popular, but they’re not the only option for outdoor growers. Autoflowering cannabis flowers by age — typically 70 to 90 days from rooting — rather than by light cycle. That changes the planning math entirely.

With autos, you don’t have to worry about photoperiod timing. You don’t have to calculate when nights will be long enough to trigger flowering. You transplant, the plant grows, and it flowers and finishes on its own schedule regardless of whether you’re in June or August. This makes autos genuinely useful for growers who miss the ideal transplant window, live at high elevation with a short season, or want to run a late-season crop that finishes before the first frost.

In mild climates — Southern California, Hawaii, coastal Florida, the Gulf Coast — autoflowering genetics make two or even three outdoor runs per season possible. Plant a run in March, harvest in June. Plant a second run in July, harvest in October. The math works, the plants cooperate, and the only limit is your space and your appetite for work.

The trade-offs with autos are real. They’re smaller plants than photoperiod genetics under most conditions. Yield per plant is lower, sometimes significantly so. And the terpene and potency ceiling has historically been lower for autoflowering genetics than for elite photoperiod cuts — though modern auto breeding has closed that gap considerably in recent years.

Browse our selection of autoflowering cannabis clones if you want to add a fast, flexible option to your outdoor season.

Pest and Mold Management for Outdoor Grows

Outdoor growing puts your plants in contact with an entire ecosystem of potential threats. Pests and pathogens that an indoor grower never encounters are a normal part of outdoor cultivation. The growers who navigate this successfully are the ones who scout daily, intervene early, and prevent problems rather than fighting them once they’ve taken hold.

Spider Mites

Spider mites are tiny arachnids that feed on the undersides of cannabis leaves, leaving telltale stippling patterns and fine webbing. They thrive in hot, dry conditions and can blow in on the wind from nearby plants or disturbed soil. Check leaf undersides weekly — or daily in hot weather — starting in early veg. Early infestations respond well to predatory insects like Phytoseiulus persimilis or targeted miticides like spinosad. Wait too long and you’re chasing them through flower, which is a much harder problem.

Aphids

Aphids cluster on new growth and stems, sucking plant sap and excreting sticky honeydew that attracts secondary problems like sooty mold. They reproduce rapidly and can overwhelm a plant in days under warm conditions. Intervene early with insecticidal soap or diluted neem oil applied to affected areas. Introduce beneficial insects like ladybugs if you have the means. Don’t spray oil-based products in full sun or you’ll burn the foliage — apply in the early morning or evening.

Caterpillars and Budworms

Caterpillars — particularly the larvae of moths that lay eggs on cannabis buds — are one of the most destructive outdoor pests in the flowering stage. They burrow into buds and eat from the inside, leaving frass (waste) and creating entry points for botrytis. By the time you see the damage, the caterpillar has often moved on. Inspect buds daily in late flower. Bacillus thuringiensis (Bt), an organic biocontrol, kills caterpillar larvae when applied to the plant surface. It degrades quickly in sunlight, so reapply after rain or every 5 to 7 days.

Powdery Mildew

Powdery mildew (PM) shows up as a white, powdery coating on leaf surfaces. It thrives in moderate temperatures (65–75°F) with high humidity and poor airflow — exactly the conditions that hit many outdoor grows in late summer. Prevention is far easier than treatment: prune for airflow, especially in the canopy interior, and apply preventive sulfur-based sprays or potassium bicarbonate early in the season. Once PM is established in a grow, controlling it without damaging the crop becomes very difficult. Train your eye to catch it at the first white spots.

Botrytis (Bud Rot)

Botrytis cinerea — gray mold, or bud rot — is the nightmare of outdoor flower growers in wet climates. It starts inside dense buds, invisible from the outside, and spreads rapidly. By the time you see the gray fuzz or notice buds that are slimy or discolored when you open them, the damage is done and spreading. Remove affected bud material immediately, cutting well below the visible infection. Preventive measures — strategic defoliation to improve airflow, avoiding overhead watering late in the day, and using oscillating fans in greenhouse settings — matter more than any spray. Botrytis thrives where air is still and humidity is consistently high. Make those conditions hard to maintain and you reduce your risk significantly.

Check plants daily in the last four weeks of flower. This is when pest and mold pressure peaks, when the stakes are highest, and when your intervention timing matters most. An hour of daily scouting in late flower has saved more crops than any single product on the market.

When to Harvest Outdoors

The harvest window is one of the most consequential decisions of the season. Harvest too early and you leave potency, terpene development, and yield on the table. Harvest too late and you risk trichome degradation, botrytis in wet weather, and frost damage. Read the plant, not the calendar.

Primary Signal: Trichome Color

Trichomes are the resin glands covering cannabis flowers. Under magnification — use a jeweler’s loupe (60–100x) or a digital microscope — you can see individual trichome heads and read their color to assess maturity.

  • Clear trichomes: The plant isn’t done. THC is still being produced. Harvest now and you’ll get an underdeveloped product.
  • Milky/cloudy trichomes: THC is at or near peak concentration. This is when most growers targeting maximum potency begin to seriously consider harvest.
  • Amber trichomes: THC is beginning to degrade into CBN, a less psychoactive compound. Some amber is normal and desirable. Many experienced growers target 80–90% milky with early amber (10–20%) for a balanced peak-potency harvest.

Most outdoor growers make their first loupe check when the large fan leaves begin to yellow and fall naturally — a sign the plant is finishing. Then check every few days from that point forward. When you’re seeing mostly milky with the first amber appearing, you’re in your window.

Secondary Signal: Pistil Color Change

Pistils — the small hair-like structures on buds — start white and shift to orange, red, or brown as the plant matures. When 70–80% or more of your pistils have changed color, you’re approaching harvest readiness. Use this as a rough secondary check, not your primary harvest trigger. Trichomes are a more accurate indicator of actual chemical maturity.

Weather as a Harvest Trigger

In outdoor growing, approaching frost is a hard harvest trigger. Frost — 32°F or below — destroys trichomes, damages bud structure, and can ruin a crop overnight. If you’re looking at a frost in your forecast, harvest immediately regardless of what the trichomes say. A slightly early harvest is far better than a frost-damaged crop. Monitor your extended forecast aggressively in the final weeks of the season.

Have your drying space ready before you cut. A wet October in the Pacific Northwest or Northeast can catch unprepared growers with wet flower and no controlled drying environment. That’s a recipe for botrytis in the dry room. Prepare your drying setup — 60°F, 60% relative humidity, good airflow, darkness — before the first cut comes down. Check out our full cannabis harvest timing guide for a deeper breakdown of the process.

Legal Compliance: Know Before You Grow

Cannabis cultivation law in the US is in active transition. On April 23, 2026, the DOJ and DEA moved FDA-approved marijuana products and state-licensed medical marijuana into Schedule III under the Controlled Substances Act. However, recreational and adult-use cannabis — even where state-legal — and all unlicensed activity remain Schedule I federally. This matters for outdoor growers who might think federal law has been fully liberalized. It has not been.

At the state level, home cultivation rules vary significantly. Always verify current law in your state before planting outdoors. Common rules in state-legal home grow jurisdictions include:

  • Plant count limits, typically 3 to 6 plants per adult, sometimes per household
  • Requirements that plants be completely out of public view — not visible from public roads, sidewalks, or neighboring properties
  • Setback requirements from schools, parks, daycare facilities, or property lines
  • Secure storage requirements for harvested flower
  • Prohibitions on outdoor cultivation even in some states with otherwise permissive home grow laws

Local ordinances can be more restrictive than state law. A city or county can prohibit outdoor cultivation even when the state permits it. Check both levels of law. Check if growing clones is legal in your state in 2026 before you place an order.

We can’t provide legal advice, and laws change. Do your own research, verify with a local attorney if you’re uncertain, and always grow responsibly for legal adult use where permitted.

Getting Your Clones from IWantClones.com

Planning your outdoor season starts with quality genetics. At IWantClones.com, we ship elite pheno-hunted clones overnight to your door — every clone at $98.88, backed by our 3-day no-bullshit guarantee. If your clones don’t arrive healthy and ready to establish, we make it right.

Our clones come from proven mother plants selected through the kind of deep genetic work that SeedsHereNow.com — our parent operation — has been doing for 15+ years with more than 70 breeders worldwide. You’re not getting mystery plants or mass-produced generic cuts. You’re getting the result of real selection, real expertise, and real accountability.

Order early in the season. Clones sell out. The best genetics don’t sit around waiting. Visit the IWantClones.com shop now and lock in your outdoor season stock while the top selections are still available.

Frequently Asked Questions About Outdoor Cannabis Growing

When should I plant cannabis clones outdoors?

Plant cannabis clones outdoors after your last frost date and once overnight lows stay consistently above 50°F. For most of the continental US, that means May through early June. In warmer southern regions like Southern California, Florida, and the Gulf Coast, you can transplant as early as March or April. Always check your specific local frost dates before committing — late frosts can kill newly transplanted clones.

What temperature is too cold for cannabis clones outdoors?

Cannabis clones struggle below 50°F and can suffer serious damage at or below 40°F. Frost — 32°F or below — can kill a clone outright, especially one that hasn’t fully hardened off to outdoor conditions. Even a brief overnight frost can damage new growth, stall root development, and stress the plant enough to set it back by weeks. Always watch the overnight forecast carefully during early season and late season.

How long does an outdoor cannabis plant take from clone to harvest?

From transplant outdoors, most photoperiod cannabis plants take 5 to 7 months to reach harvest — including vegetative growth under long summer days followed by an 8 to 11 week flowering period triggered by shortening nights. Autoflowering clones finish much faster, typically 70 to 90 days from transplant regardless of light cycle, making them an excellent option for growers with shorter seasons or later starts.

Can I grow autoflowering cannabis clones outdoors in any region?

Yes. Autoflowering cannabis clones flower by age rather than light cycle, making them viable in nearly every US region where the growing season is long enough for their 70 to 90 day finish time. In mild climates like Southern California, Hawaii, and Florida, two or even three outdoor auto runs per season are possible with proper planning and back-to-back scheduling.

What’s the biggest mistake outdoor growers make with clones?

Moving clones directly from indoor cultivation into full outdoor sun without hardening them off first. Clones arrive adapted to artificial lighting — sudden exposure to direct summer sun causes light shock, bleaching, wilting, and significant stress that sets plants back by days or weeks. A proper 7 to 10 day hardening-off process, starting with just 2 hours of morning sun and building gradually, prevents this entirely and costs nothing but a little patience.

Written by James Bean

Recent Posts

2026 Outdoor Cannabis Grow Season Guide: When to Plant Clones by Region

Learn the outdoor cannabis grow season by US region—when to plant clones, harvest windows, and expert tips. Shop elite clones at IWantClones.com.

Read More
Cannabis Genetics & Breeding 101: How New Strains Are Made

Learn how cannabis breeders create new strains—genotype vs phenotype, F1 hybrids, backcrossing, and pheno hunting. Elite clones at IWantClones.com.

Read More
How Often We Drop New Cannabis Clone Genetics (Restocks & Pheno Hunts)

Discover how often IWantClones drops new cannabis genetics, when restocks happen, and how to never miss a limited release. 70+ breeders, 15 yrs sourcing experience.

Read More

Subscribe Today!

Get 10% off when you sign up for our weekly updates!

About Us

At IWantClones.com, we are dedicated to providing top-quality cannabis clones to growers of all levels.

Subscribe Today!

Subscribe our newsletter to get our latest update & news
We currently accept credit/debit card payments, cash, check, money order, bitcoin (BTC), litecoin (LTE), bitcoin cash (BCH), and dogecoin (DOGE).
© 2026 seedsherenow.com All Rights Reserved
magnifiercross linkedin facebook pinterest youtube rss twitter instagram facebook-blank rss-blank linkedin-blank pinterest youtube twitter instagram